SQL Editor
The Keboola SQL Editor allows users without specialized tools to directly interact with their data warehouse within Keboola Connection. It offers a smooth, fully integrated experience, replacing previous solutions like Snowsight. The editor is tightly connected with Keboola Storage, so you can easily access and use your buckets, tables, shared codes and variables in one place.
Currently, the SQL Editor supports Snowflake and Google BigQuery workspaces.
Creating an SQL Workspace
Section titled “Creating an SQL Workspace”The SQL Editor is accessed via a dedicated SQL workspace. To get started, you must first create this workspace.
-
Navigate to Workspaces from the main navigation menu.
-
Click + Create Workspace.
-
Select Snowflake SQL Workspace or Google BigQuery Workspace, depending on your project’s backend.
-
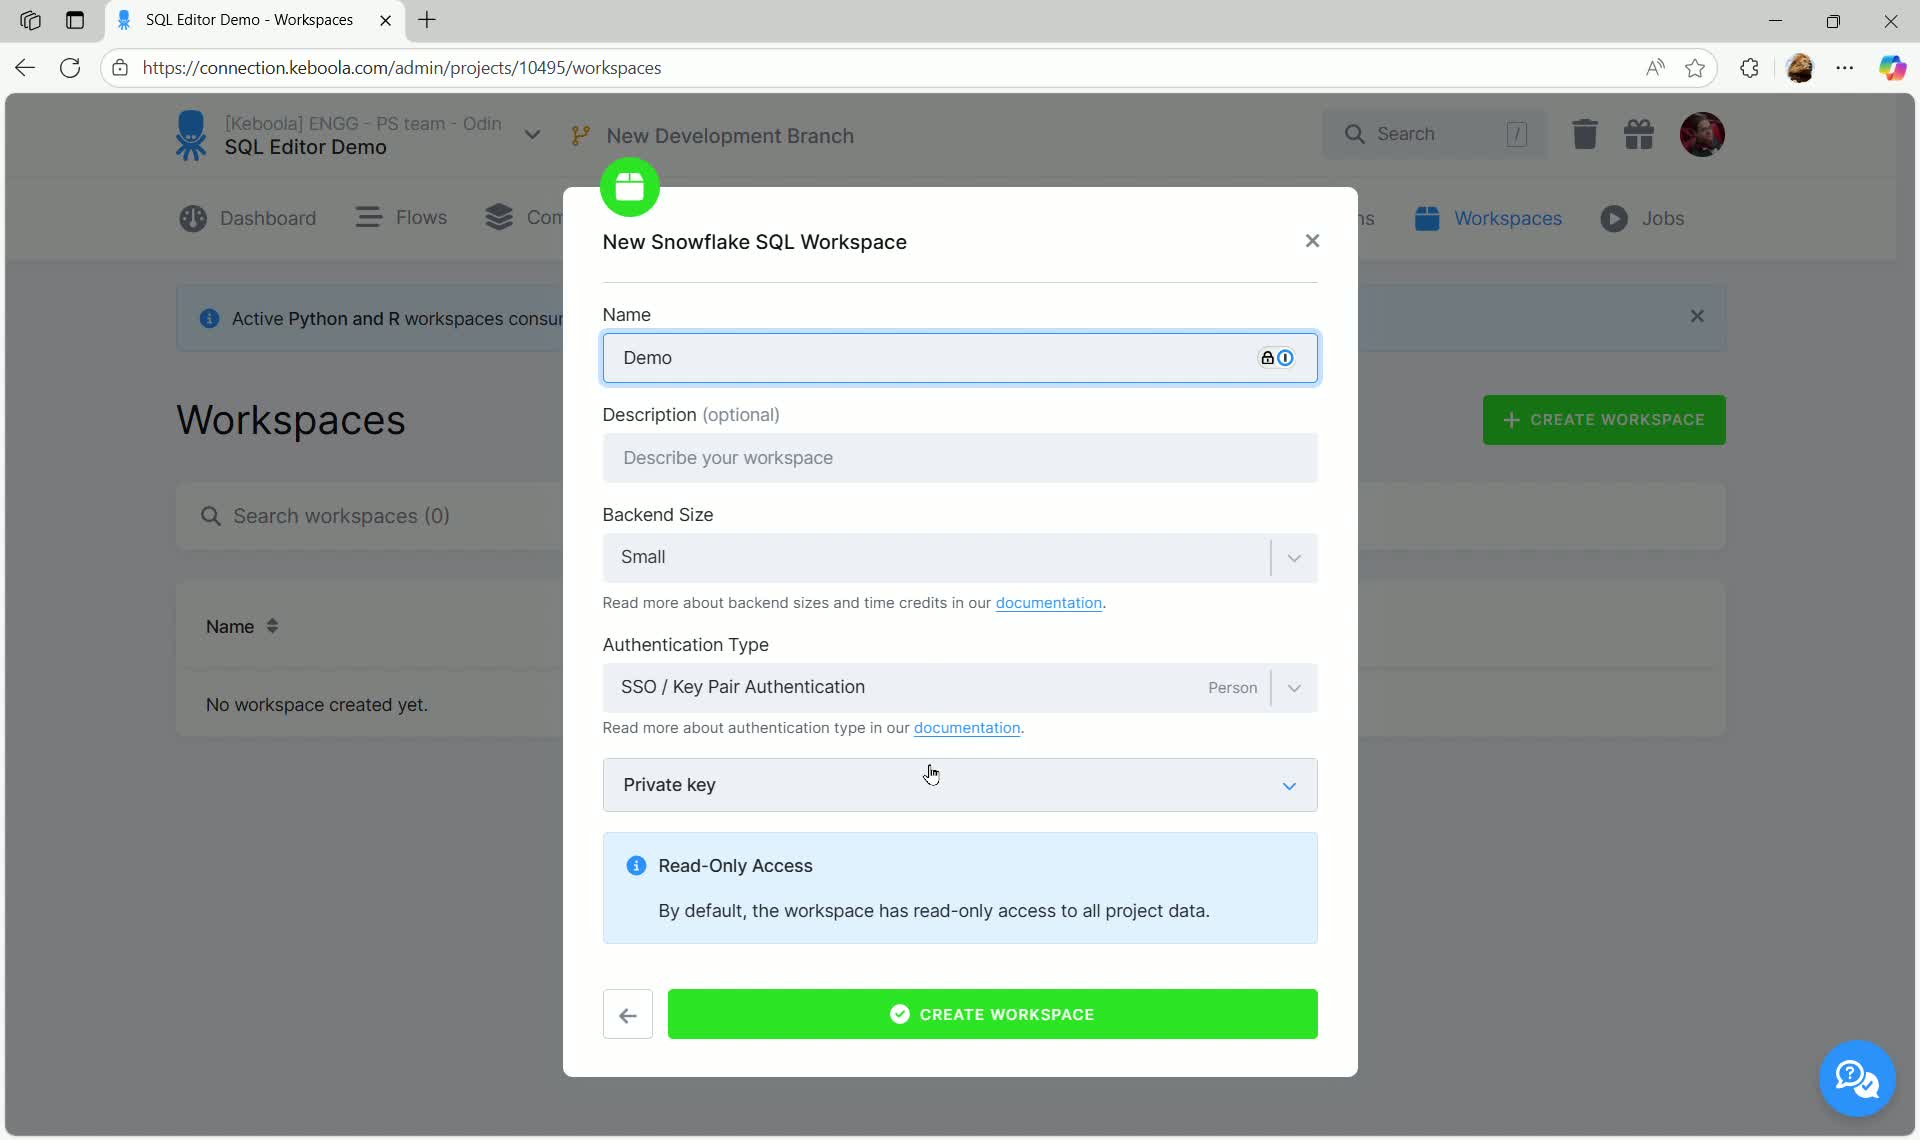
In the configuration dialog, provide a Name for your workspace (e.g., “Demo”). You can optionally add a description and select the Backend Size (Snowflake only).
-
Click CREATE WORKSPACE.
The workspace will be scheduled and created. Once active, you can access the SQL Editor.
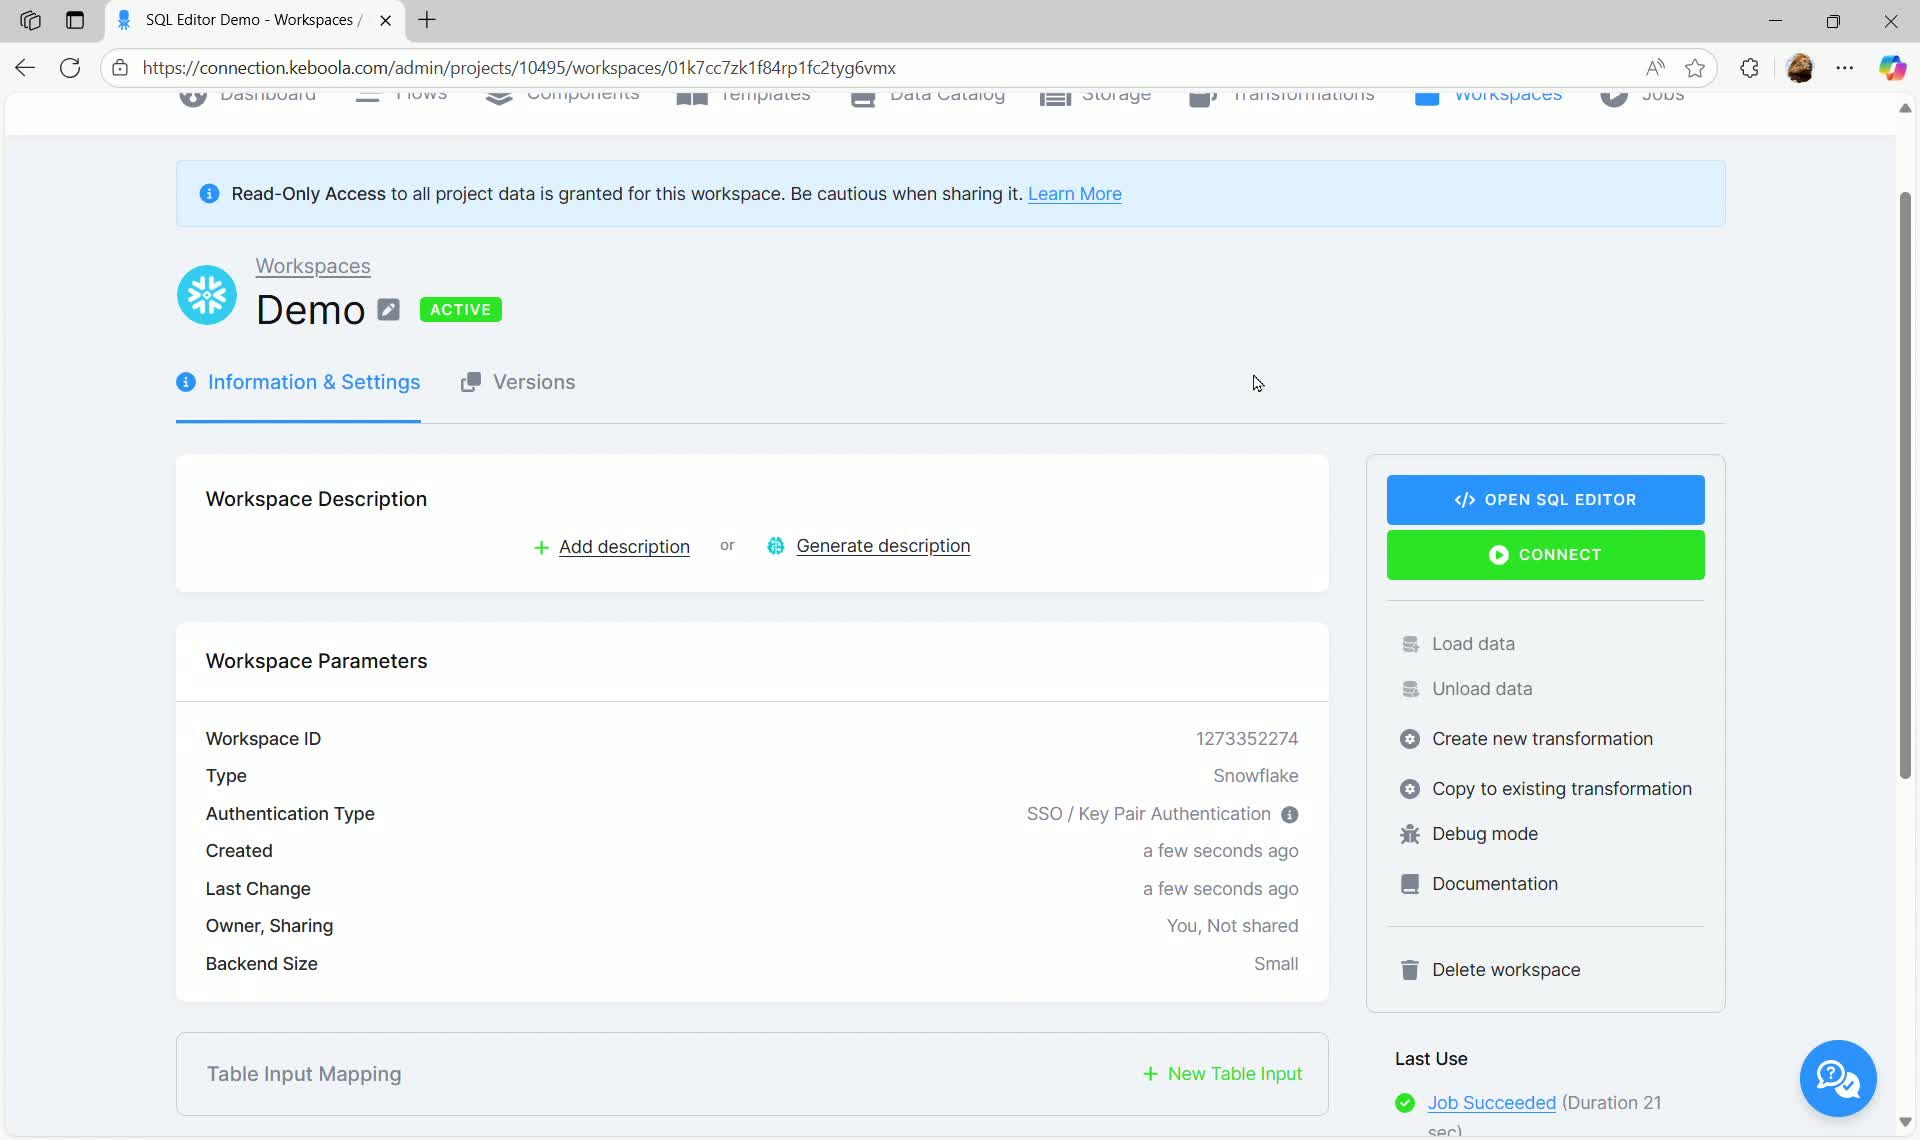
- Click on the newly created workspace to view its details.
- Click OPEN SQL EDITOR.
SQL Editor Interface Overview
Section titled “SQL Editor Interface Overview”The SQL Editor interface is divided into key sections that make it easy to explore data, write queries, and create transformations directly within Keboola.
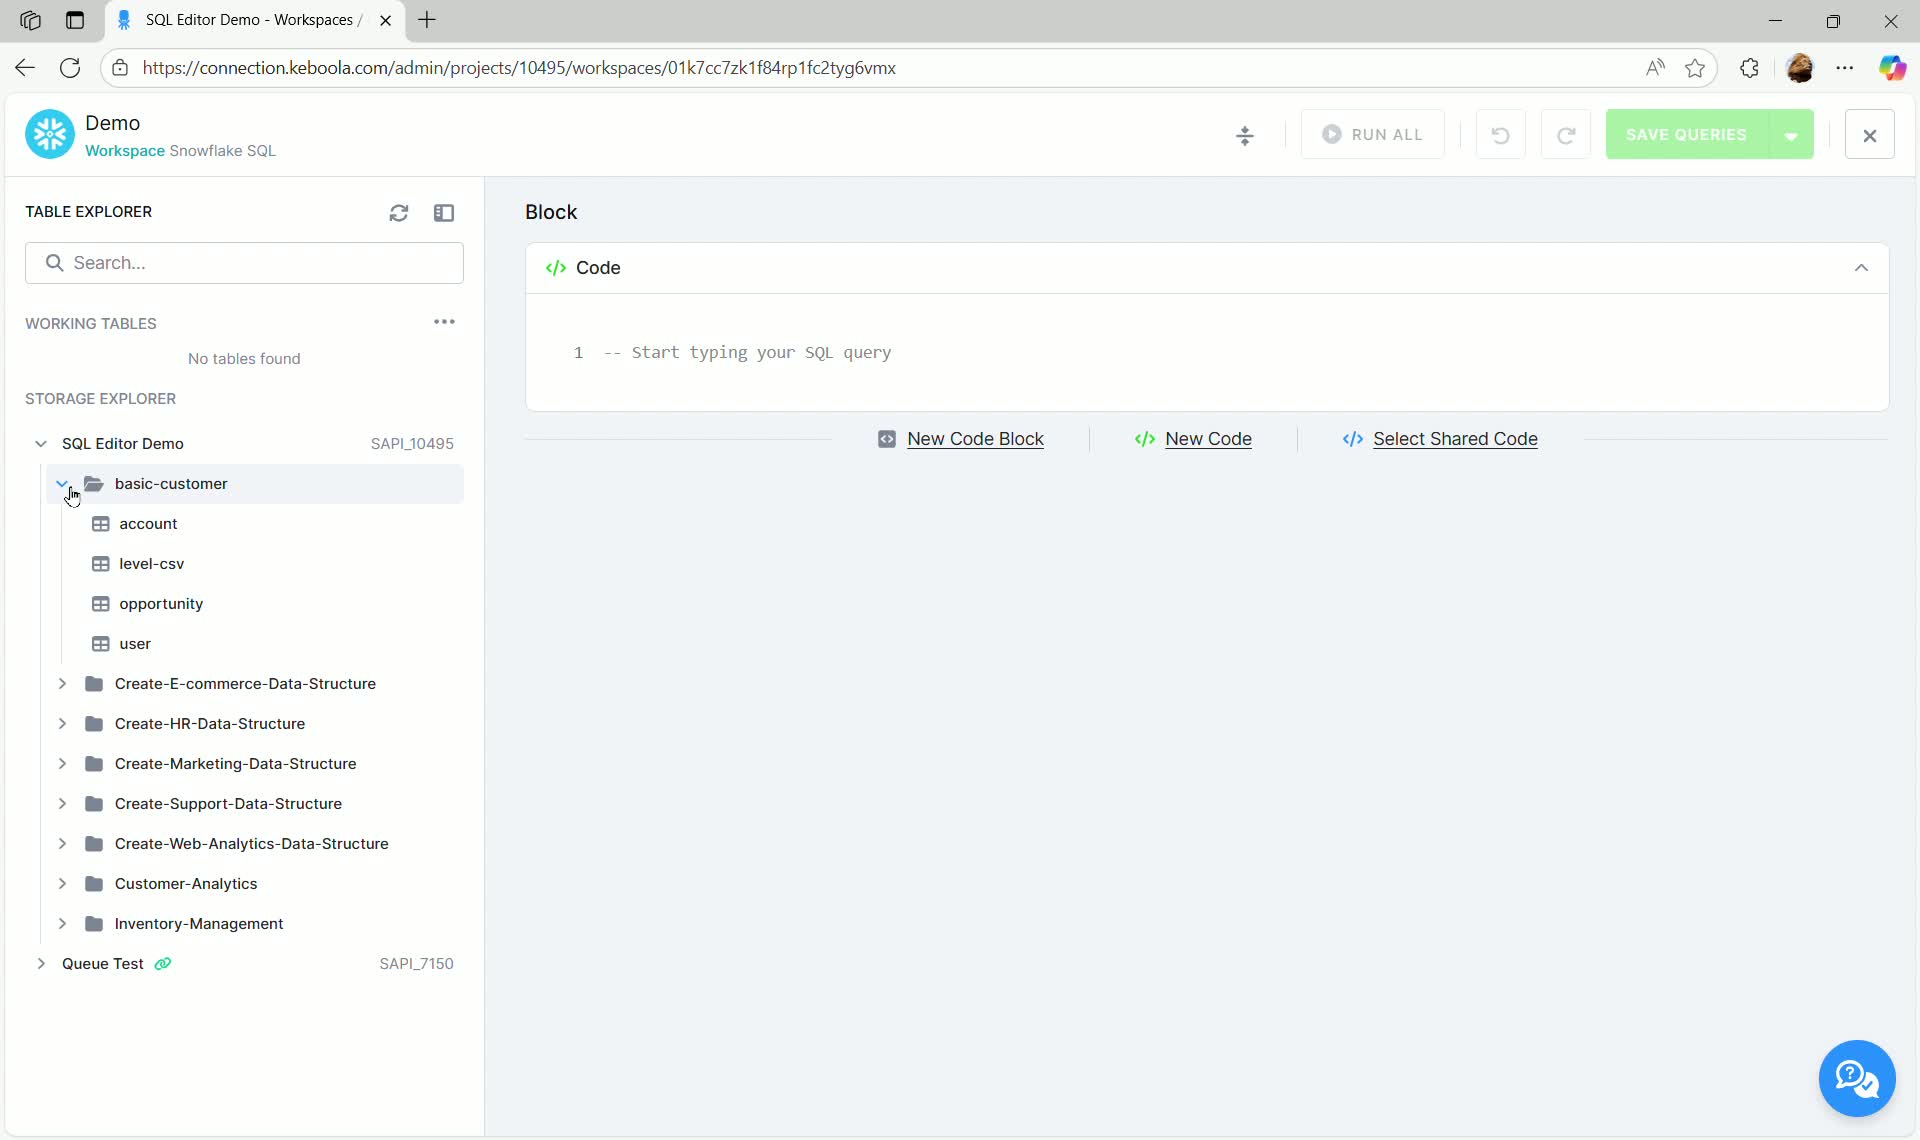
Left Pane: Table Explorer
Section titled “Left Pane: Table Explorer”The left pane, known as the Table Explorer, is divided into two sections:
- Working Tables: Displays temporary tables created during your current session (initially empty).
- Storage Explorer: Allows you to browse all tables and buckets available in your Keboola project.
- Buckets and Tables: The explorer shows buckets (folders) and the tables they contain. You can expand buckets to see tables (e.g.,
account,user).
- Linked Tables: Linked buckets and tables (shared with you from other projects) are also visible, indicated by a small chain icon.
Right Pane: Code Blocks and Results
Section titled “Right Pane: Code Blocks and Results”The main central area is where you write and execute your SQL code.
- Code Block: This is where you write your SQL queries. The editor supports syntax highlighting and autocompletion for SQL keywords and functions of your backend (Snowflake or BigQuery).
- Query Result Pane: Located below the code block, this area displays the results of executed queries and query details.
Basic Usage and Querying
Section titled “Basic Usage and Querying”The SQL Editor provides various functionalities to streamline data exploration.
Previewing Data
Section titled “Previewing Data”To quickly inspect the contents of a table in the Storage Explorer:
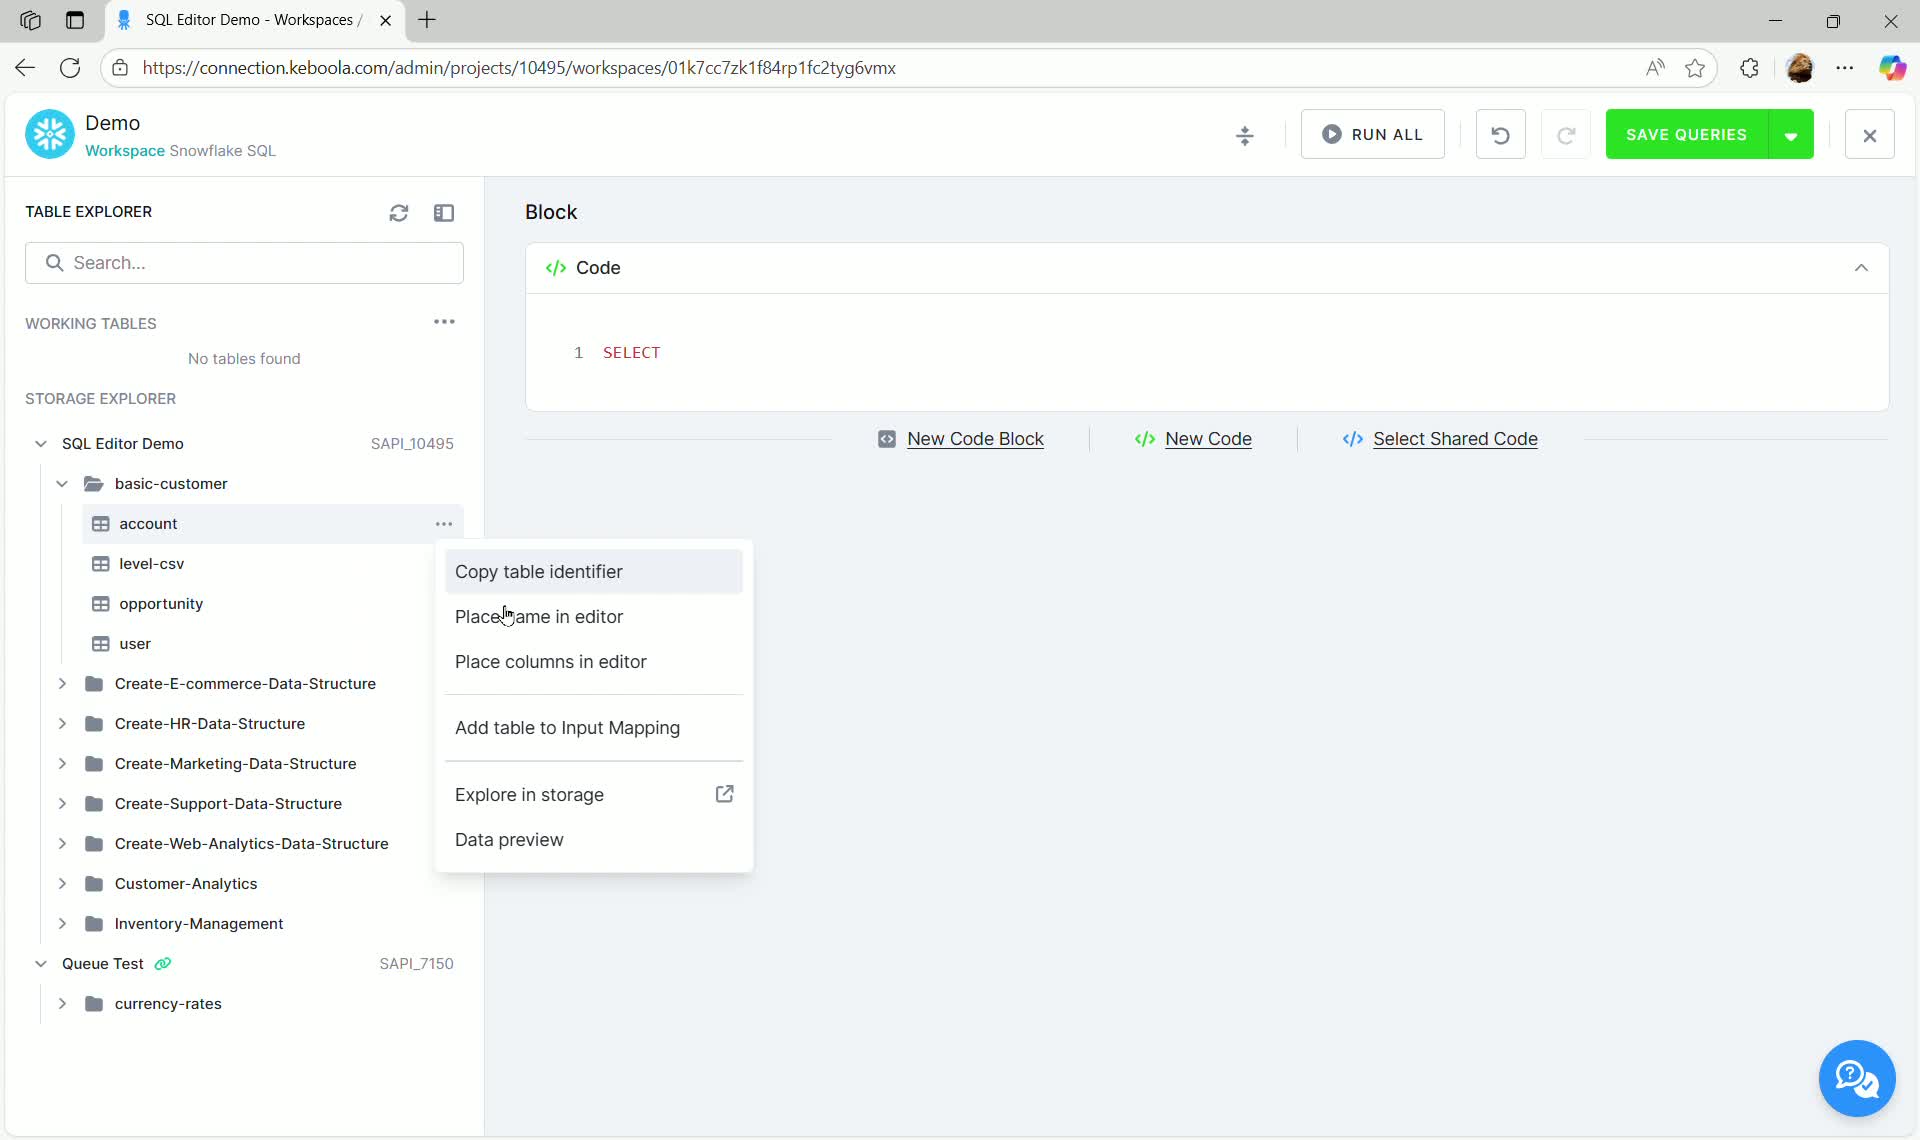
- Click the three dots next to the desired table (e.g.,
account). - Select Data preview.
This executes a SELECT * FROM table_name LIMIT 100 query, showing the first rows and metadata in the results pane below.
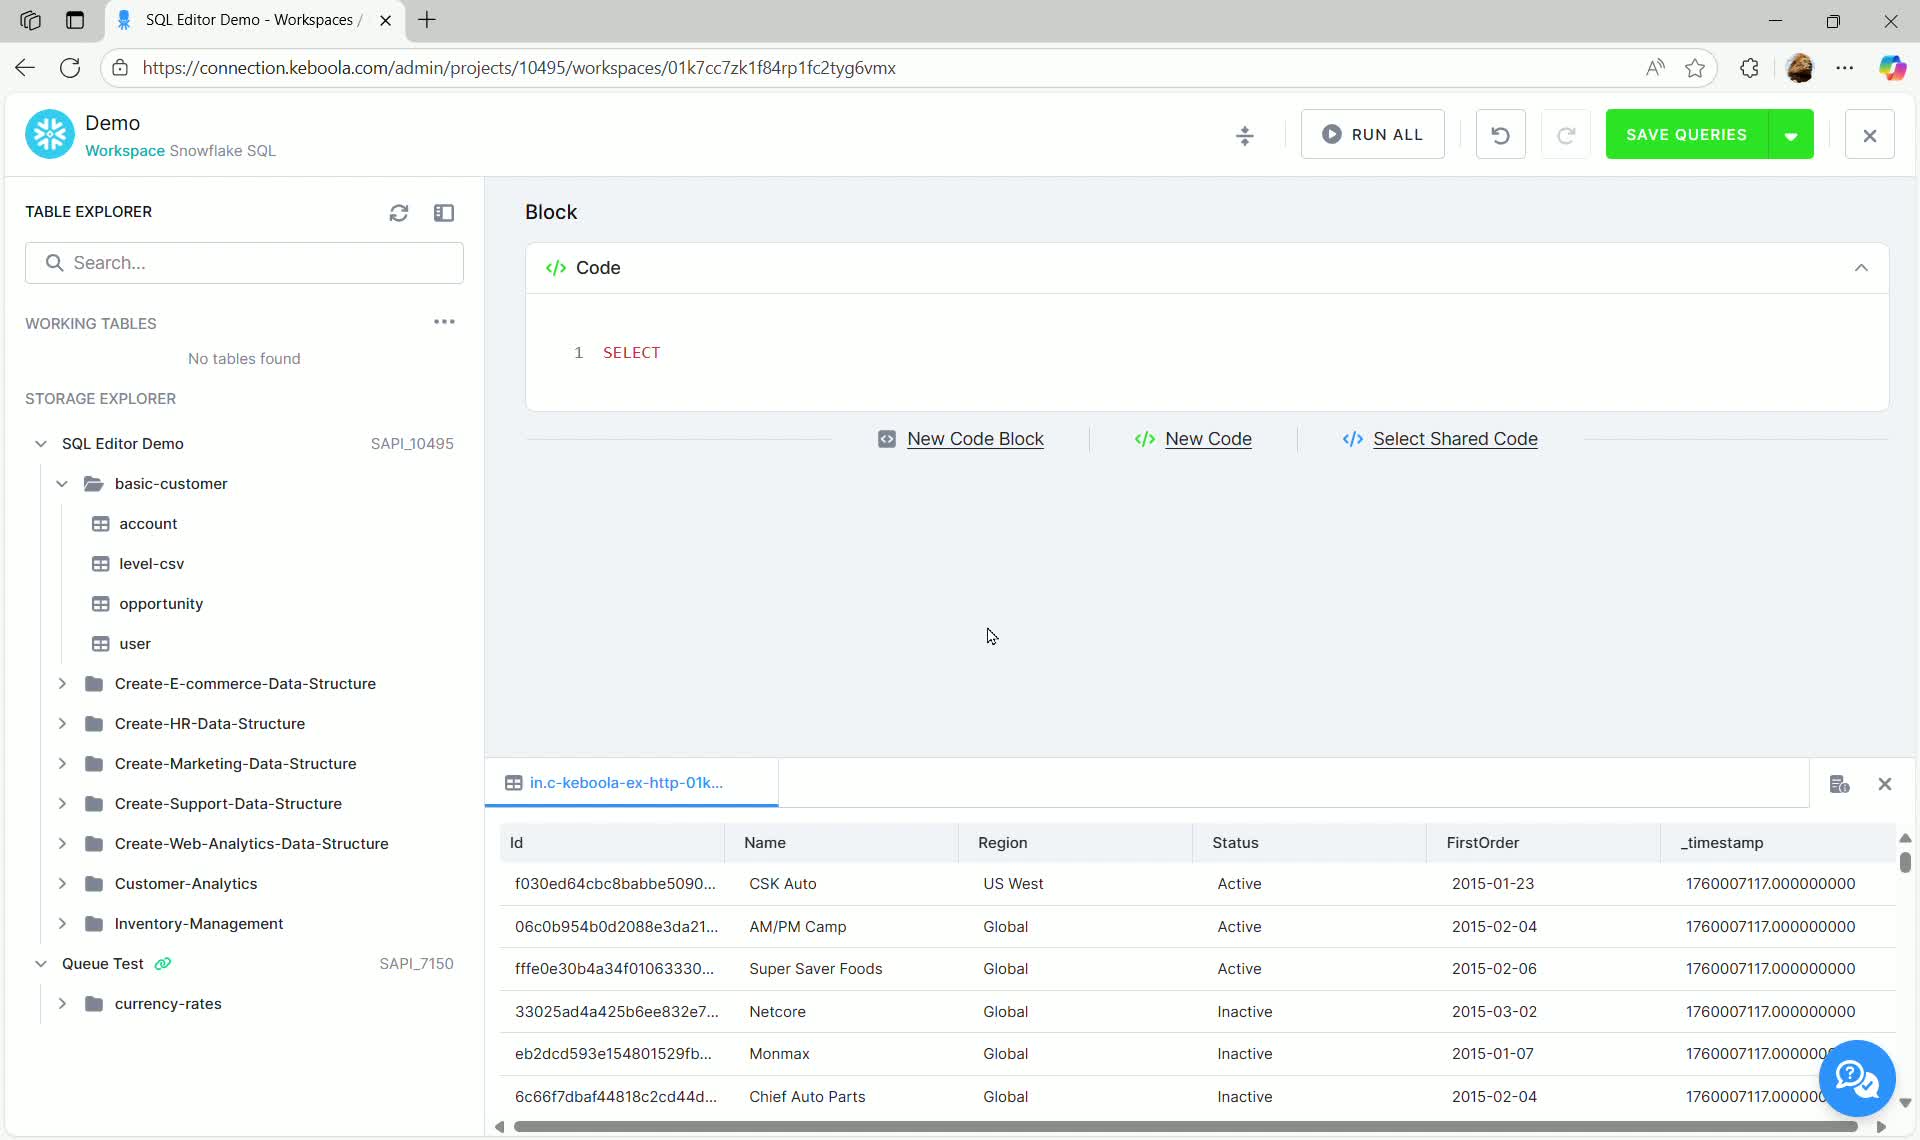
Inserting Table Names
Section titled “Inserting Table Names”Instead of manually typing full table names, you can insert the fully qualified name directly into the editor:
- Click the three dots next to the table name.
- Select Place name in editor.

The editor automatically populates the code block with the table’s fully qualified identifier. The exact format depends on your backend; the example below shows Snowflake.
SELECT * FROM "SAPI_10495"."in.c-keboola-ex-http-01k749e8rrzzs9s7f9p7gbrg"."account";Running Queries
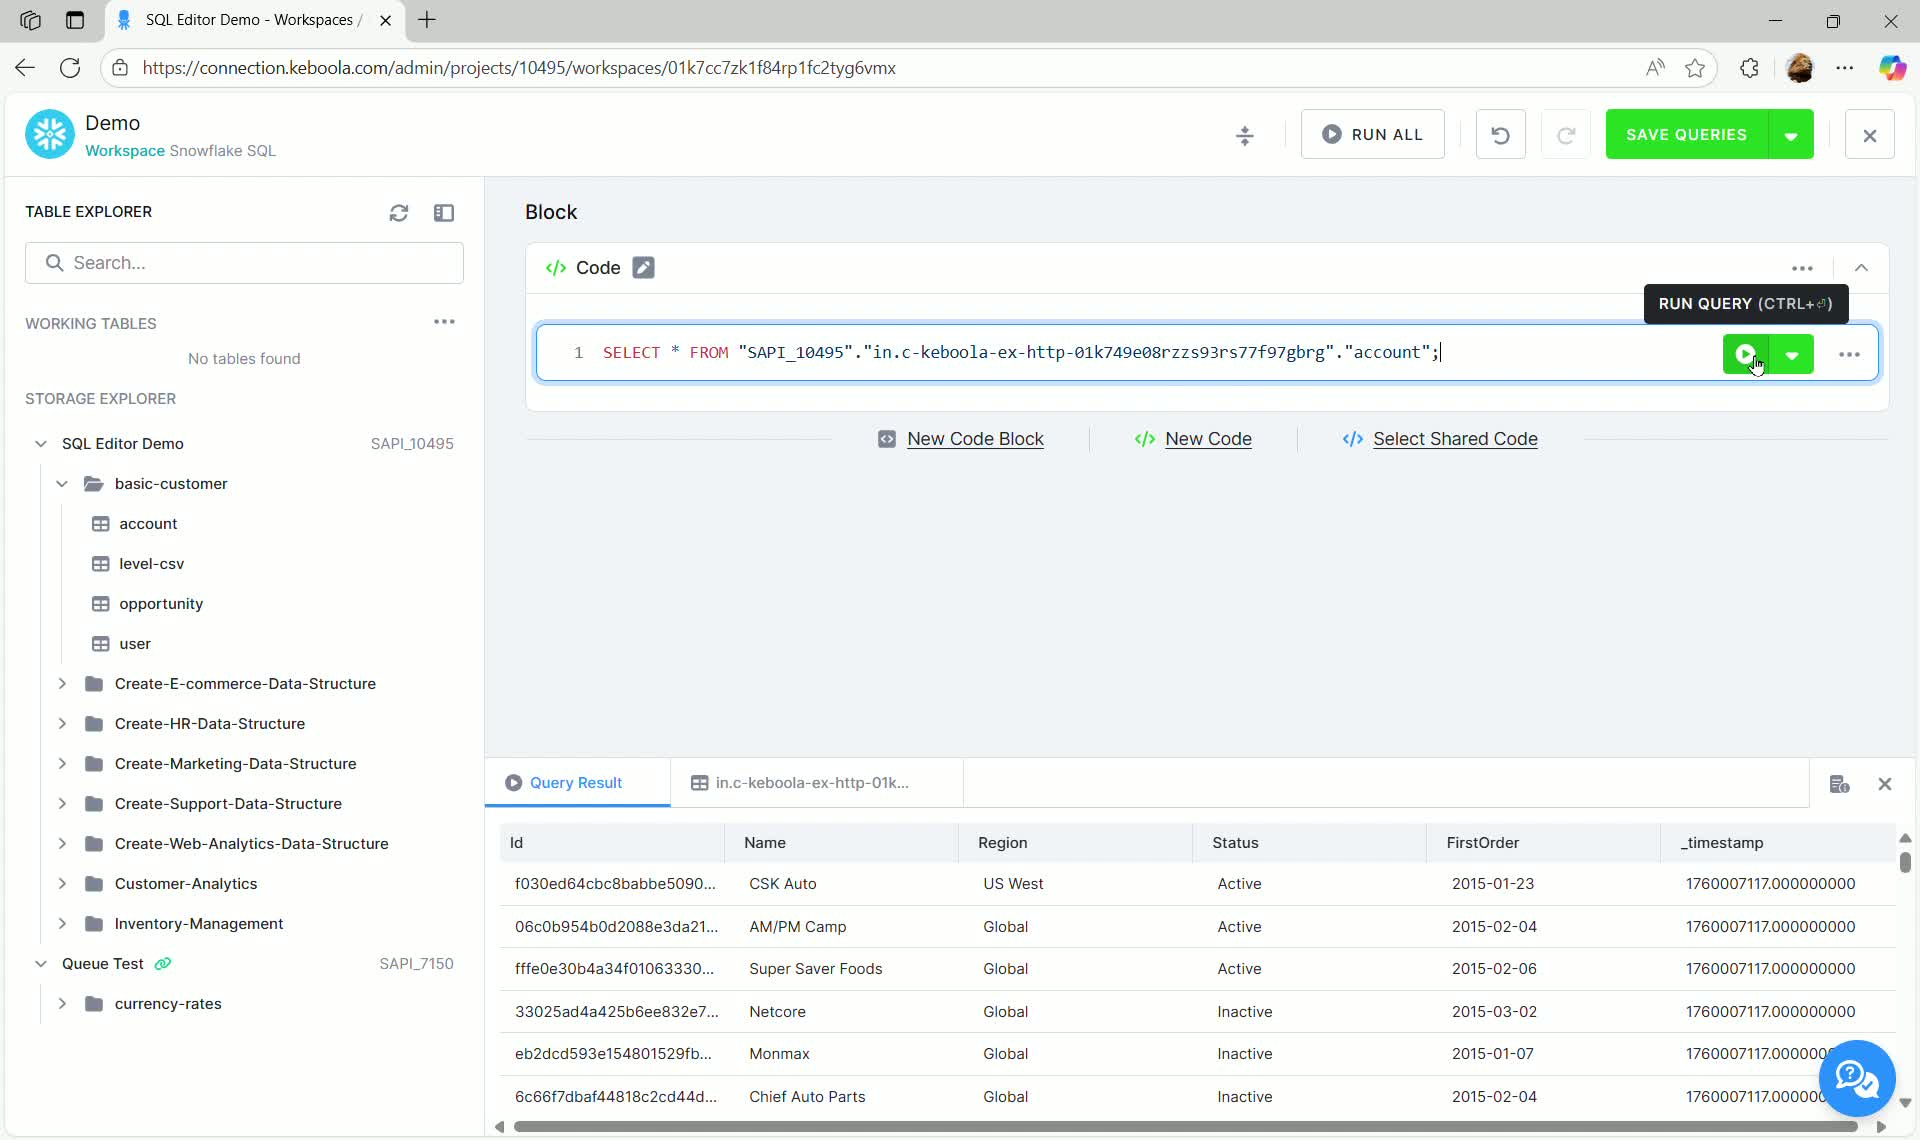
Section titled “Running Queries”You can run a query either by clicking the green run icon next to the code block or using the keyboard shortcut Ctrl + Enter.
Sessions in SQL Editor
Section titled “Sessions in SQL Editor”A session allows multiple queries to share context and state, so you can work step by step instead of everything being completely independent. Think of a session as a temporary working environment that exists while you’re actively working in the editor.
How long does a session last?
Section titled “How long does a session last?”A session in the SQL Editor lasts for 24 hours when there is no user activity (e.g. running a query) or when SQL Editor is closed.
What happens when a session expires?
Section titled “What happens when a session expires?”- Temporary tables are removed
- Session variables are cleared
- Other session-specific state is lost
Your SQL queries themselves are not lost, but anything that depended on the previous session state will no longer work until it is recreated. If your browser window stays open past the 24-hour limit, you’ll see a message informing you that the session has expired.
SQL features that depend on sessions
Section titled “SQL features that depend on sessions”- Temporary tables (e.g. CREATE TEMP TABLE)
- Temporary views
- SQL variables
- Session parameters
- Multi-step workflows that assume shared state between queries
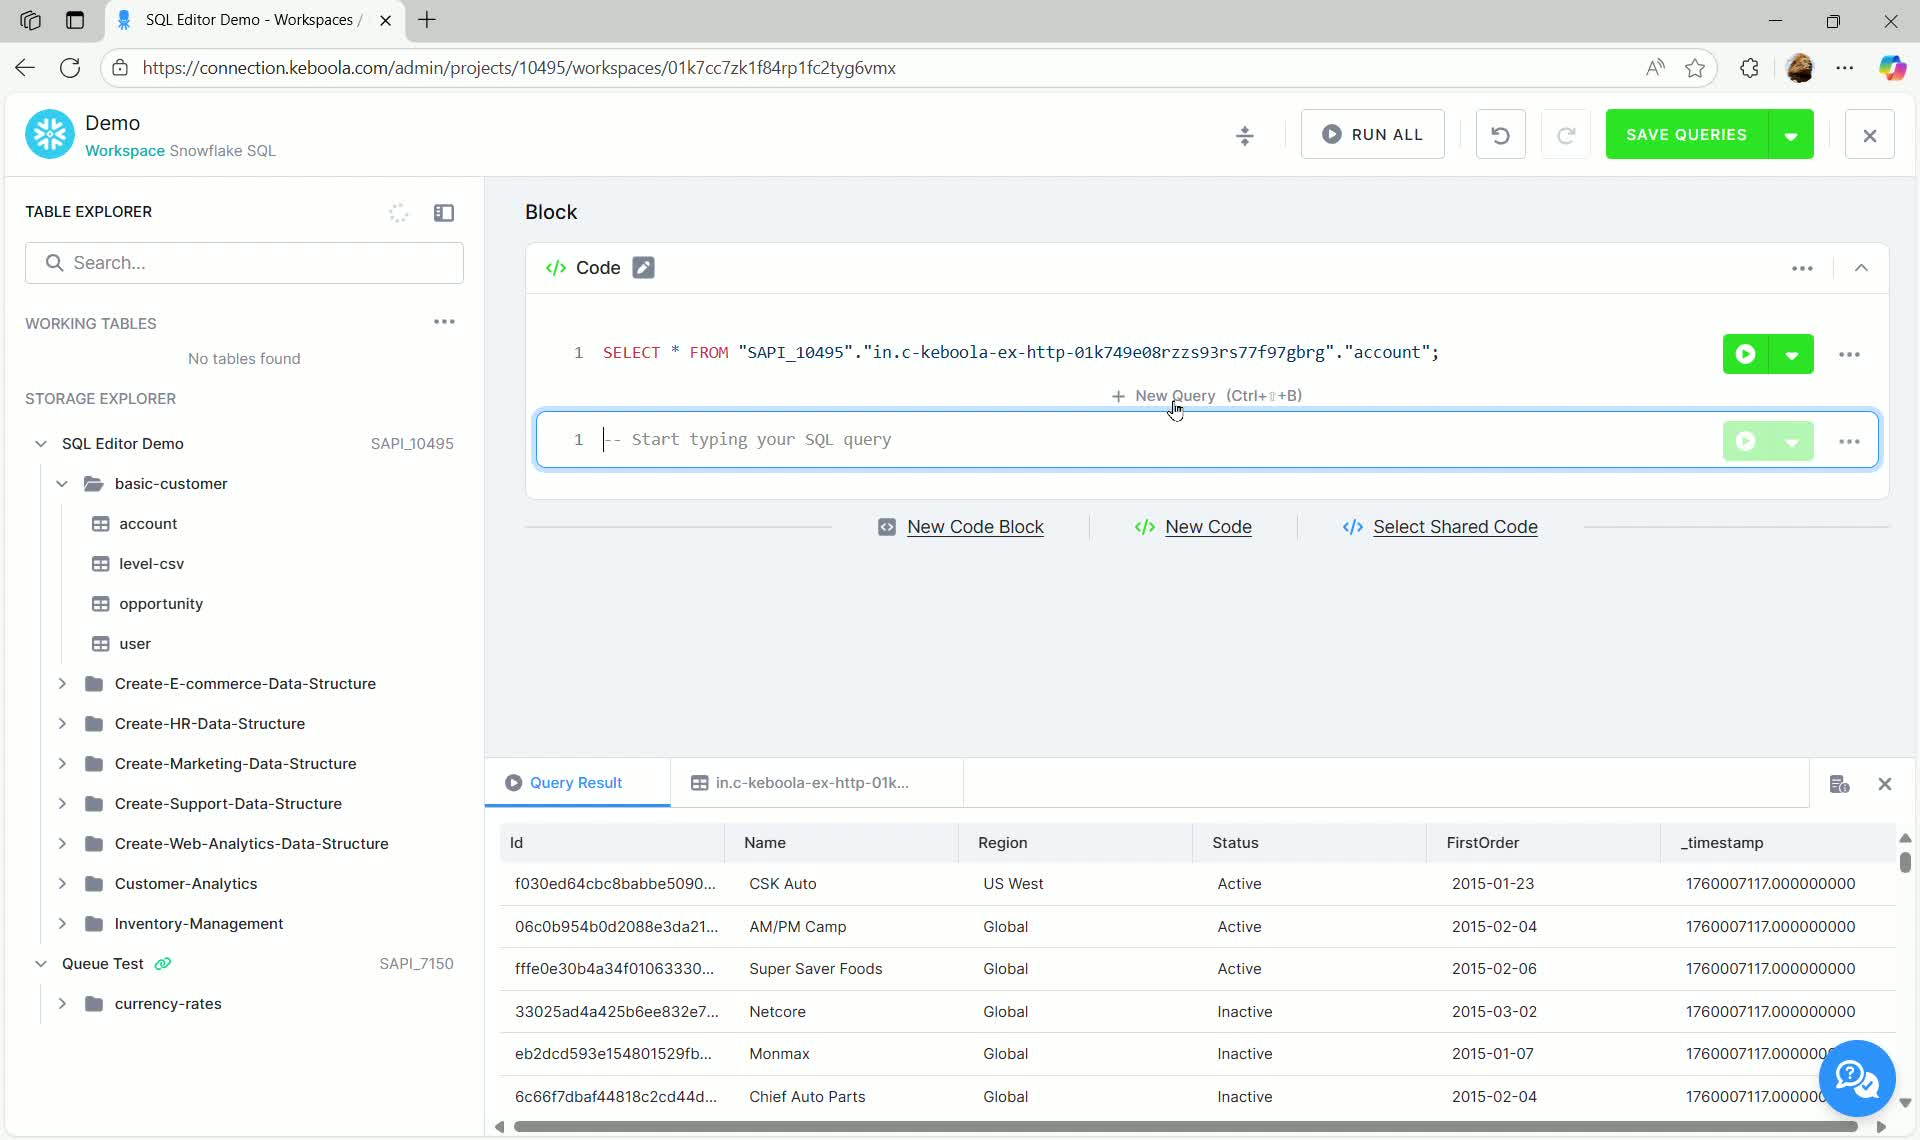
Working with Multiple Queries
Section titled “Working with Multiple Queries”You can add multiple code blocks using the + New Query button below the existing block, or + New Code Block below the main editor section.
Export Query result
Section titled “Export Query result”To download your query results as a CSV-formatted file, select Export Query result and choose your preffered format:
- CSV — Standard comma-separated values
- CSV (gzip) — Compressed CSV for large exports
Download limit: Exported files are limited to 100 MB. If your query result exceeds this size, consider adding a LIMIT clause to reduce the row count, filtering the data before export, or using Keboola Storage to access the full dataset.
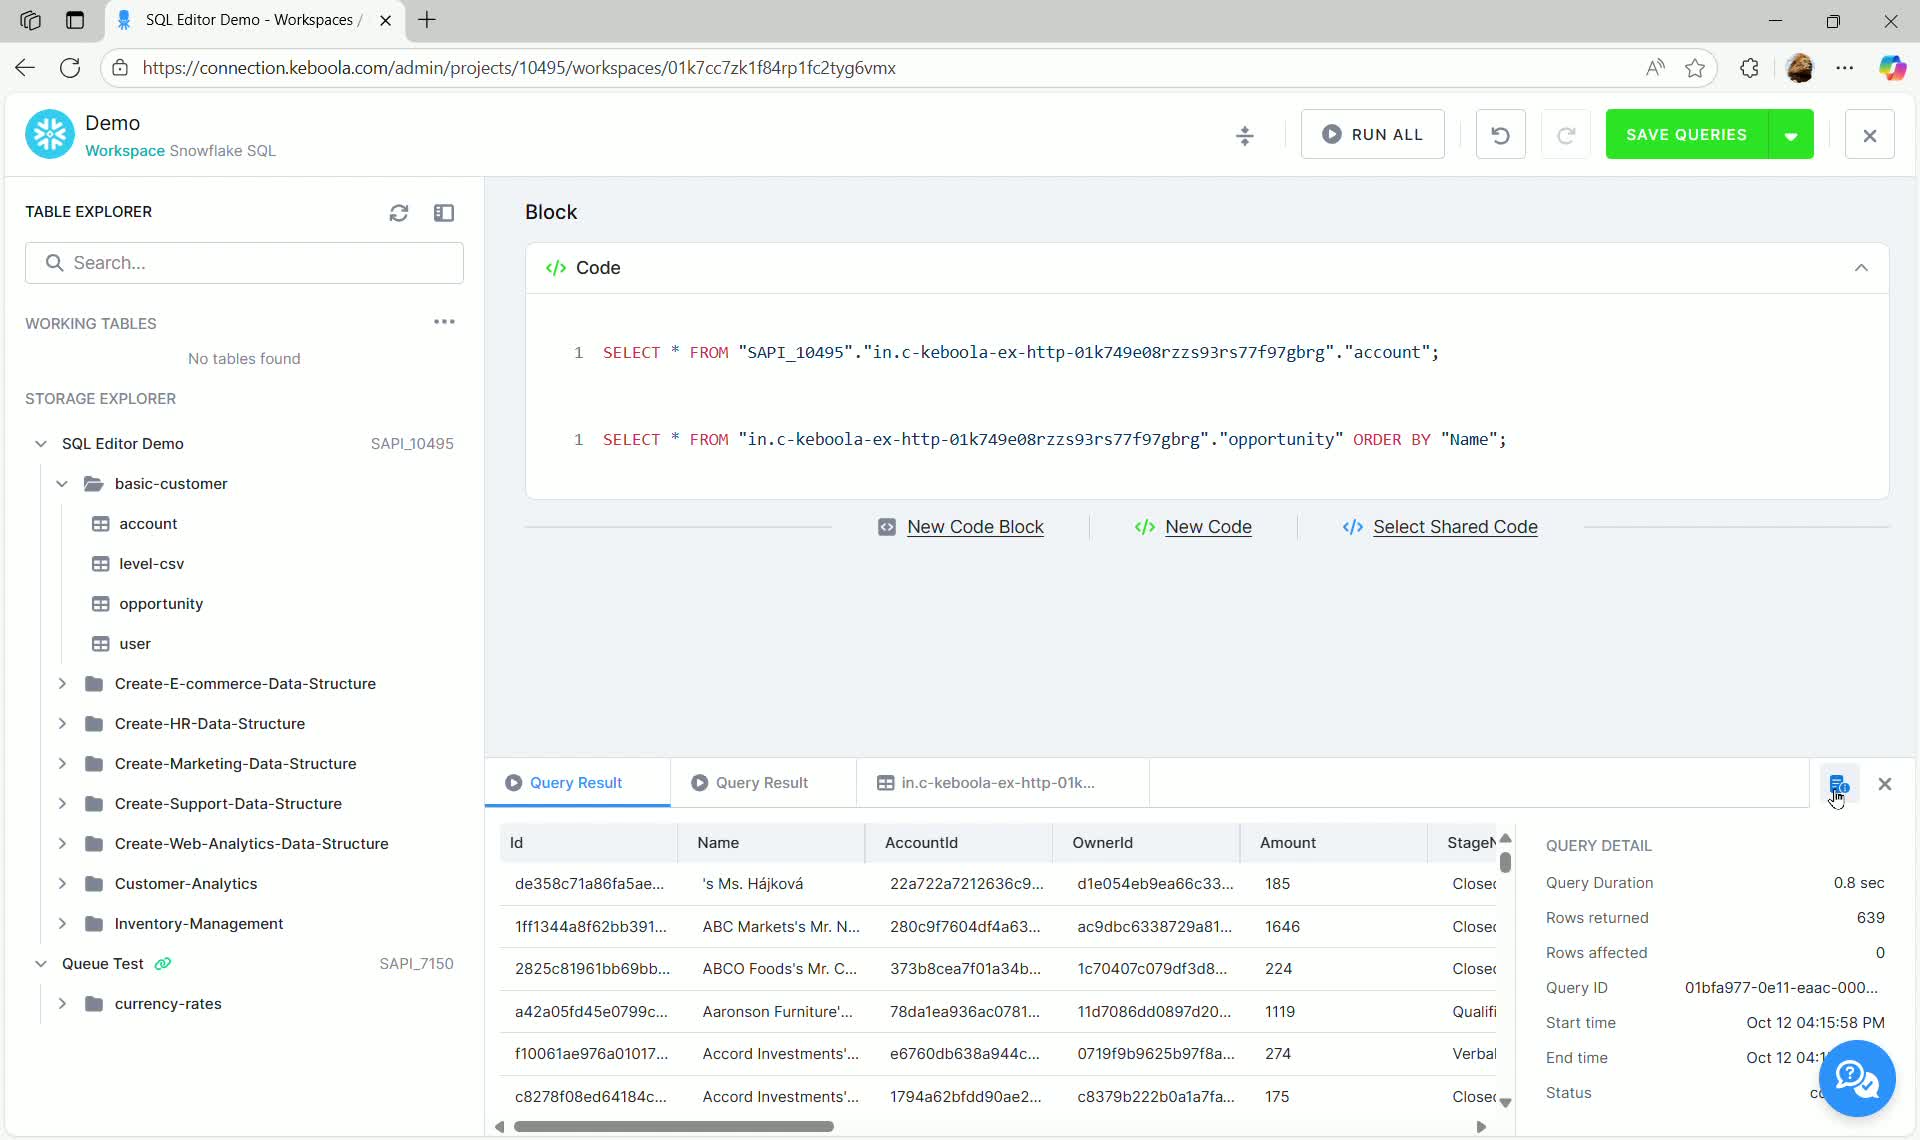
Viewing Query Details
Section titled “Viewing Query Details”After executing a query, you can access detailed information about the execution in the results pane by clicking QUERY DETAILS.
Viewing Query History
Section titled “Viewing Query History”After executing a query, you can view detailed information about previously run queries in the results pane by clicking QUERY HISTORY.
Creating Transformations and Output Mapping
Section titled “Creating Transformations and Output Mapping”The SQL Editor supports creating persistent tables that are saved back into Keboola Storage.
Creating Output Tables
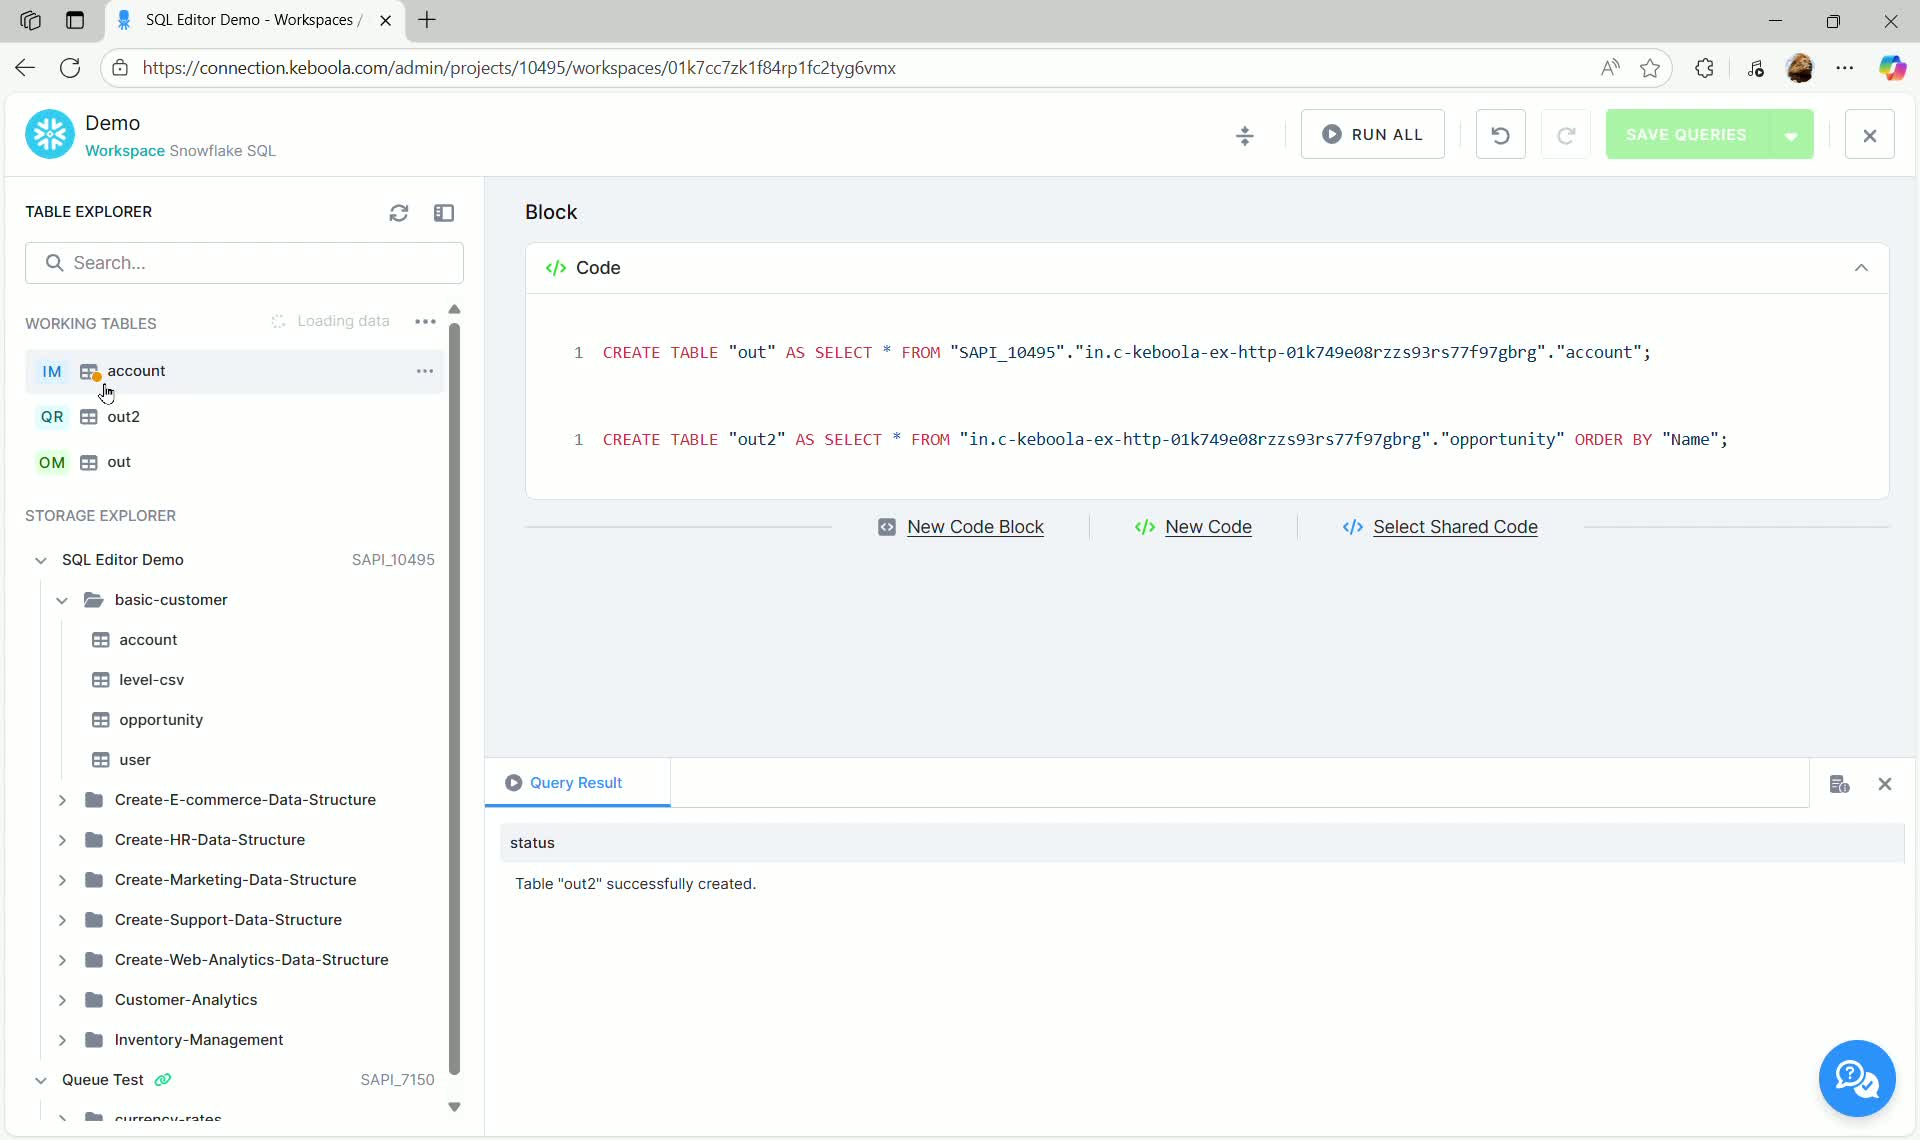
Section titled “Creating Output Tables”To create a persistent table, you must convert your SELECT statements into CREATE TABLE AS SELECT statements, specifying a temporary output table name. These tables are automatically created in the workspace schema upon successful execution.
- Define a new table using
CREATE TABLE "out" AS SELECT ...
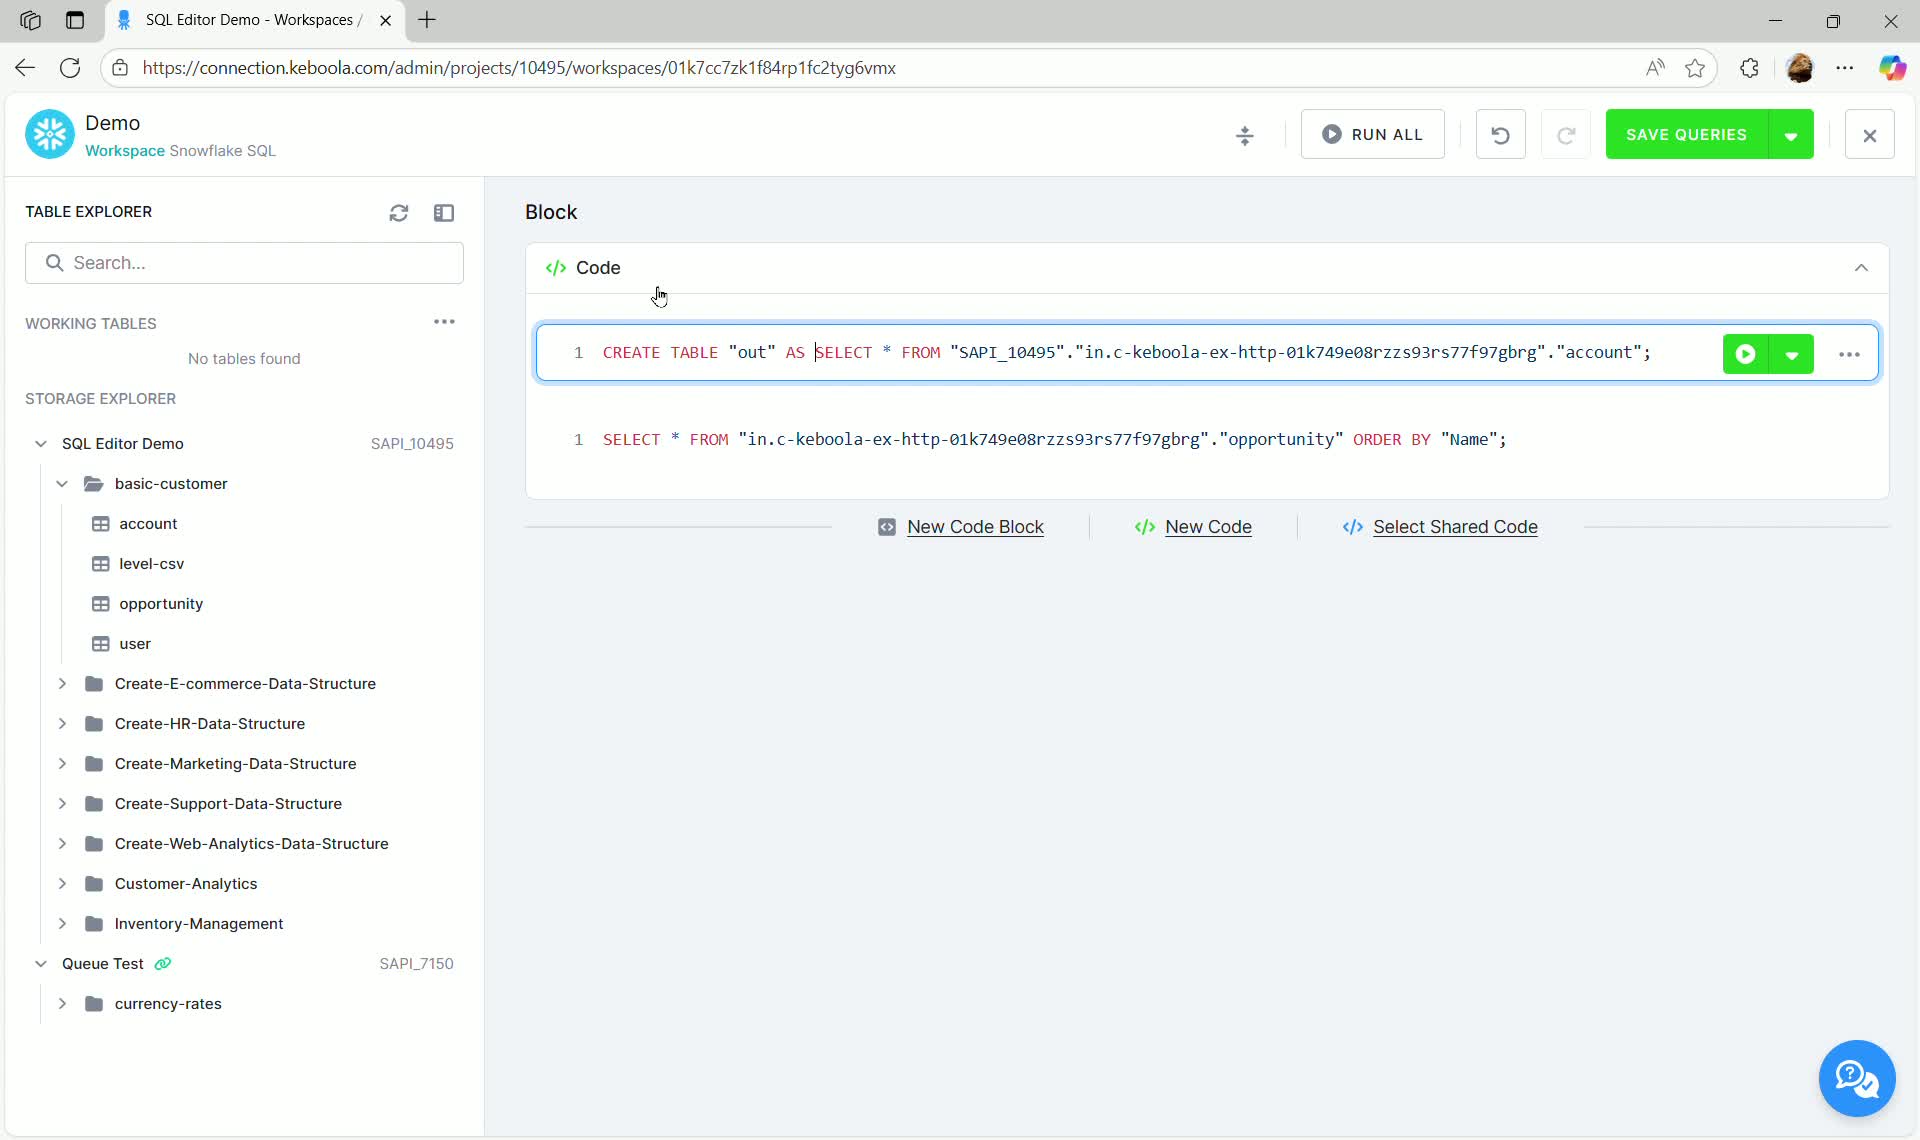
- Run the query block.
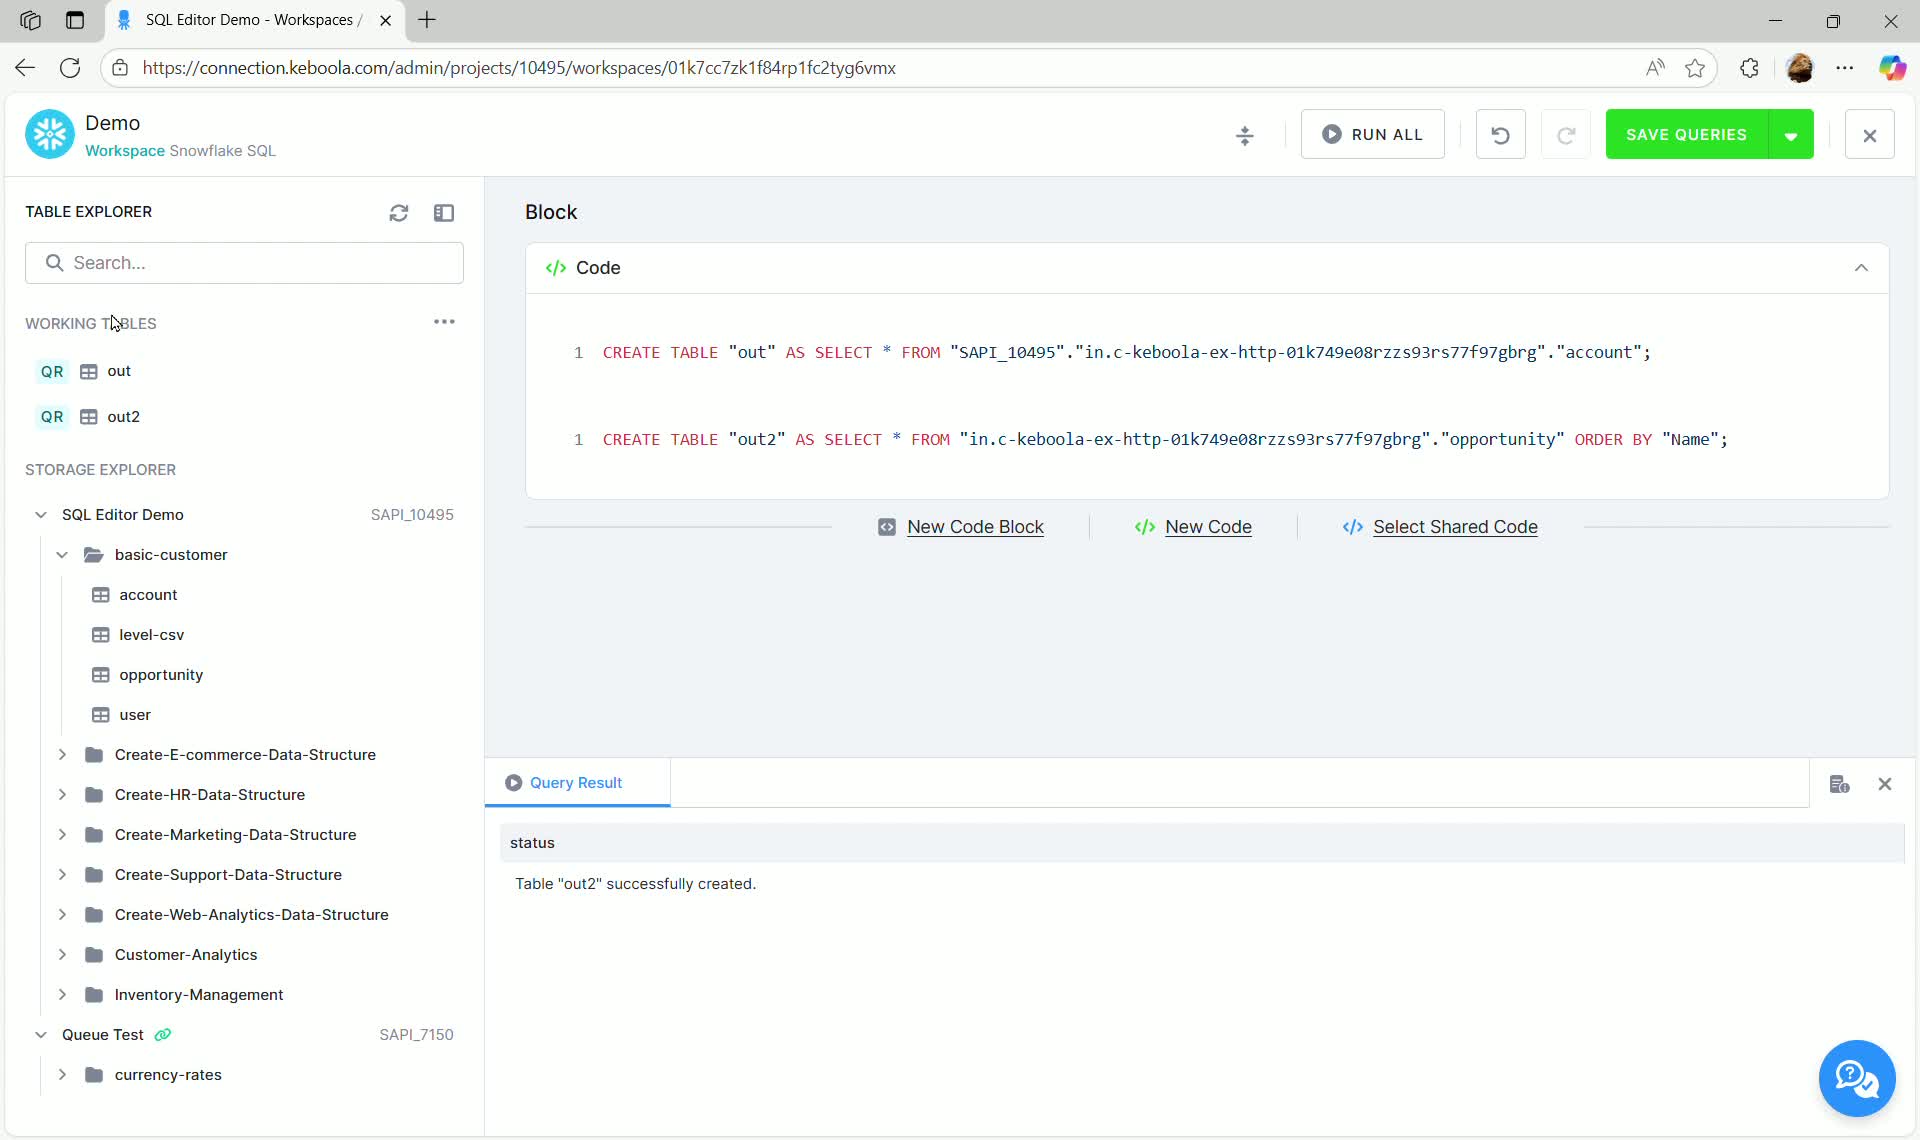
If successful, the new tables (e.g., out and out2) will appear in the Working Tables section.
Mapping Output Tables to Storage
Section titled “Mapping Output Tables to Storage”Once temporary working tables are created, you must map them to a destination in Keboola Storage if you want to create a transformation that saves data permanently.
- In the Working Tables section, click the three dots next to the temporary table (e.g.,
out). - Select Add table to Output Mapping.
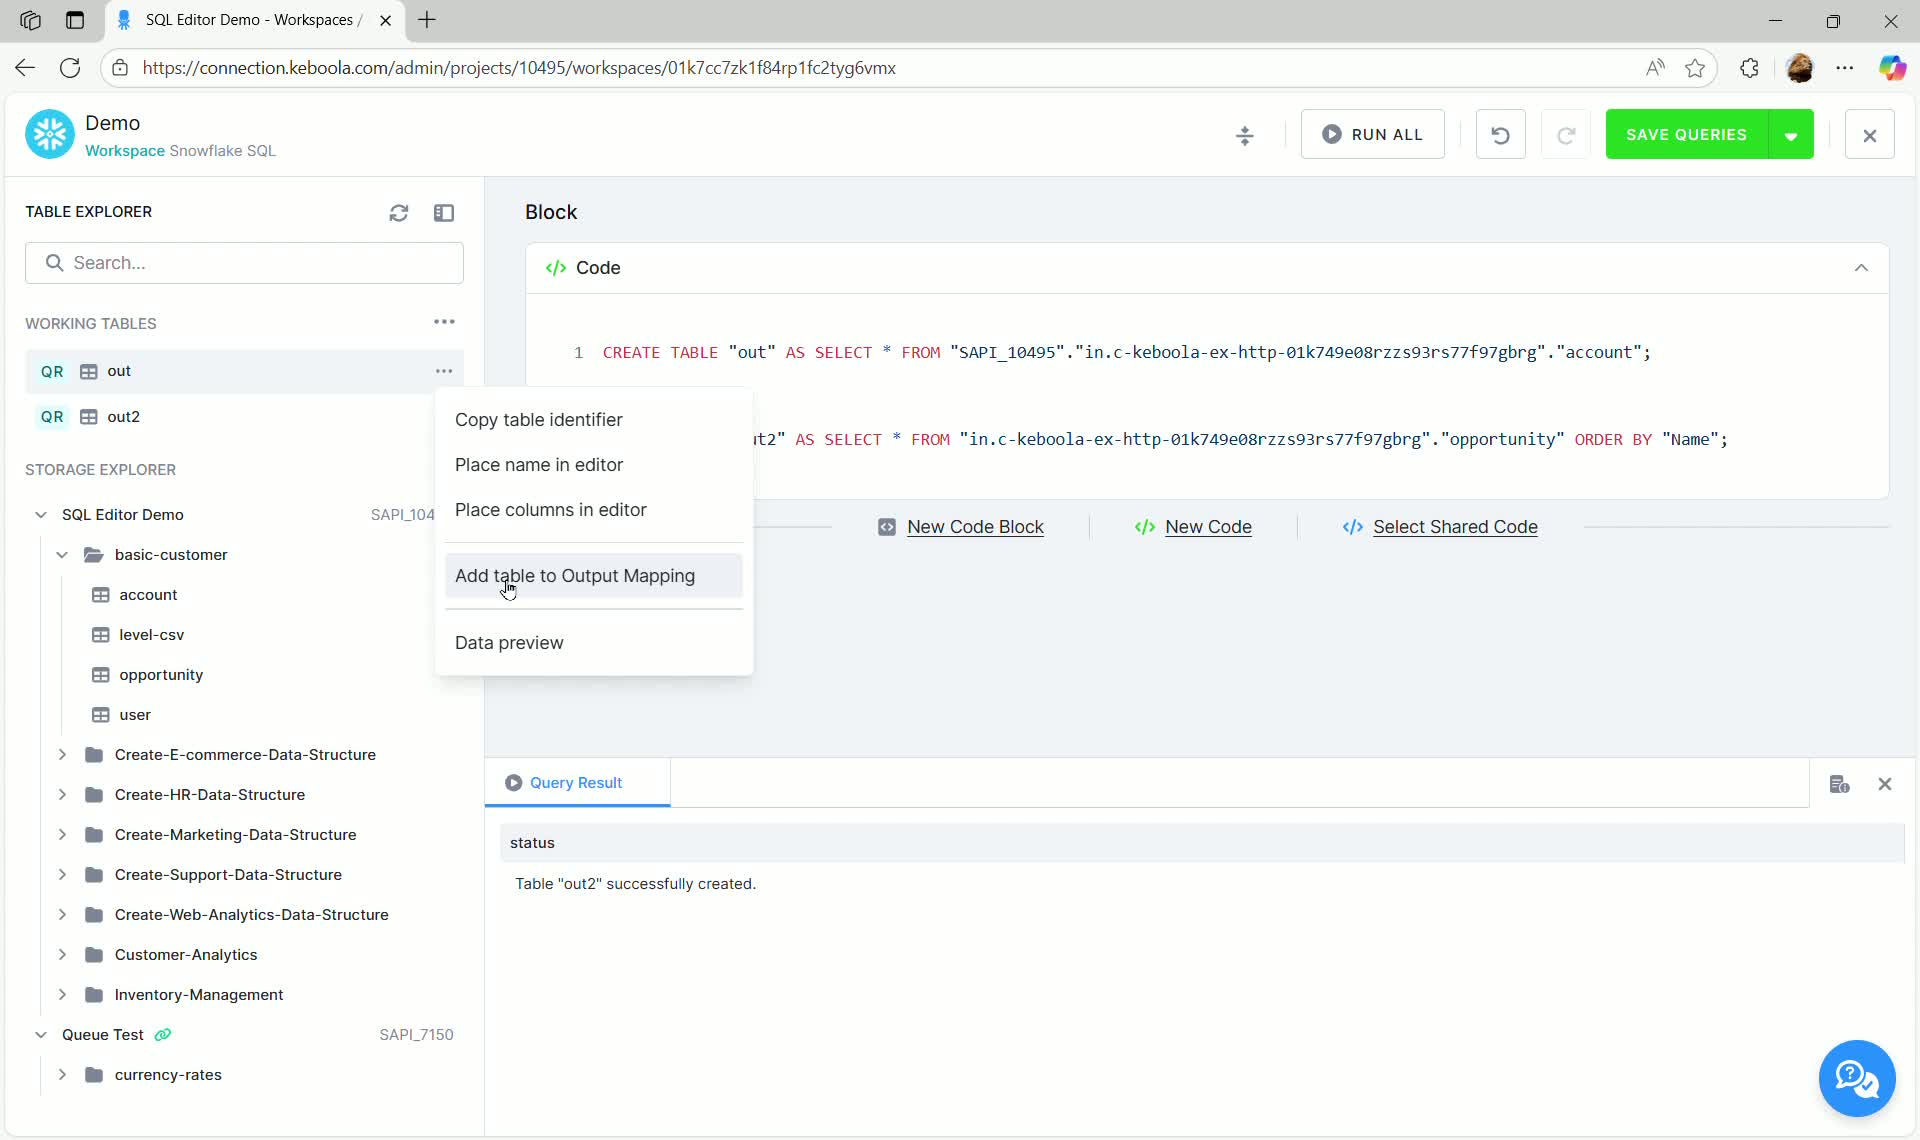
- In the Output Mapping dialog, configure the destination bucket and table name in Storage. You can also define the primary key and set incremental loading options.
- Click ADD OUTPUT.
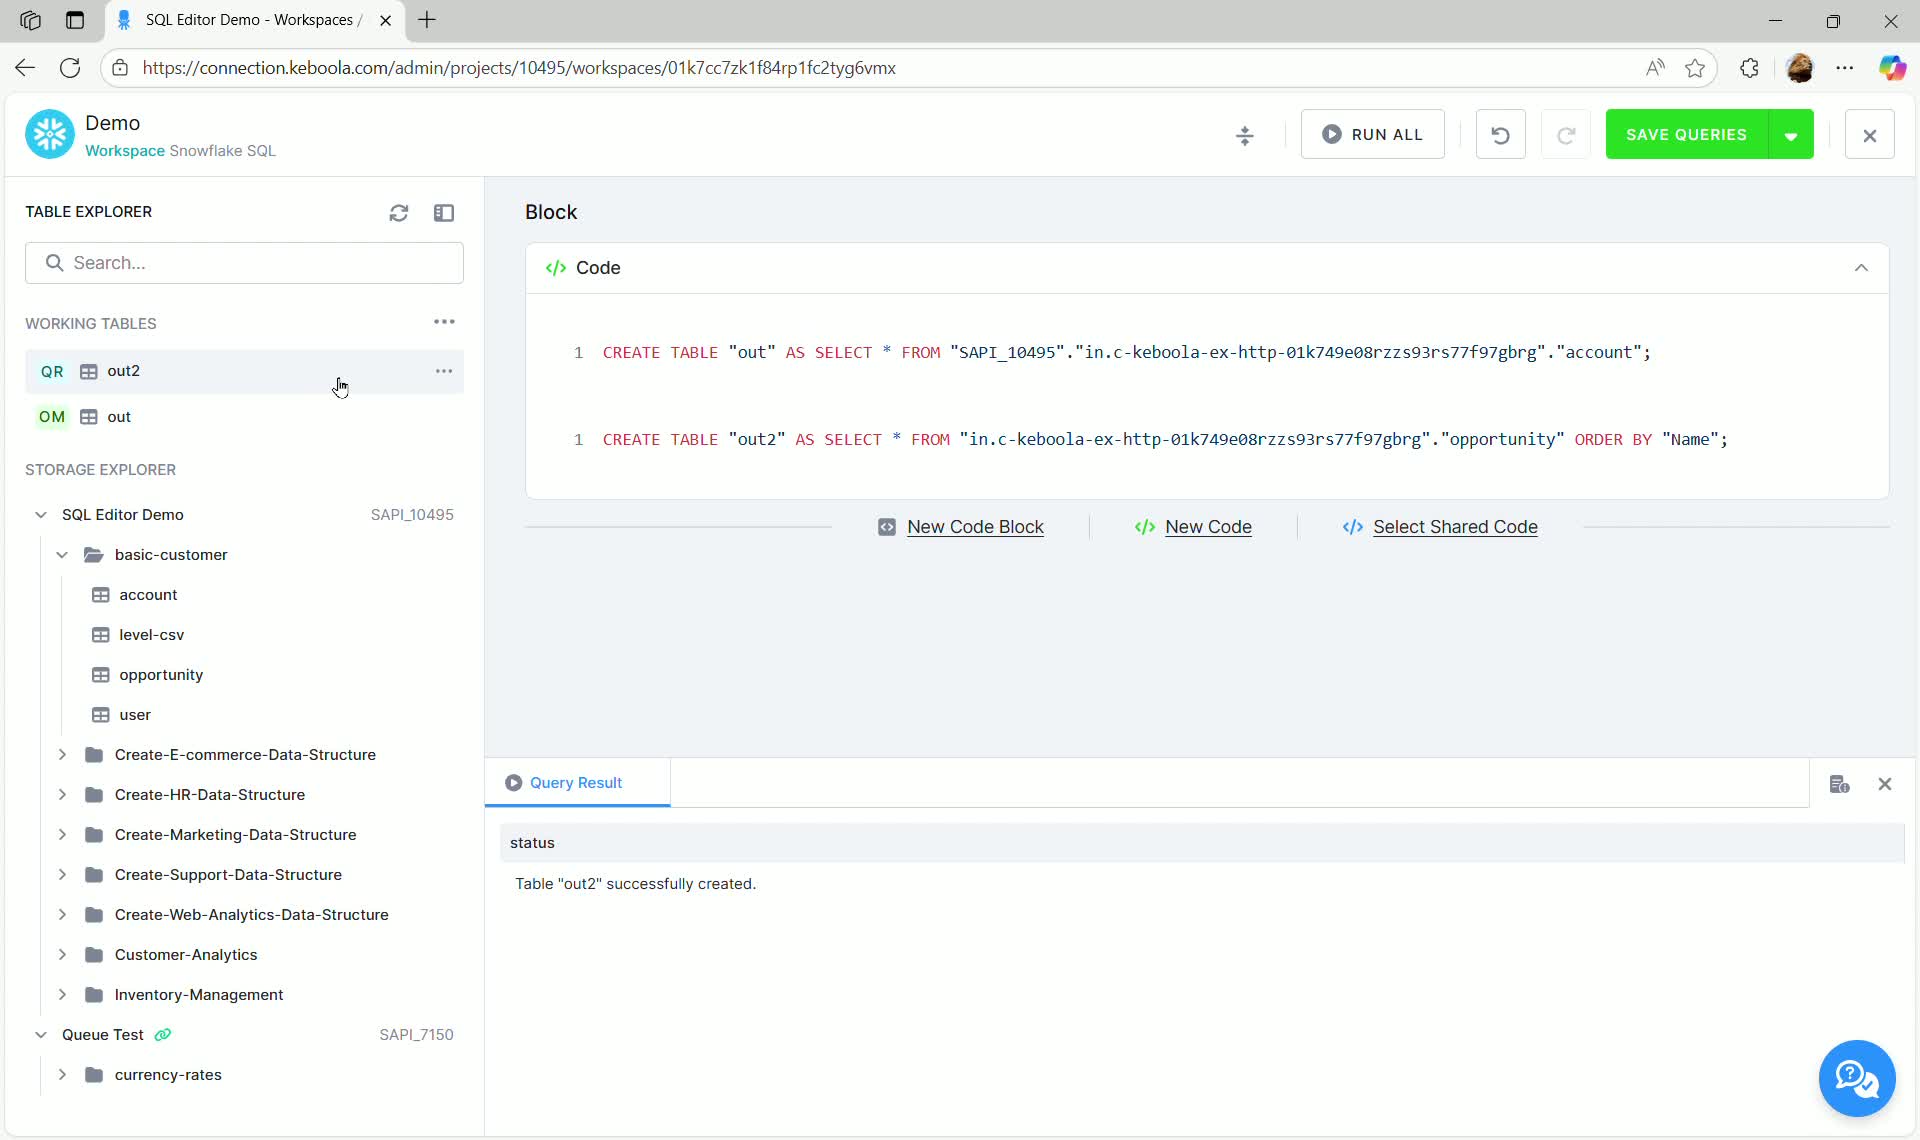
Once mapped, the table icon in the Working Tables section changes to OM (Output Mapping), confirming it is ready to be saved as a transformation.
Saving Queries as a Transformation
Section titled “Saving Queries as a Transformation”To persist the SQL logic and output mapping into a formal Keboola Transformation:
- Click SAVE QUERIES in the top right corner.

- Select Save with description (or Save if no new queries were added).
This action saves the SQL code and the output mapping configuration, creating a new Transformation component in your project.
Advanced SQL Editor Concepts
Section titled “Advanced SQL Editor Concepts”This section describes advanced concepts available in the SQL Editor.
Input Mapping
Section titled “Input Mapping”While the SQL Editor automatically provides read-only access to all tables within the project’s Storage (visible in the Storage Explorer below the Working Tables section), Input Mapping (IM) is necessary when you need to apply filters, specify specific columns, or set time-based filters before the data is loaded into the workspace database.
Input Mapping is also commonly used when migrating older transformations that rely on input mapping configuration.
Setting up Input Mapping
Section titled “Setting up Input Mapping”To set up Input Mapping for a table:
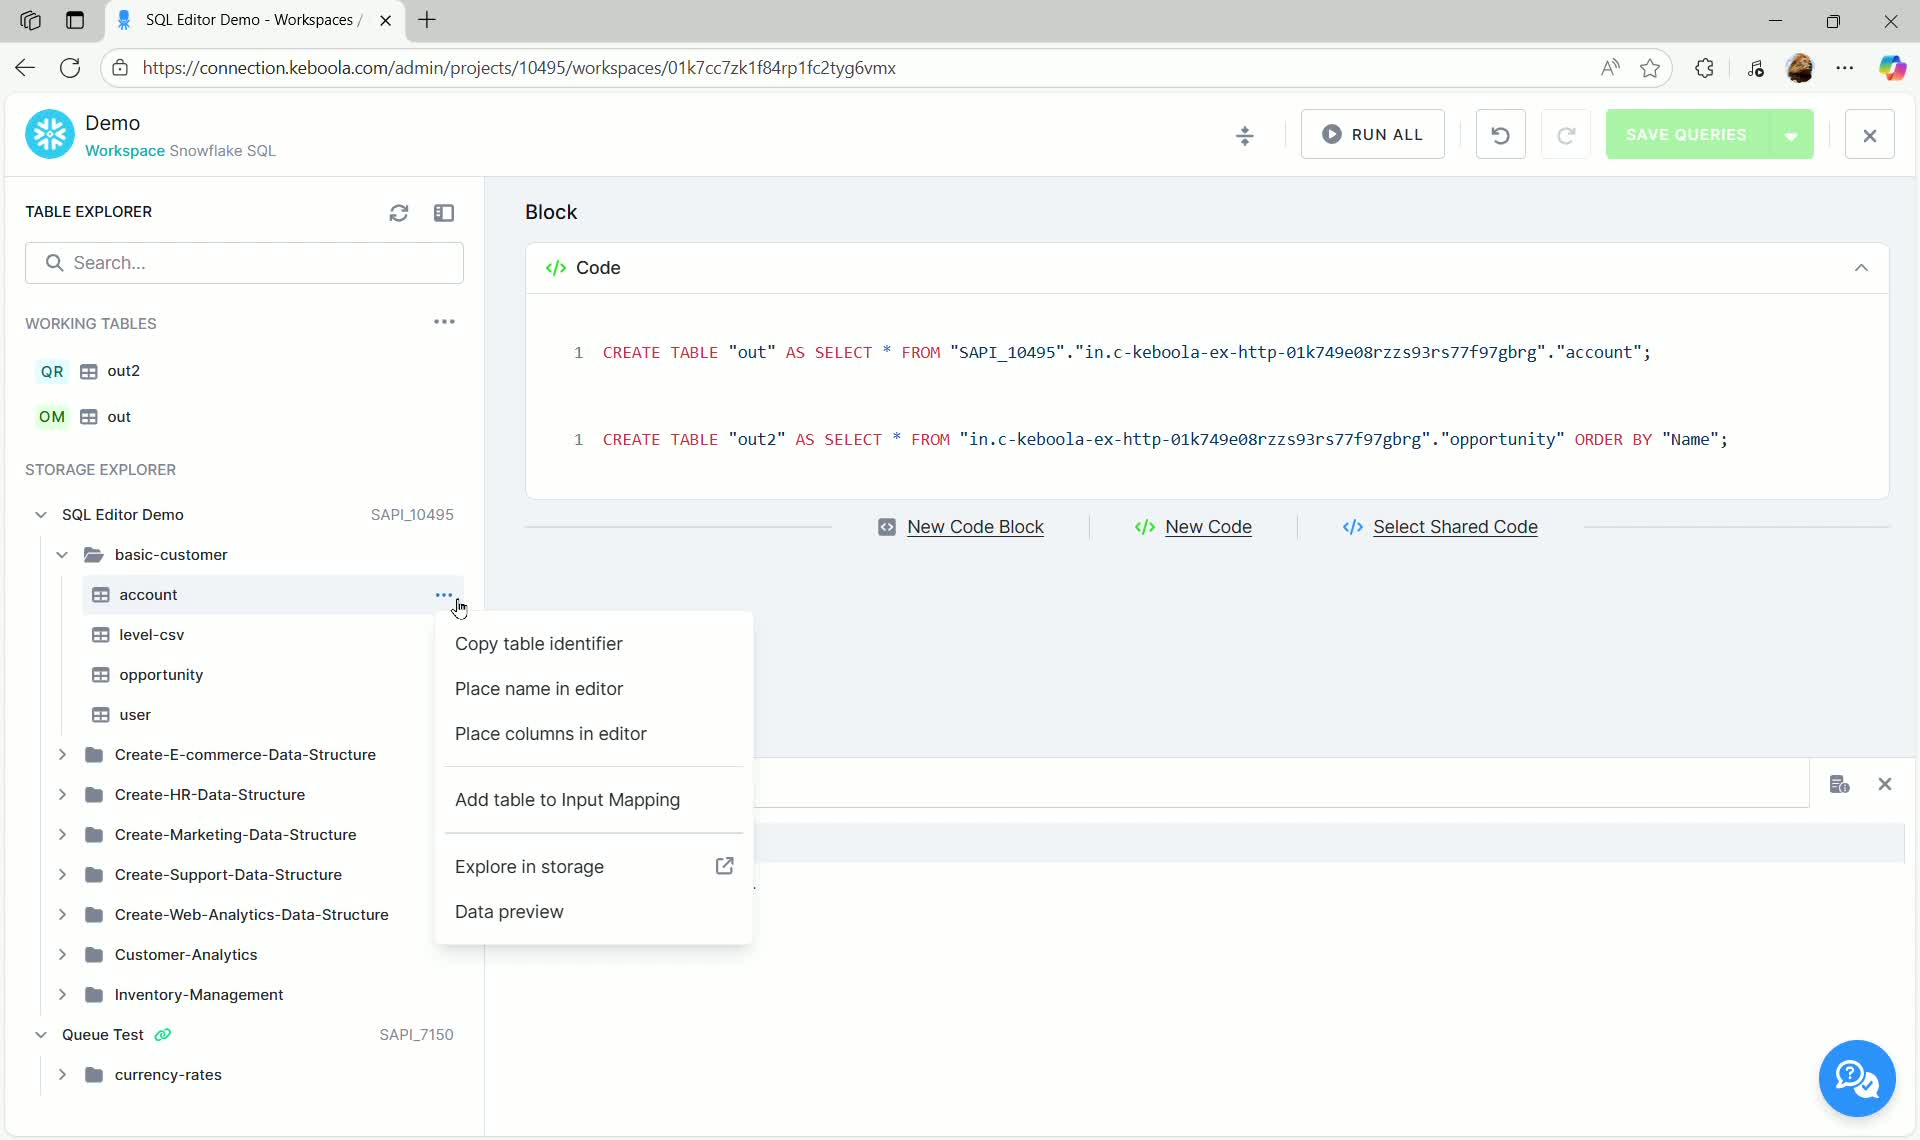
- Locate the desired table in the Storage Explorer (e.g., the
accounttable underbasic-customer). - Click the three dots next to the table name.
- Select Add table to Input Mapping.
- The Input Mapping configuration dialog opens:
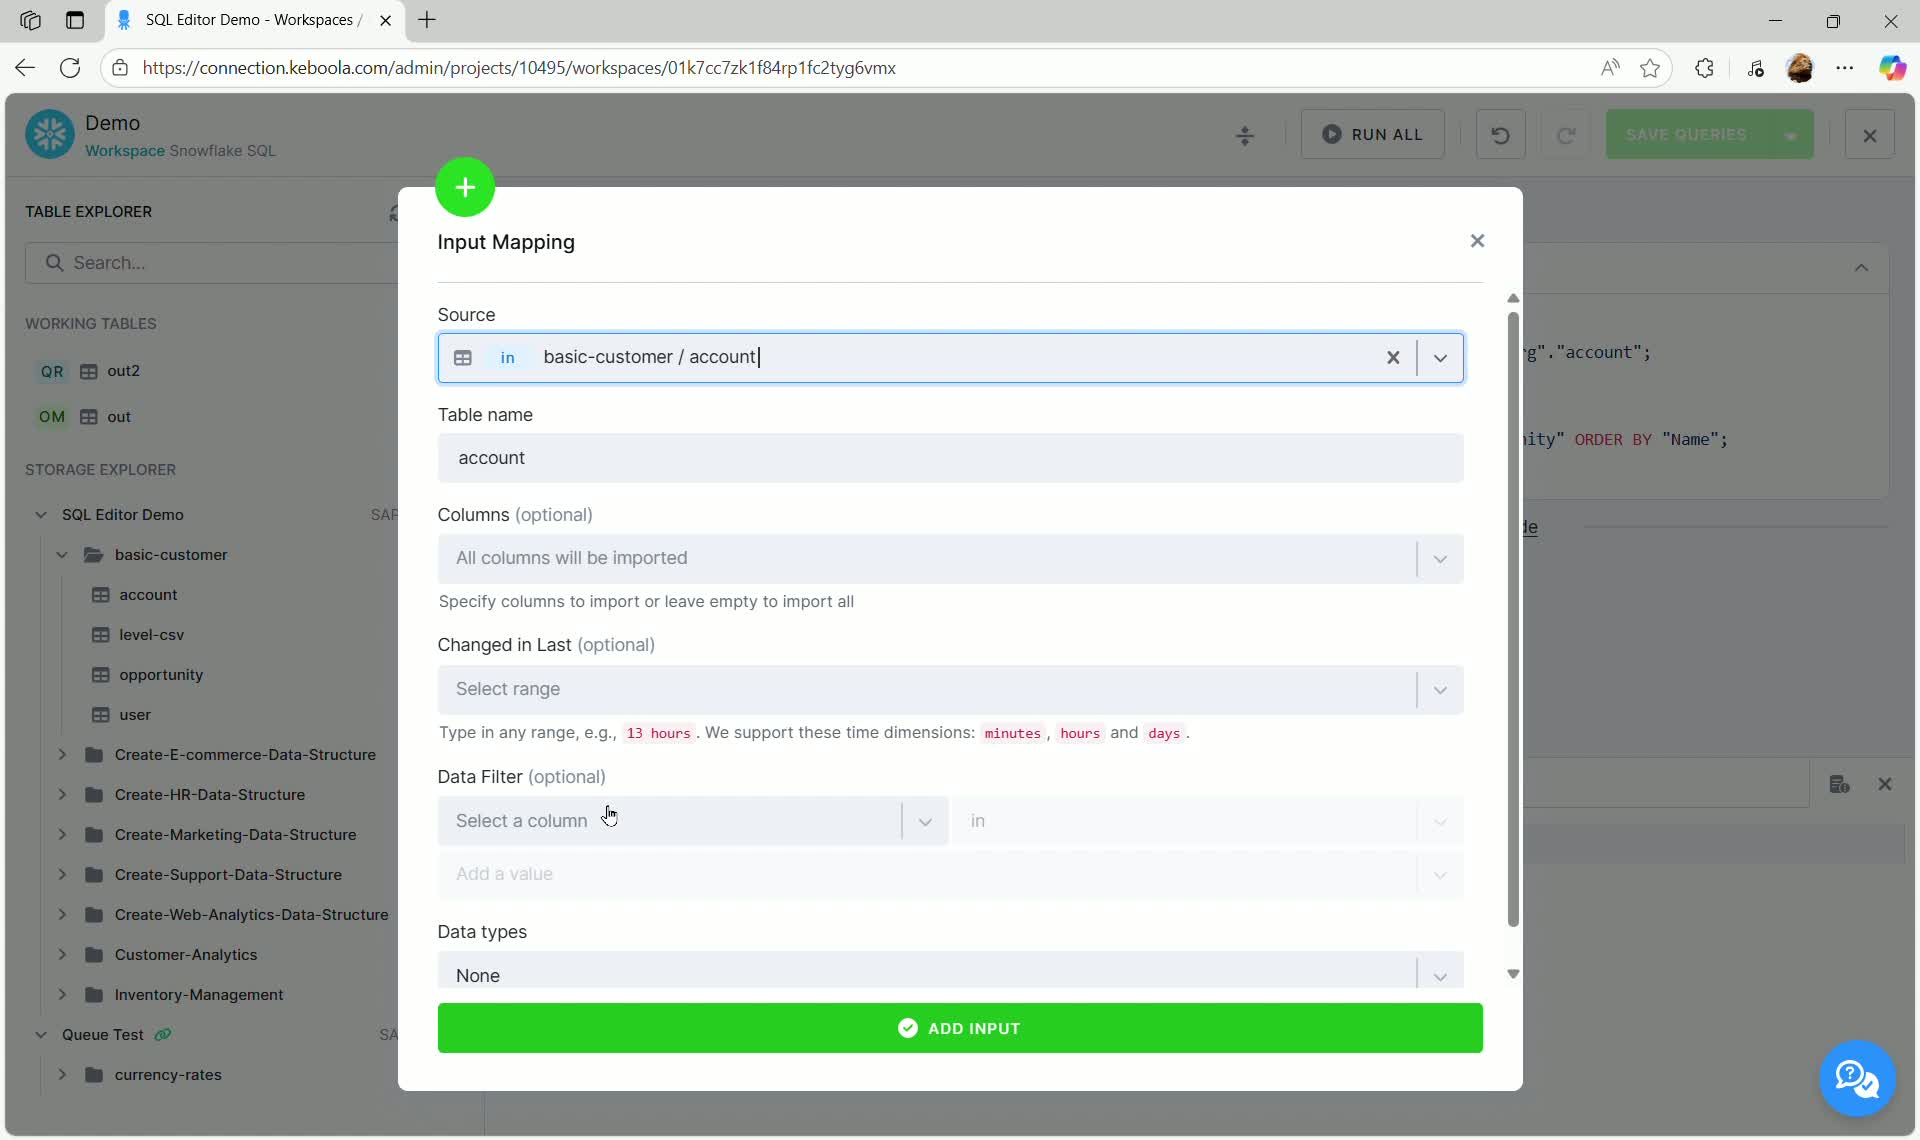
Here you can define:
- Source: The source bucket and table (pre-filled).
- Table Name: The alias used for this table in your SQL queries within the workspace (e.g.,
account). - Columns (optional): Specify which columns to import, or leave empty to import all.
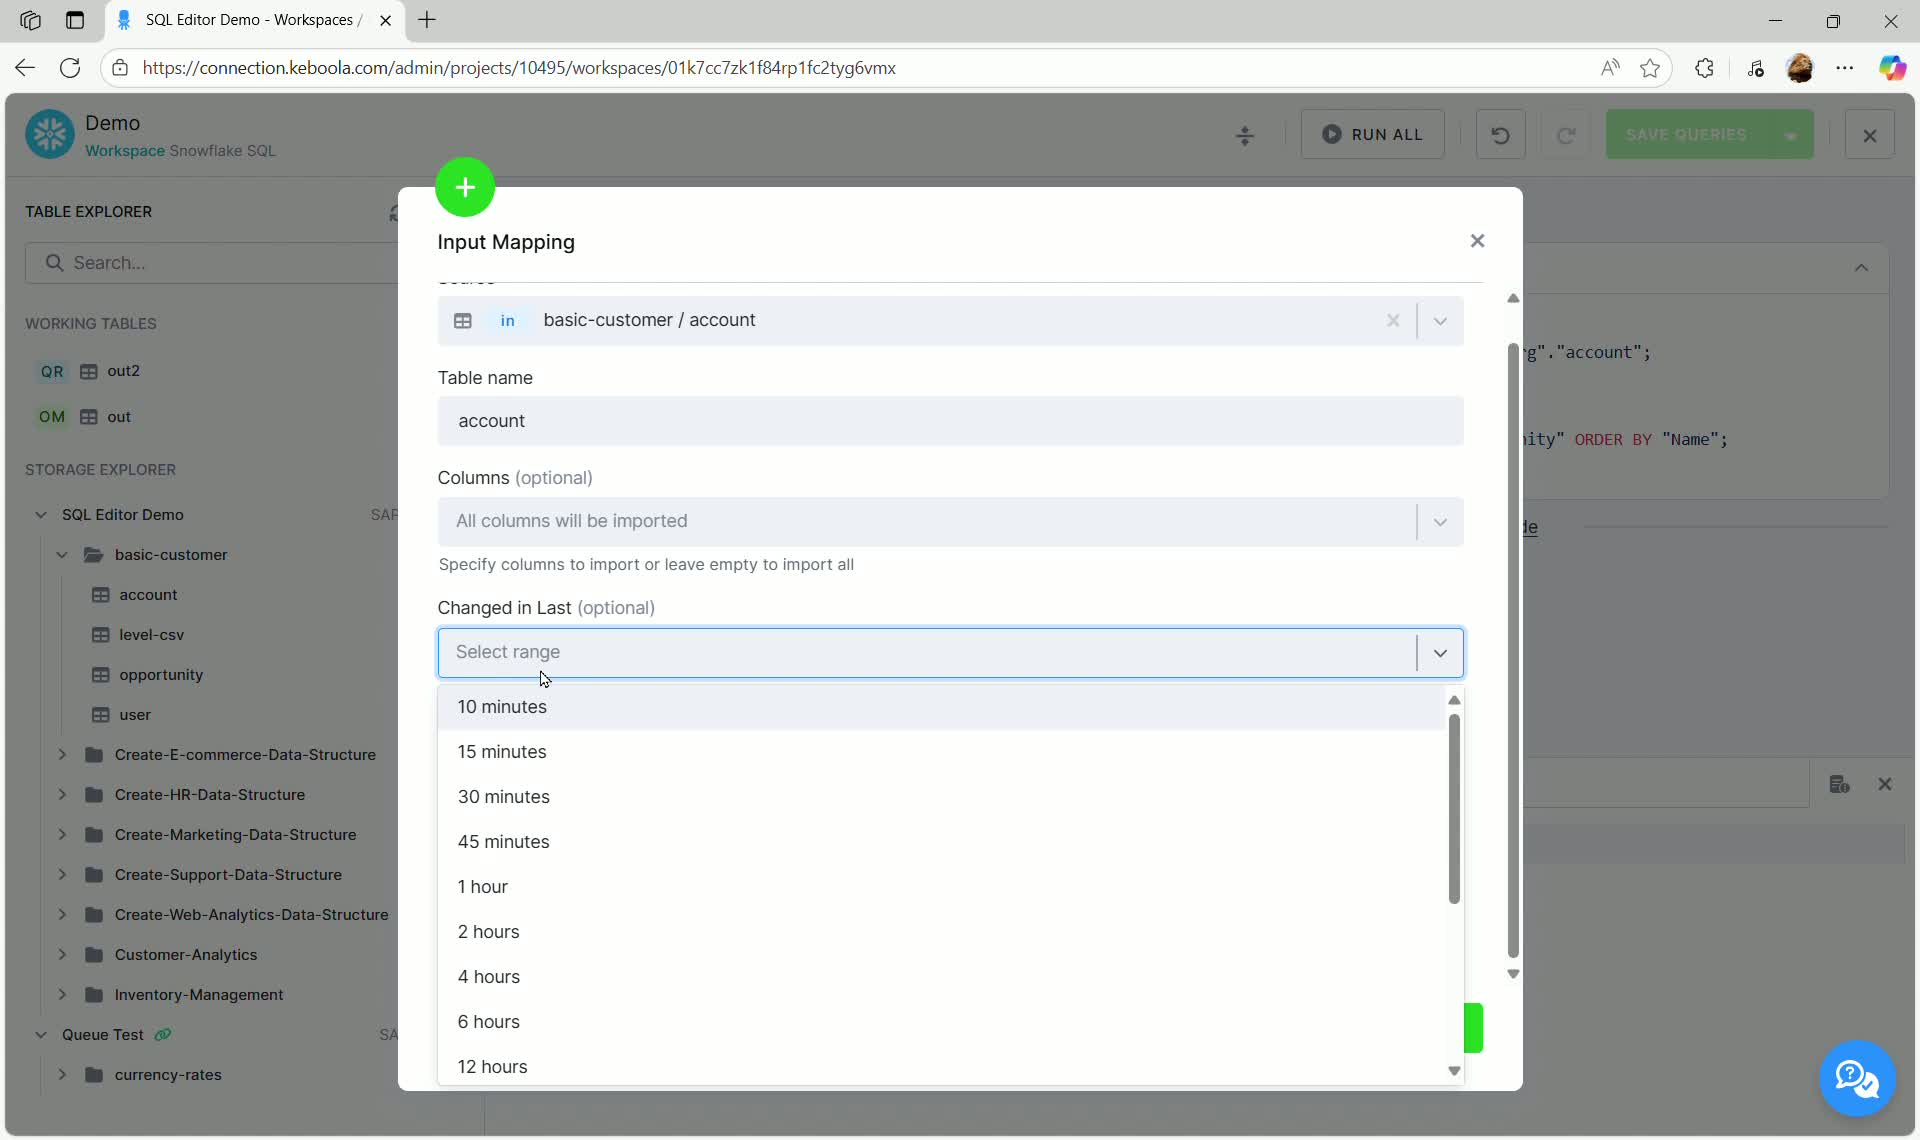
- Changed in Last (optional): Filter the data based on when it was last changed in Storage. This is useful for incremental loads.
- Data Filter (optional): Apply column-based filtering using specific values.
- Data Types: Define column data types (optional).
- Click Add Input to finalize the configuration. The table now appears in the Working Tables section marked with IM (Input Mapping).
Loading Input Mapped Data
Section titled “Loading Input Mapped Data”When a table is configured with Input Mapping, it is not immediately loaded into the workspace. The configuration merely tells the transformation what to load when it runs.
To query and work with the filtered/mapped data interactively in the editor, you must manually load it:
- In the Working Tables section, locate the Input Mapped table (e.g.,
account). - Click the Load Data option that appears near the table.
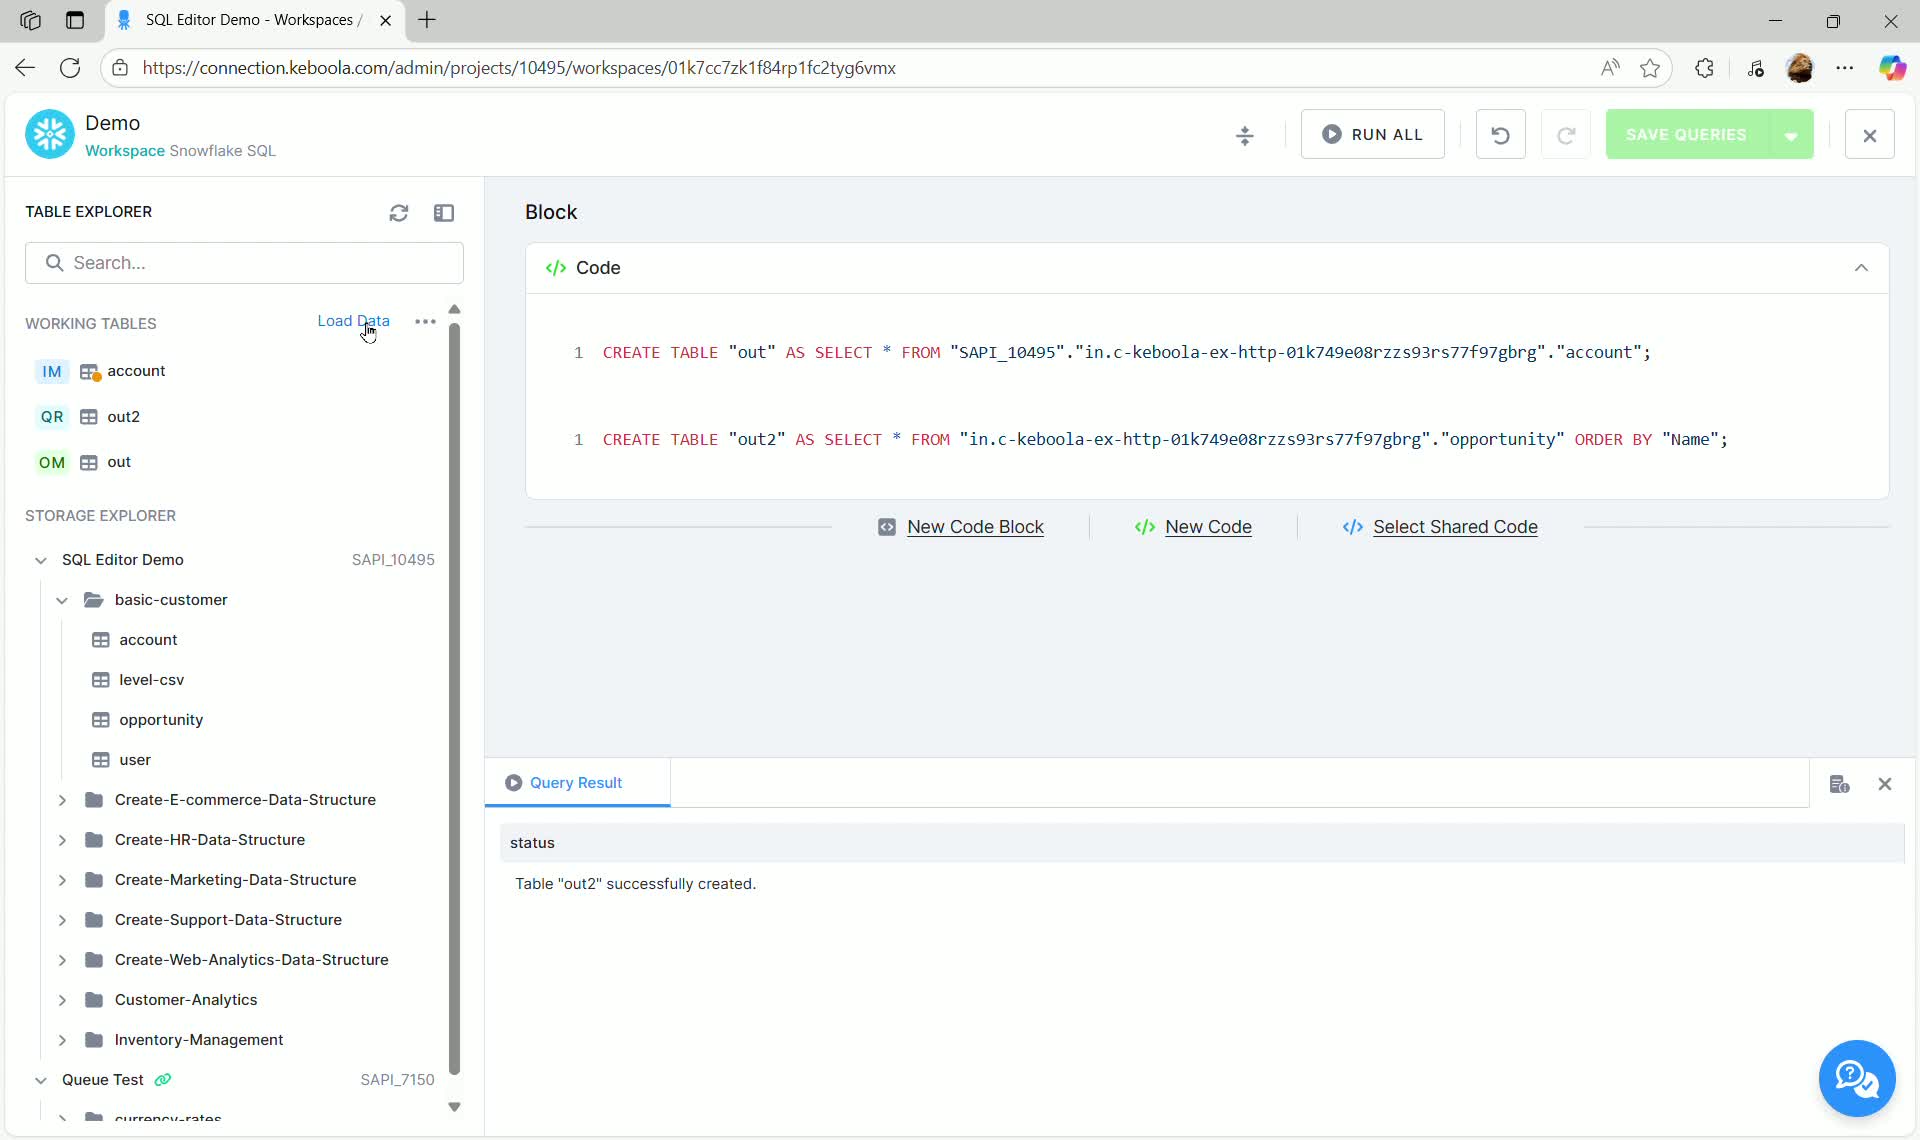
- Confirm the loading by clicking Load Latest Data.
If a table is configured for Input Mapping but not yet loaded, hovering over the table icon will show a warning indicating limited functionality.
Shared Code
Section titled “Shared Code”Shared Code allows you to reuse predefined SQL queries across multiple transformations or query blocks. This promotes consistency and simplifies maintenance.
Importing Shared Code Blocks
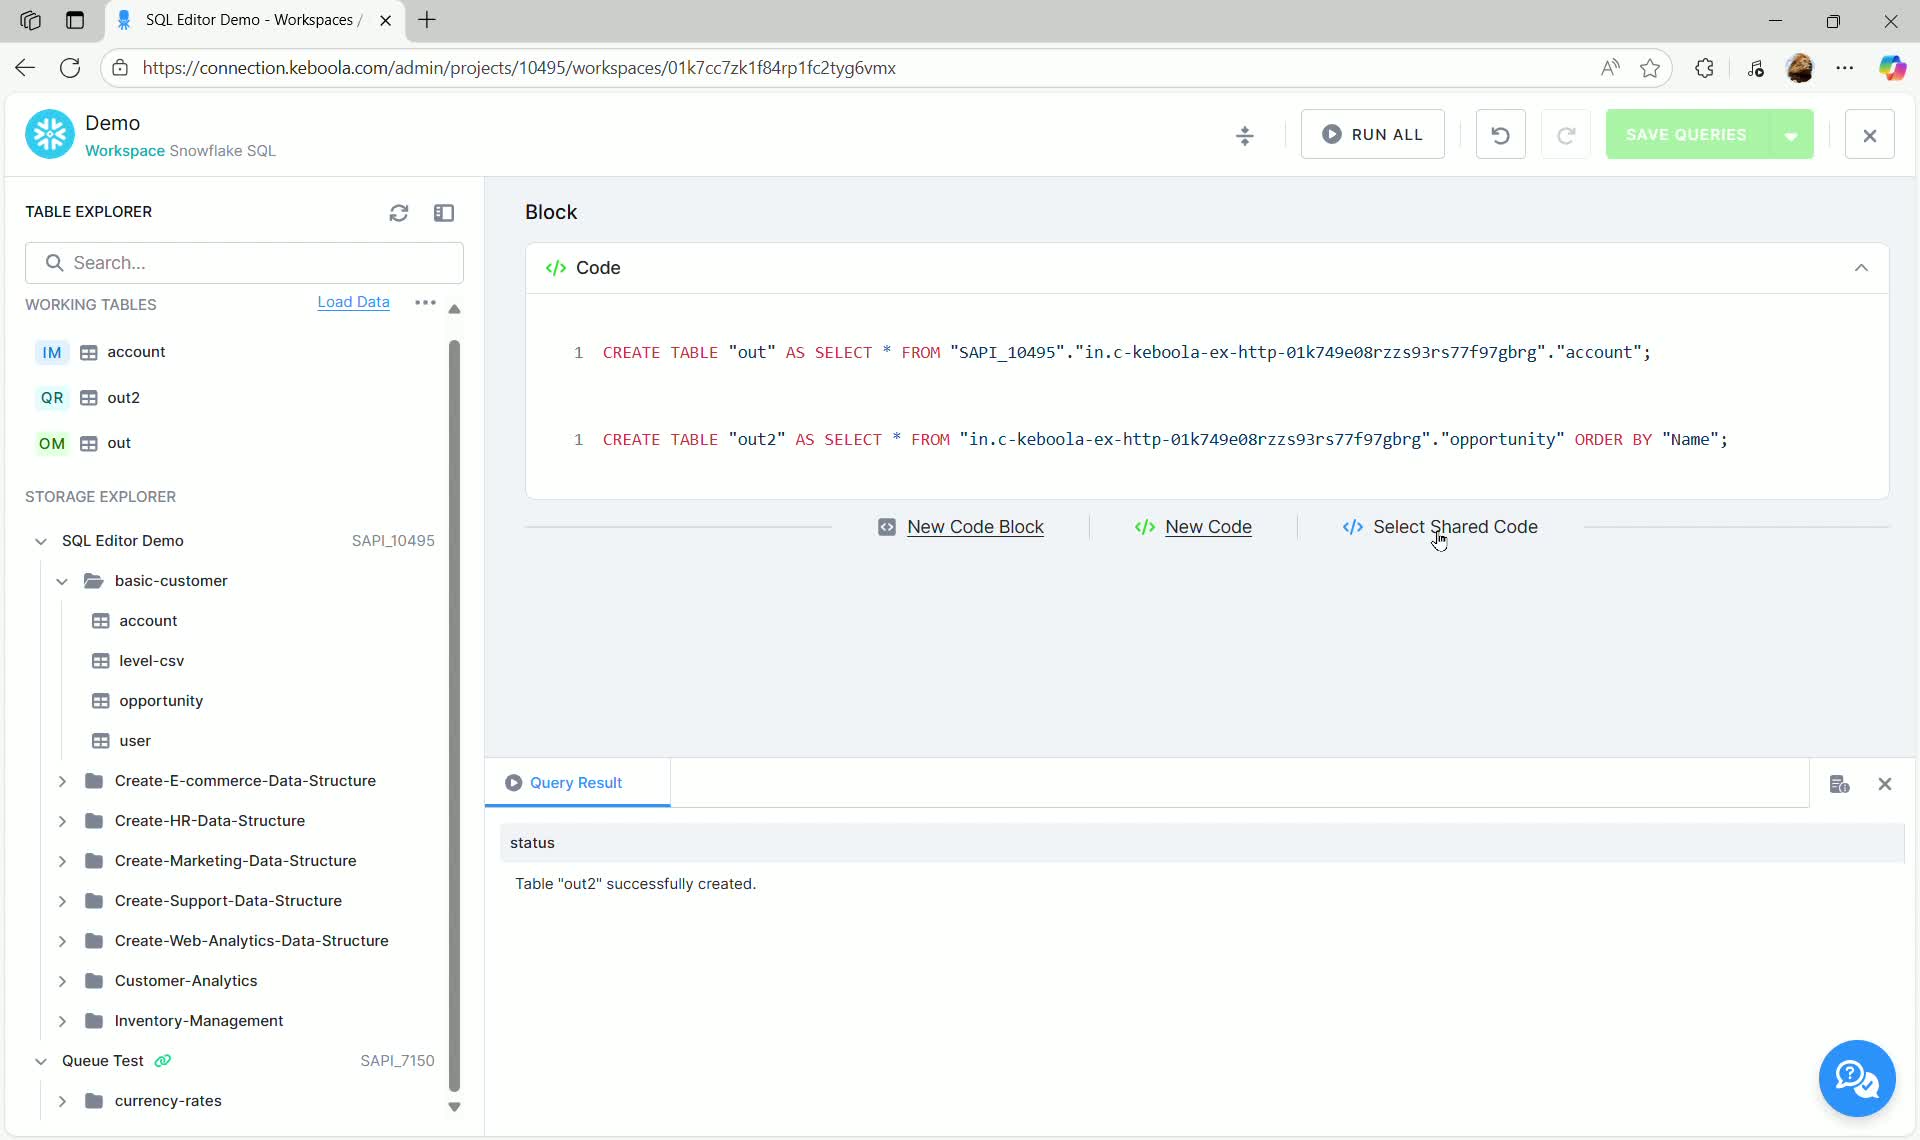
Section titled “Importing Shared Code Blocks”To import shared code into a transformation block:
- In the SQL code editor block, click the Select Shared Code link.
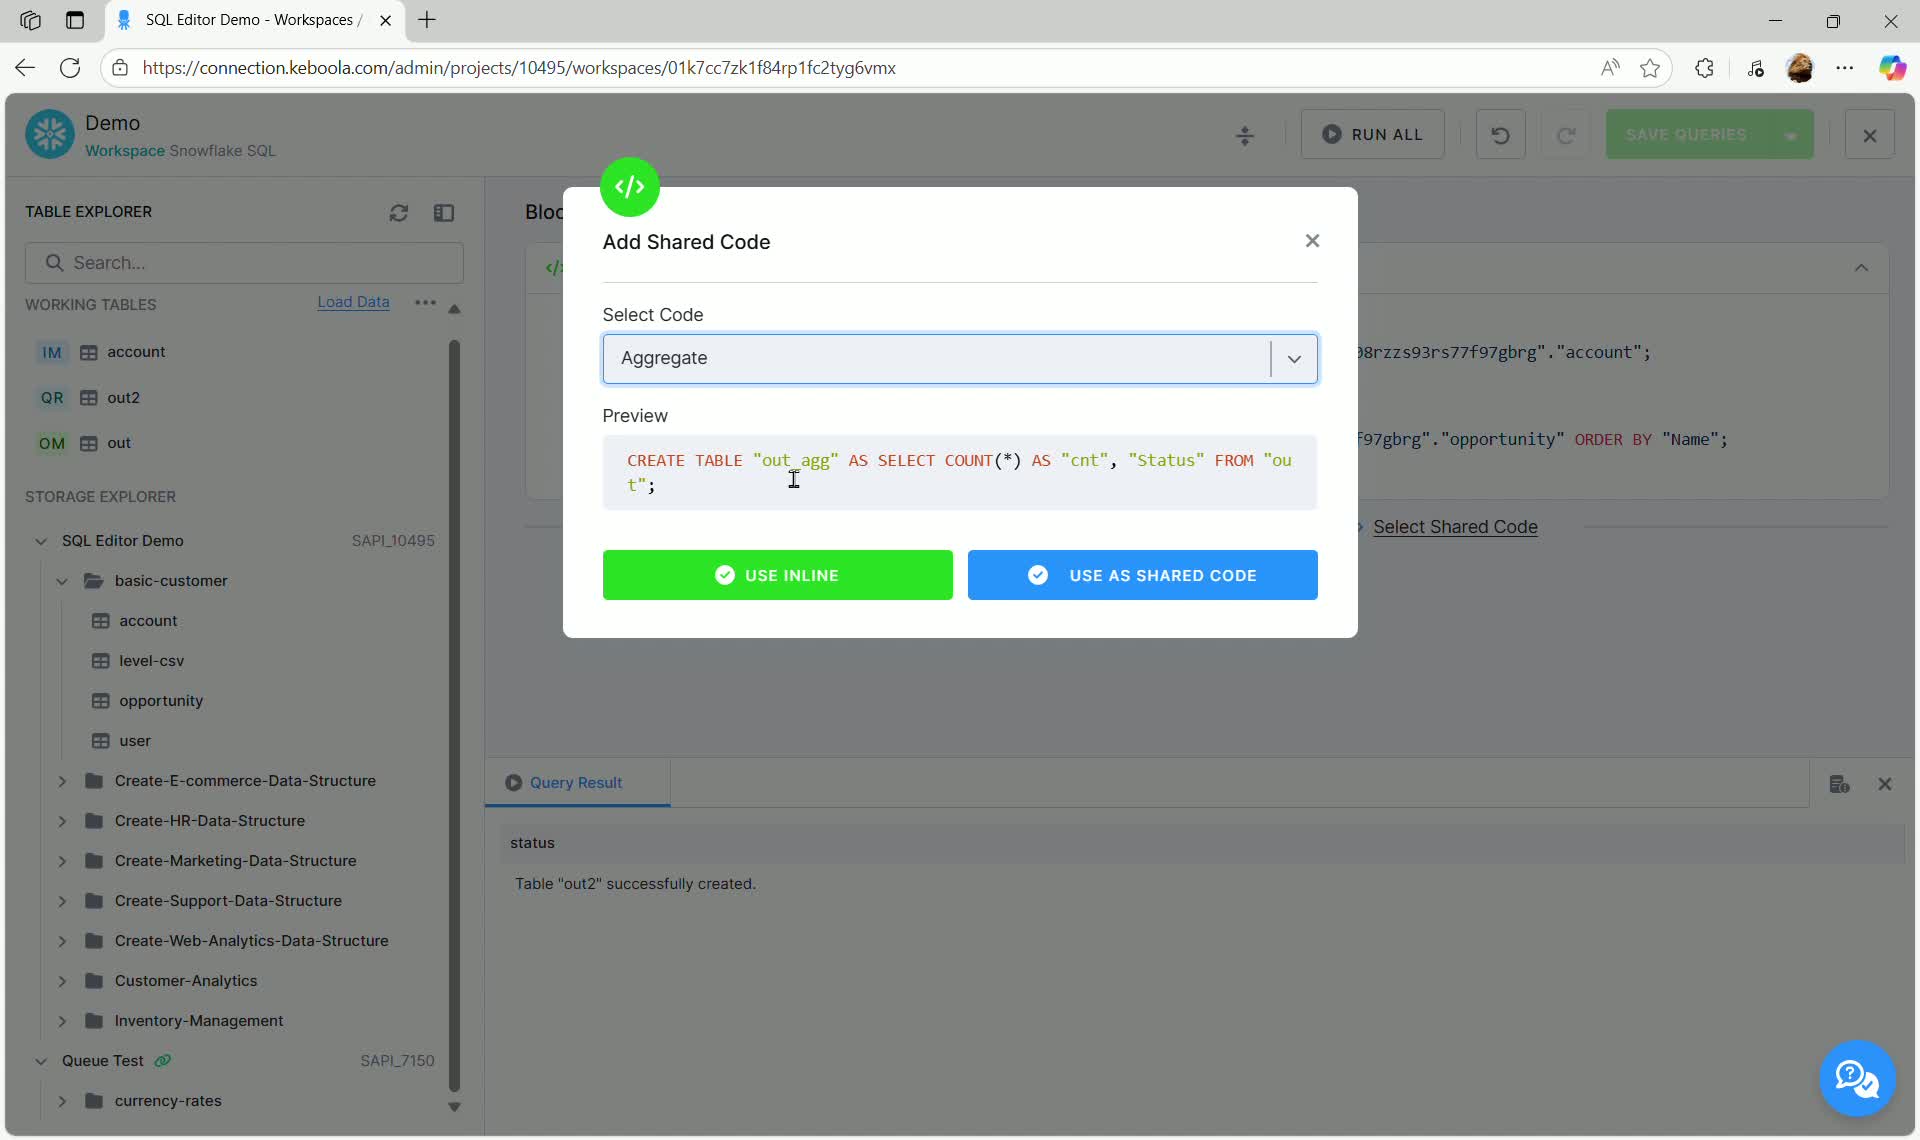
- In the “Add Shared Code” dialog, select the desired code from the dropdown (e.g.,
Aggregate).
Shared Code Options
Section titled “Shared Code Options”You have two options for using shared code:
- Use Inline: The SQL text of the shared code is copied directly into your transformation block. You can then freely edit and modify the code locally. This is equivalent to copy-pasting the code.
- Use as Shared Code (Linking): The code block is linked to the original shared code template.
When linking shared code:
- The code block appears labeled SHARED CODE.
- Any updates made to the original shared code template will automatically propagate to this transformation block.
- The code within the block is read-only (uneditable), ensuring integrity with the shared template.
If you need to make modifications to the code for a specific transformation, you must use the Use Inline option.
Variables
Section titled “Variables”Variables allow you to parametrize transformations. More information can be found here. Variables can be created, edited, used or removed inside of SQL Editor.
Using Variables in Transformations and Workspaces
Section titled “Using Variables in Transformations and Workspaces”Variables behave consistently across both Workspaces and Transformations:
In a Workspace, you can create variables and use them in your SQL queries. When you save the Workspace (which also saves its queries), you can then copy it to a new or existing Transformation. This action transfers the queries, input/output mapping, and all associated variables.
In a Transformation, you can also create variables and reference them in your transformation queries. You can then copy the Transformation to a Workspace, which brings over its queries, mappings, and variables.
Important
Section titled “Important”Variables are not shared automatically between Workspaces and Transformations. If you create a variable in either a Workspace or a Transformation and do not copy the configuration to the other environment, that variable will remain local to where it was created—meaning it won’t be visible or usable elsewhere.
Workspace Sharing
Section titled “Workspace Sharing”How Workspaces work now while using SQL Editor, there are two important components:
- Workspace
This stores configuration - such as:
- Input Mapping (IM)
- Output Mapping (OM)
- Saved SQL queries
- Working Tables
This is the state of the database schema where tables are created while working in the workspace. Every user has his own.
Previous Behavior (before SQL Editor): One workspace sandbox had one shared physical workspace for all users. Multiple users worked in the same database schema, meaning:
- They could see each other’s tables.
- They could accidentally overwrite or remove each other’s data. Workspaces were hidden in the UI unless explicitly shared, but technically everyone still accessed the same workspace behind the scenes.
Current Behavior (SQL Editor Workspaces): Each user now gets their own physical workspace (database schema) even though the sandbox configuration is shared. This makes collaboration safer because:
- Users share saved SQL queries, input/output mappings, and configuration.
- But do NOT share query result tables or loaded data. Everyone works in an isolated database state.
What This Means in Practice
Section titled “What This Means in Practice”| Scenario | What Happens | Impact |
|---|---|---|
| Two users open the same shared workspace sandbox | They see the same configuration (Input/Output mapping, saved SQL queries) | ✅ Collaboration on queries and configuration |
| User creates a table by running a query (not output-mapped) | Table is created only in that user’s personal database schema | ❌ Other users cannot see or access it |
| User saves an SQL query | Query is saved to the shared workspace sandbox configuration | ✅ Other users can see and run it |
| Two users save queries at the same time | A conflict warning appears (configuration changed by another user) | ⚠️ One user may need to reload/resolve changes |
| User unloads table from SQL Editor to Storage | Table becomes a standard KBC Storage table | ✅ Visible to others via Storage, outside the workspace |
| Sharing workspace sandbox is enabled | Users can open each other’s workspace sandbox configuration | ✅ Shared queries & mappings, ❌ not shared database state |
Benefits of the New Setup
- Safer collaboration – users don’t overwrite each other’s data
- SQL queries can be shared without entering the database (unlike before)
- No risk of table conflicts when multiple people work in parallel
- Query results can now be exported to Storage (previously not possible)
- Same configuration, personal workspace state = best of both isolation and collaboration
Limitations to Be Aware Of
- Users cannot directly share tables or workspace data with each other
- Only saved SQL queries are shared, drafts or unsaved queries are not visible to others
- When multiple users edit and save queries at the same time, a conflict alert may appear (e.g., “You are saving a configuration that was modified by another user.”)
- Each user sees their own version of workspace tables, even when working in the same shared sandbox