Part 2: Data Manipulation
At this juncture, you’re acquainted with the swift process of loading data into Keboola, resulting in four new tables in your Storage:
account, opportunity, level, and user.
In this segment of the tutorial, we’ll guide you through data manipulation in Storage using transformations. Our objective is to create a denormalized table from the input tables and make some minor modifications to it.
Creating Transformation
Section titled “Creating Transformation”- To start, navigate to the Keboola Transformations section.
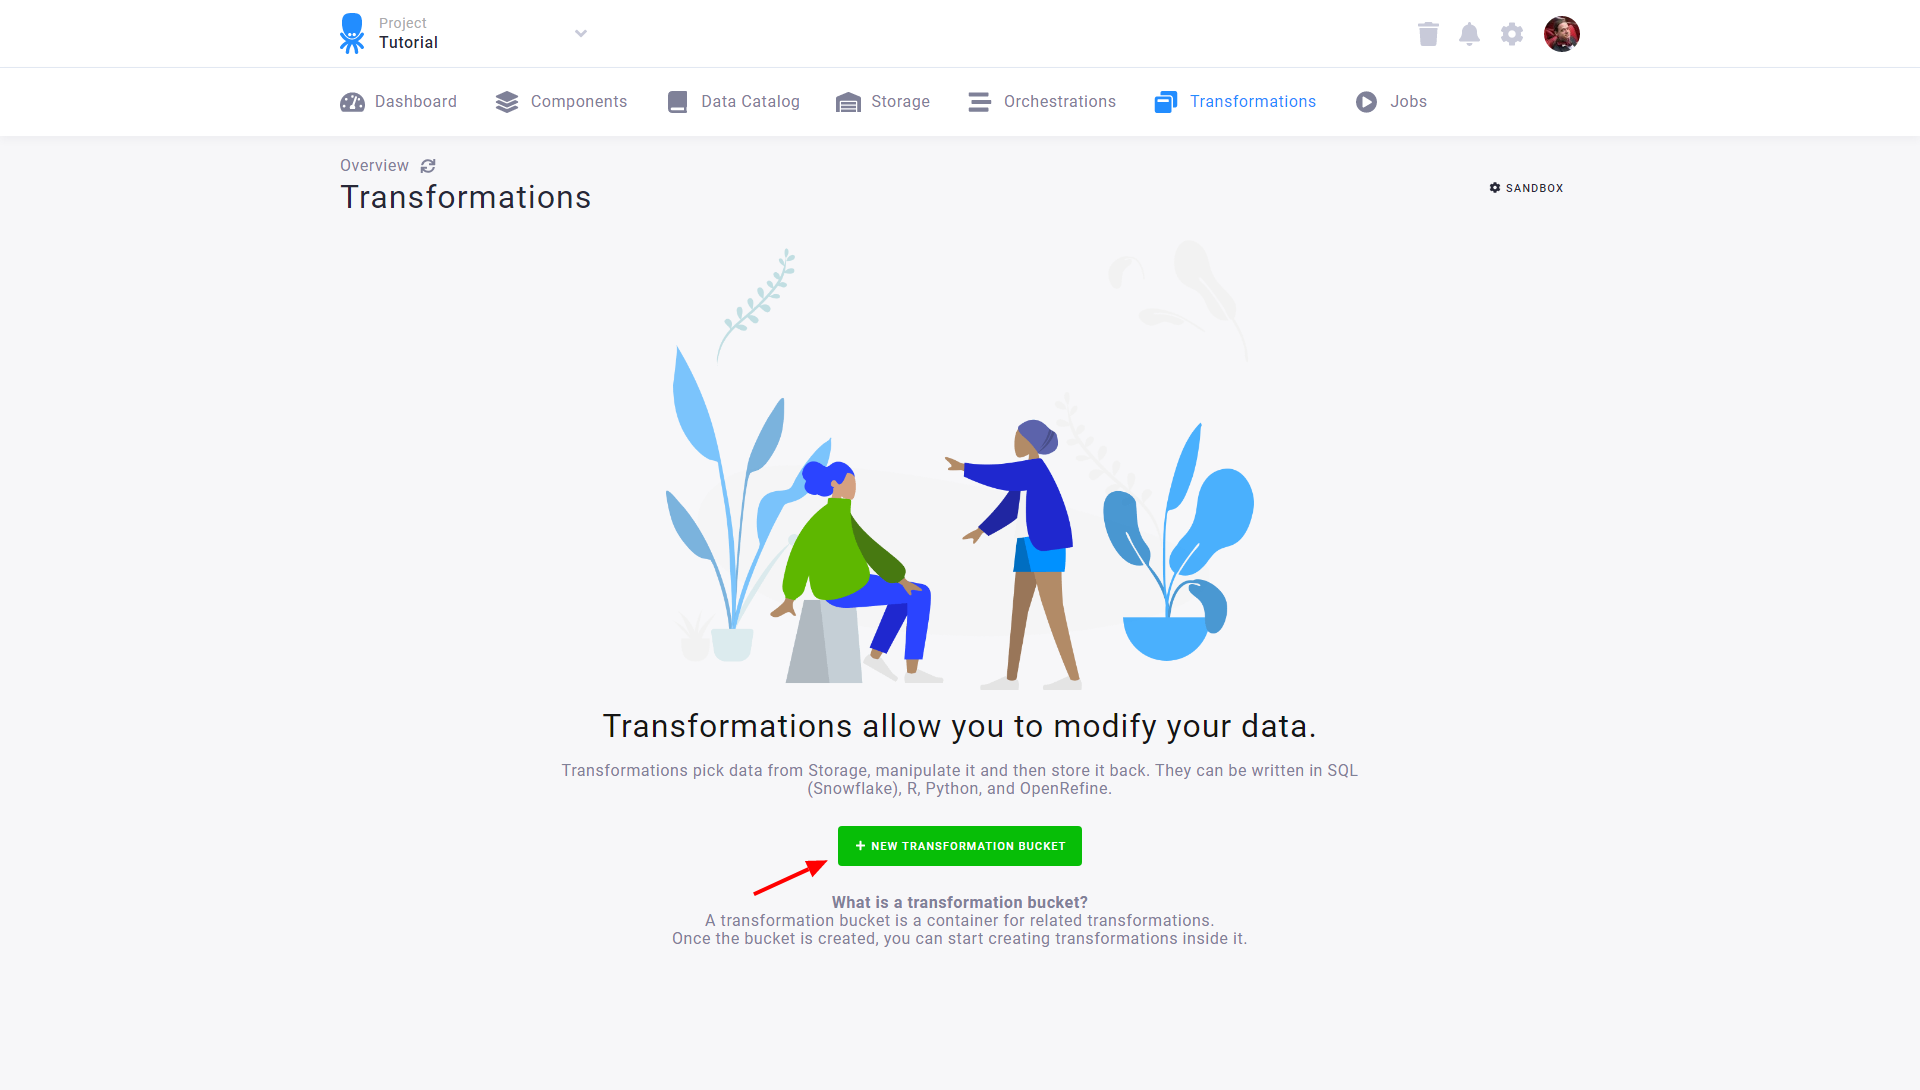
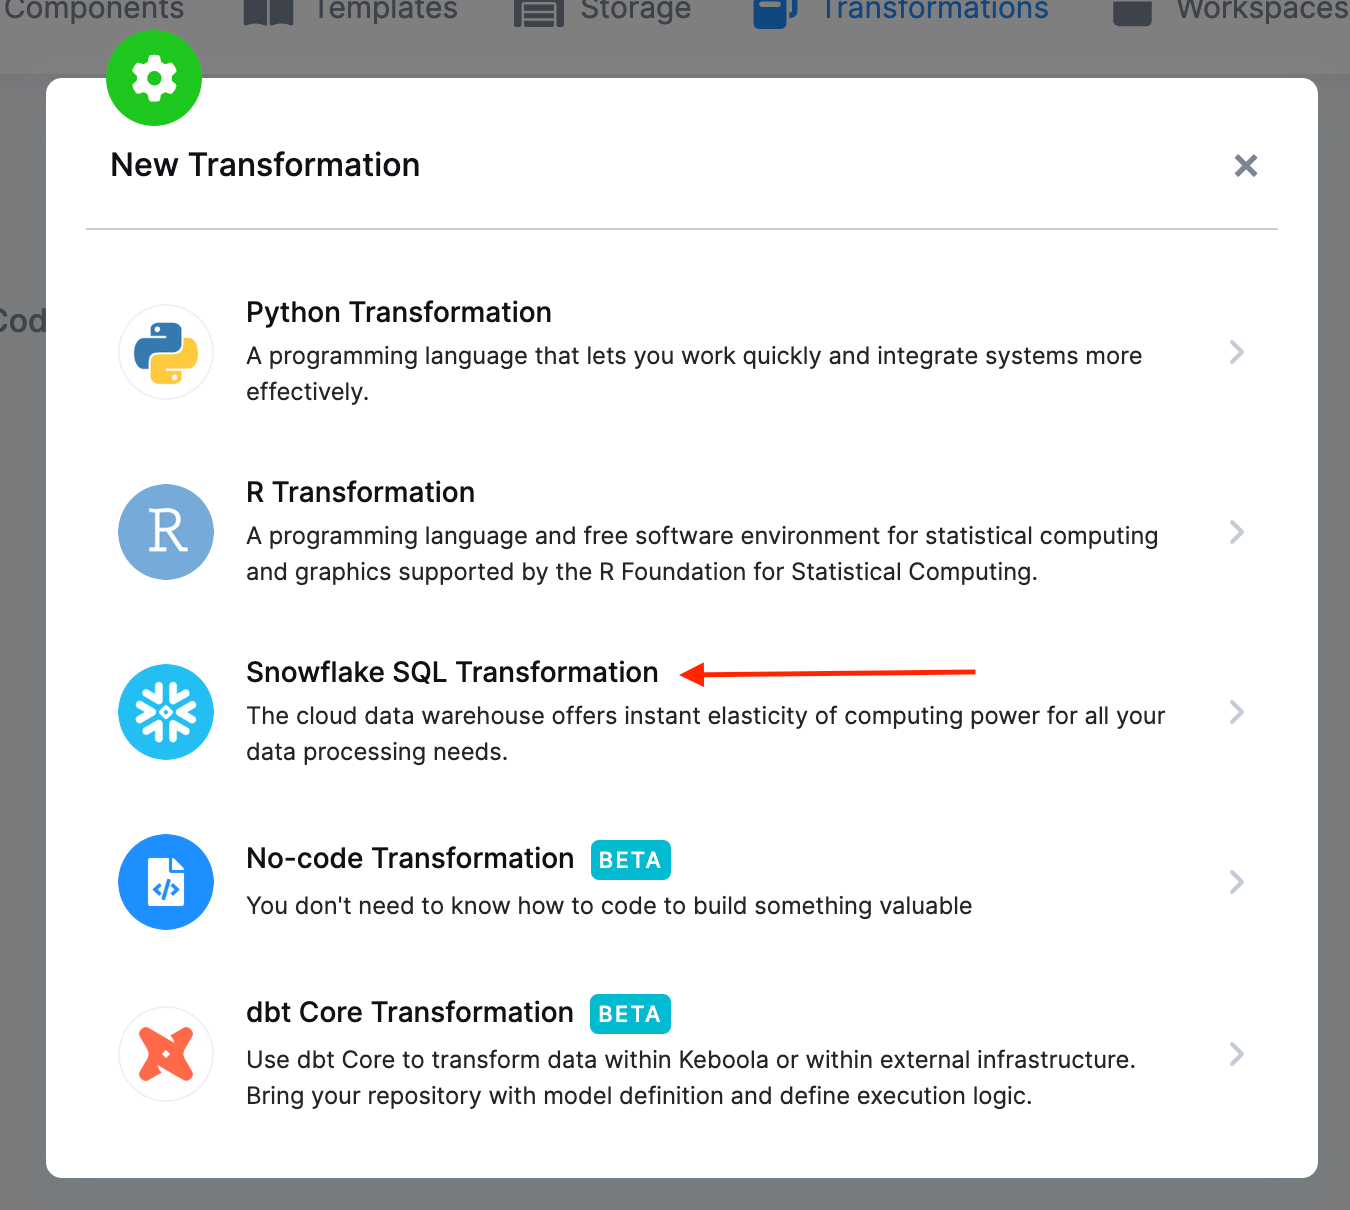
- Next, click the Create Transformation button and choose Snowflake SQL Transformation (or another SQL transformation, depending on your project’s backend).
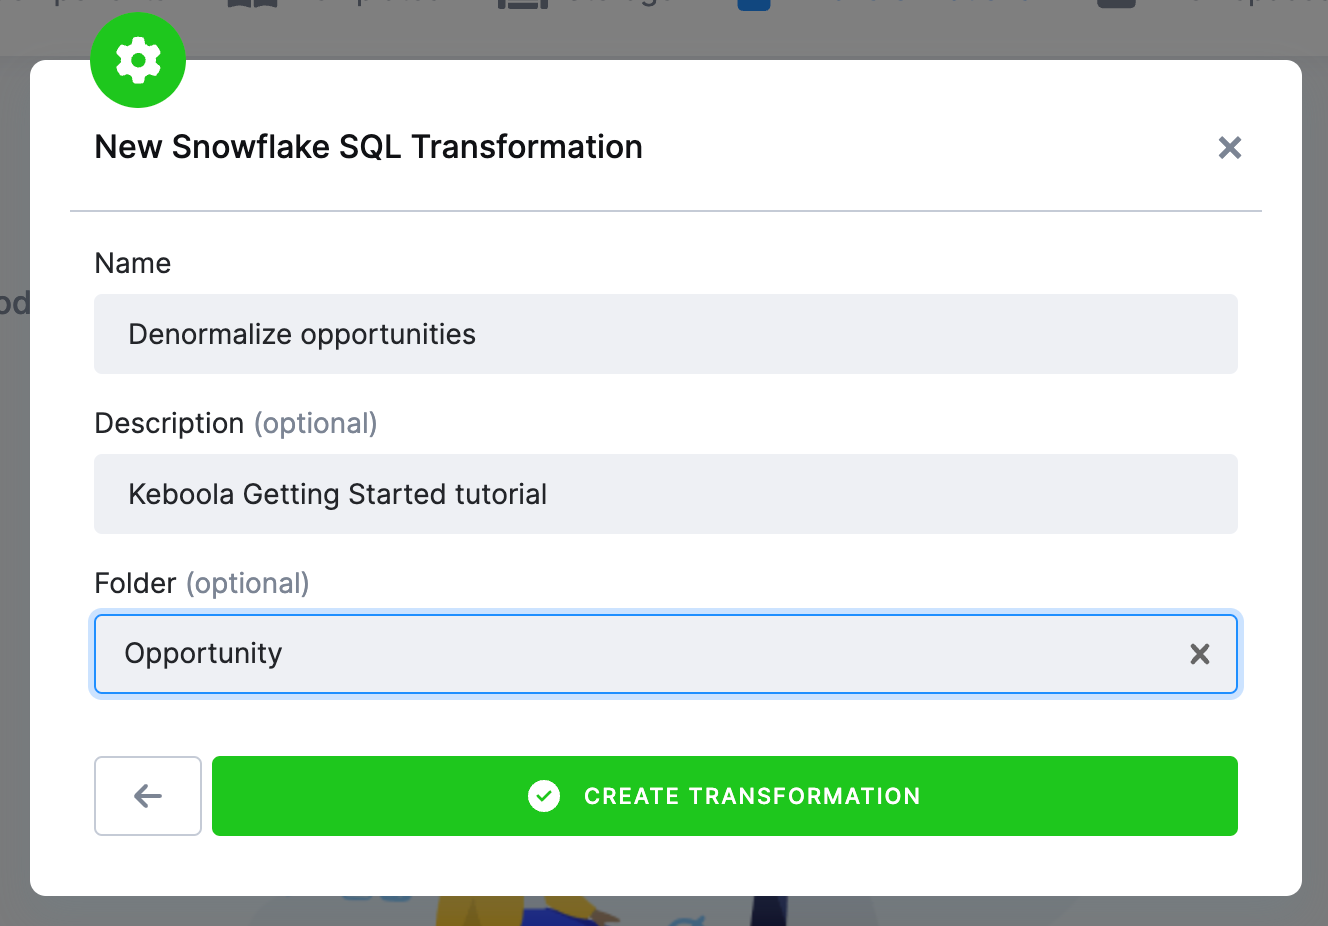
- Enter
Denormalize opportunitiesas its name, and remember to provide a description. Transformations can be organized into folders; you can either add it to a folder during creation or move it to any folder later. Now, enterOpportunityas the folder name.
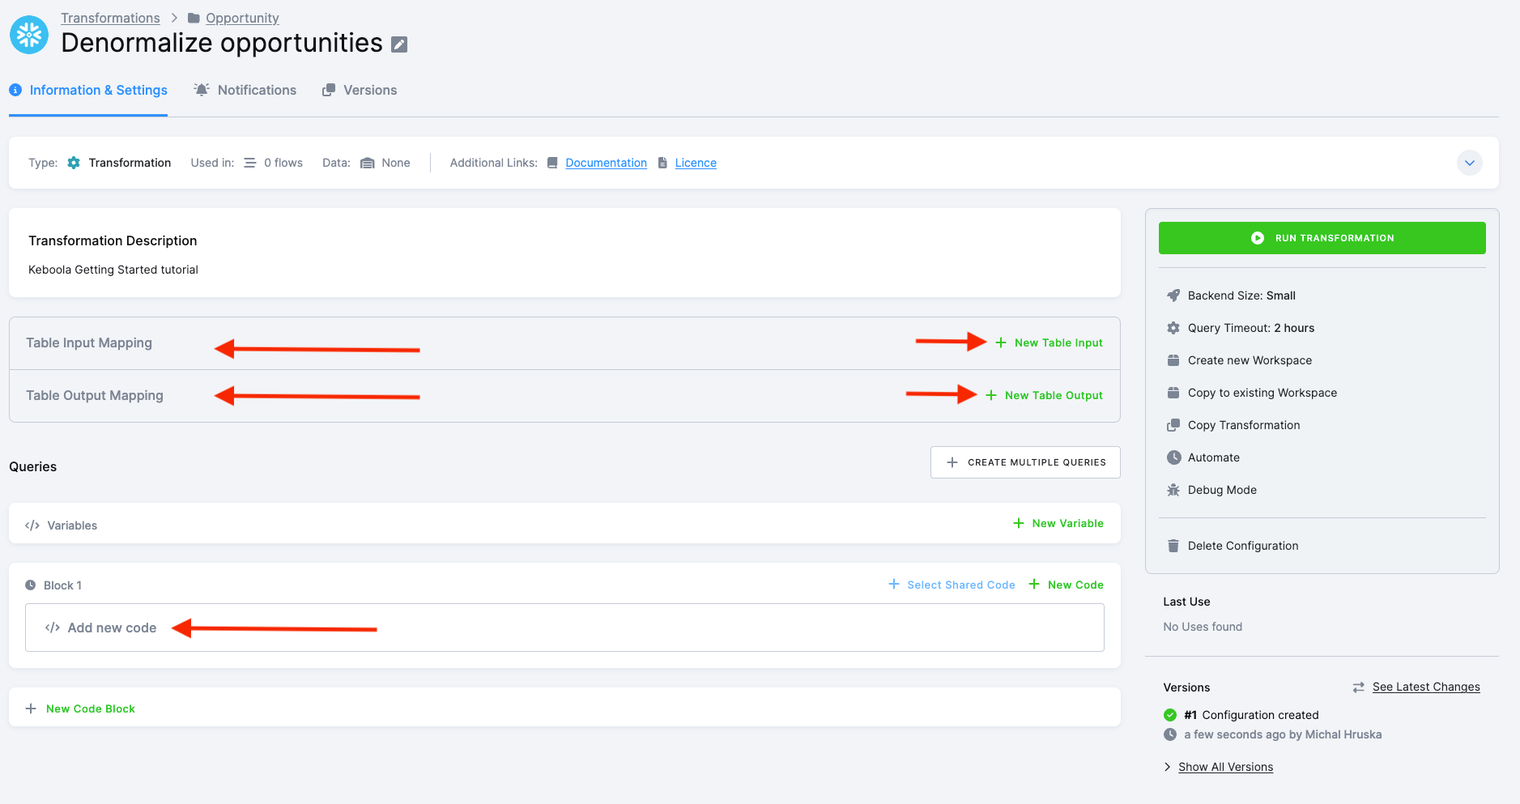
Keboola transformations operate on a few fundamental building blocks. It’s crucial to note that the transformation process occurs in a dedicated database schema, meaning queries are not executed directly against your Storage tables. Instead, the system clones selected tables into the dedicated transformation schema, executes queries, and finally unloads created/modified objects back to the Storage.
- Input Mapping: This is where you specify the tables to be used in your transformation. In the default setup, tables not mentioned in Input Mapping cannot be used in the transformation.
- Output Mapping: This section deals with tables created or modified within your transformation. Here, you specify the tables that will be written into Storage after the successful execution of the transformation. Tables not mentioned in Output Mapping will neither be modified nor permanently stored; they are considered temporary.
- Queries: SQL queries define what will happen with the data. These queries take the tables from Input Mapping, modify them, and produce the tables referenced in Output Mapping. To enhance clarity, queries can be further organized into blocks.
The mapping concept serves as a crucial safeguard when manipulating your data. It ensures that there is no accidental modification of the wrong tables. The only tables modified by your transformation are those explicitly specified in the Output Mapping. Additionally, this concept plays a vital role in maintaining a detailed data lineage across your project.
Input Mapping
Section titled “Input Mapping”Let’s start with setting Input Mapping by clicking the New Input button.
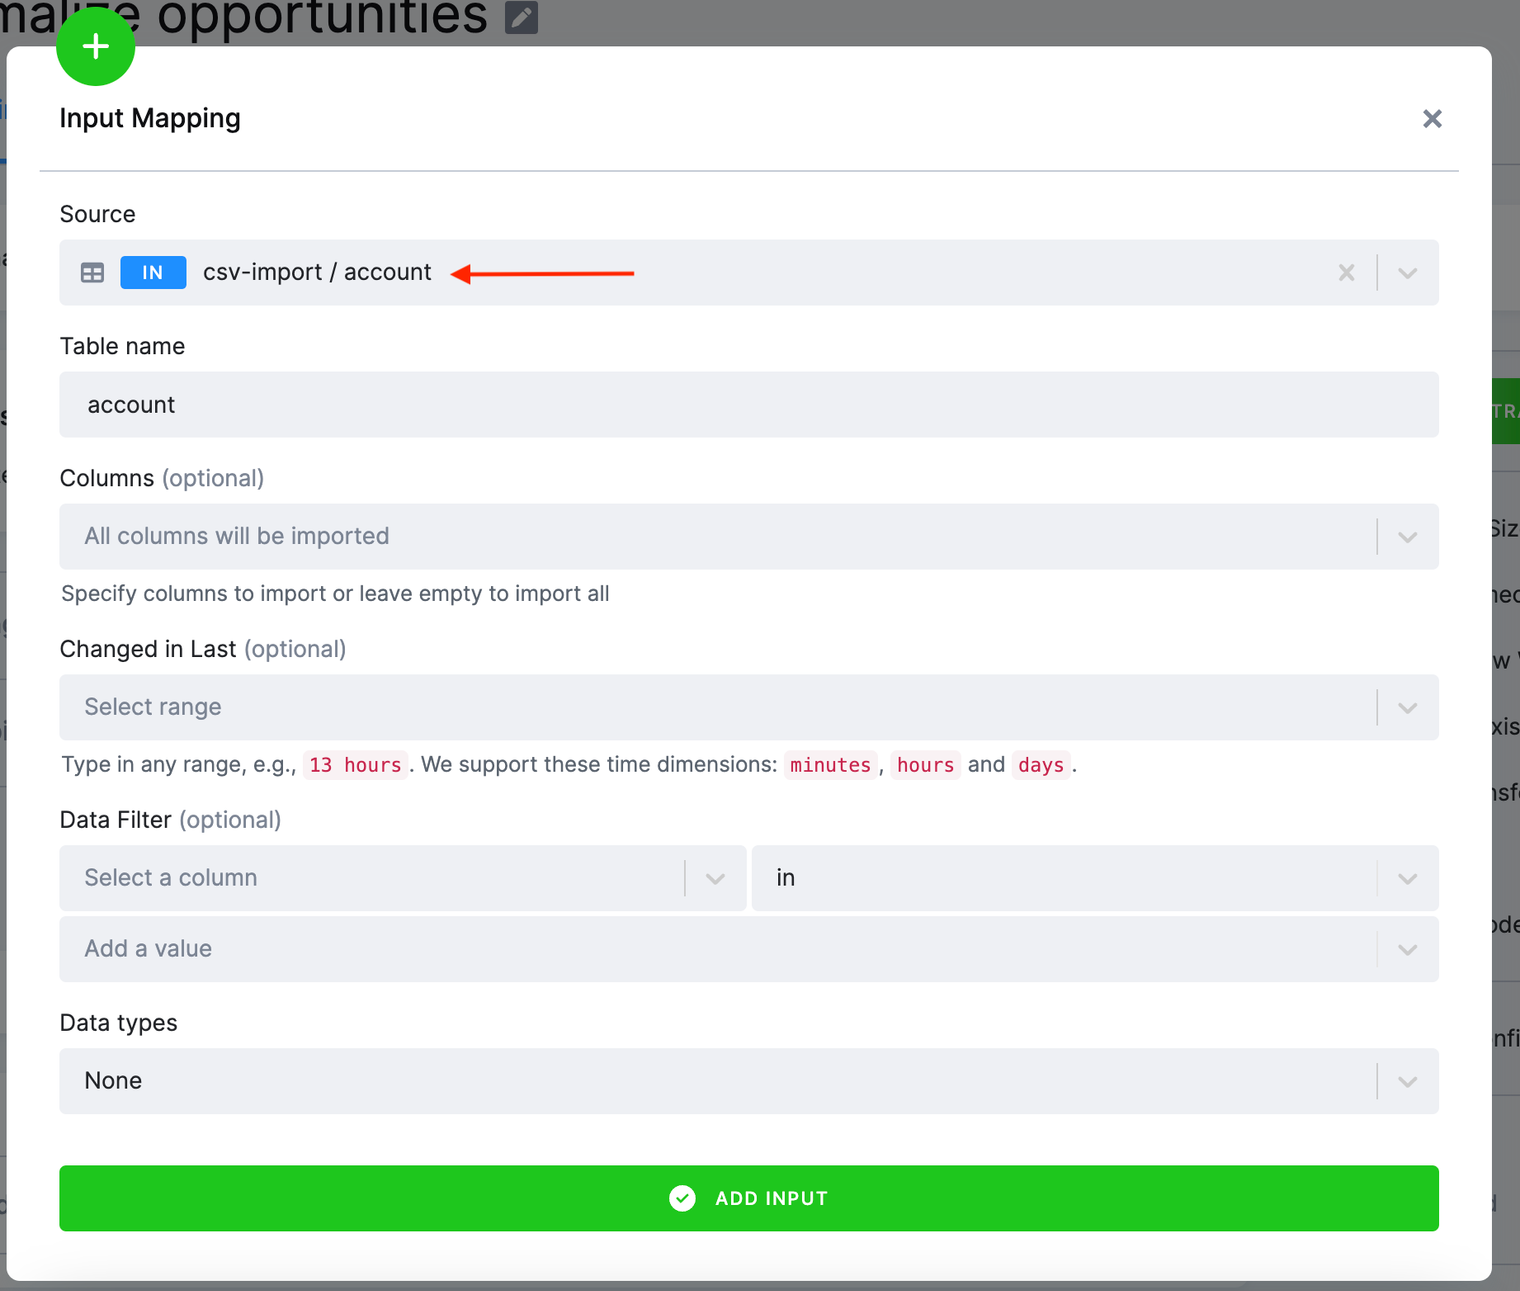
The Source field in the input mapping refers to Storage. Select in.c-csv-import.account as the source table. You can do a full text search in the select
field; typing acc will give you the table as well. In the Table name field, the table name account is automatically filled for you. This is the name of the
source table inside the transformation. Use the Add Input button to create the input mapping.
Please note that there are additional settings you can configure, such as the Changed in Last filter, which aids in incremental processing of large tables. However, for the purpose of our tutorial, we won’t delve into those details. See additional information about input mapping (all available options, etc.).
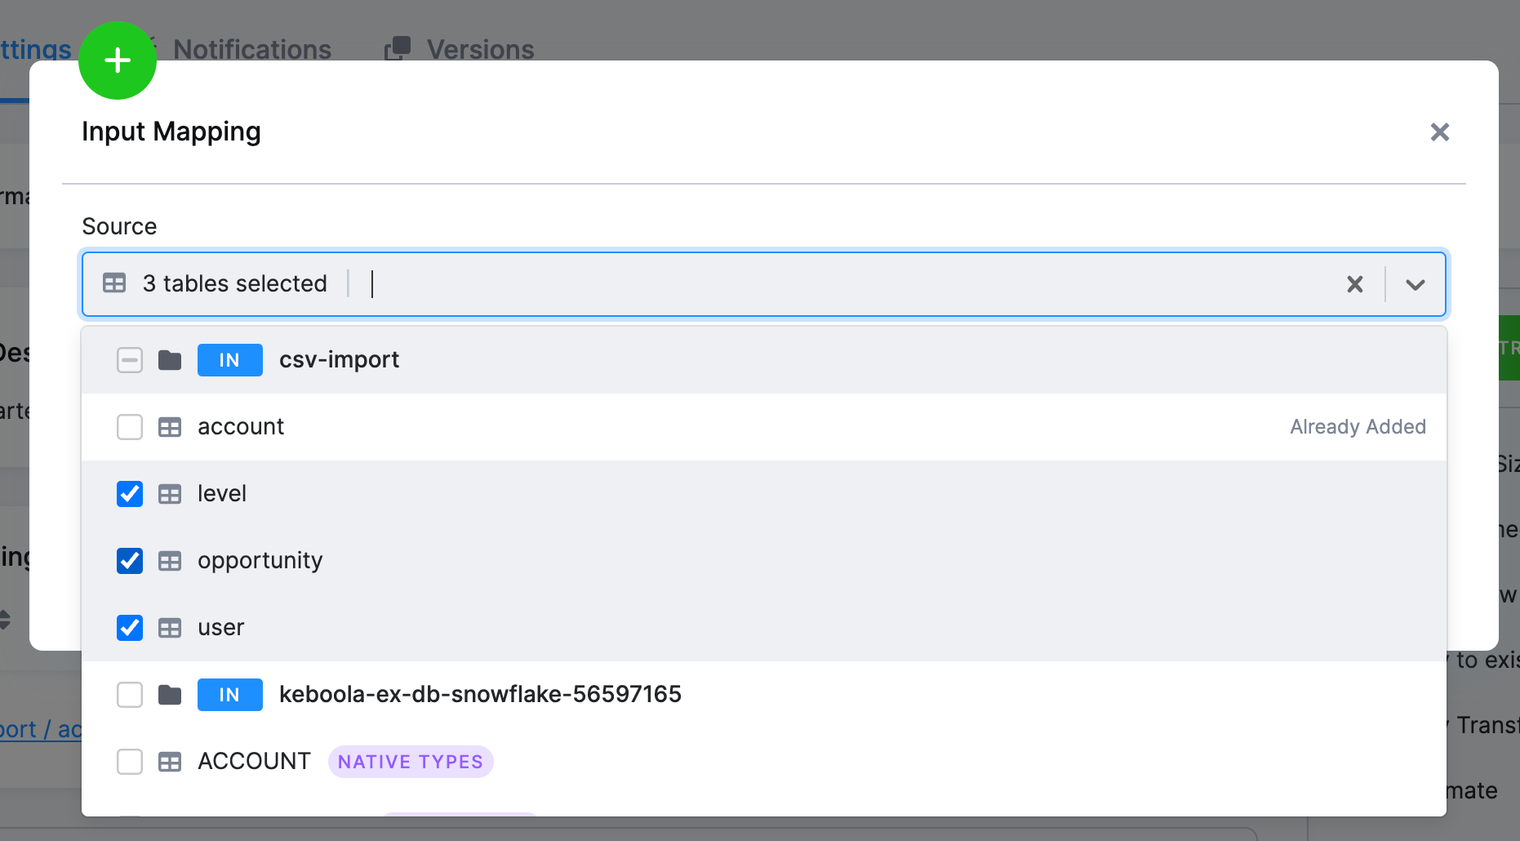
Add the remaining three tables: opportunity, user and level. You can add multiple tables at once:
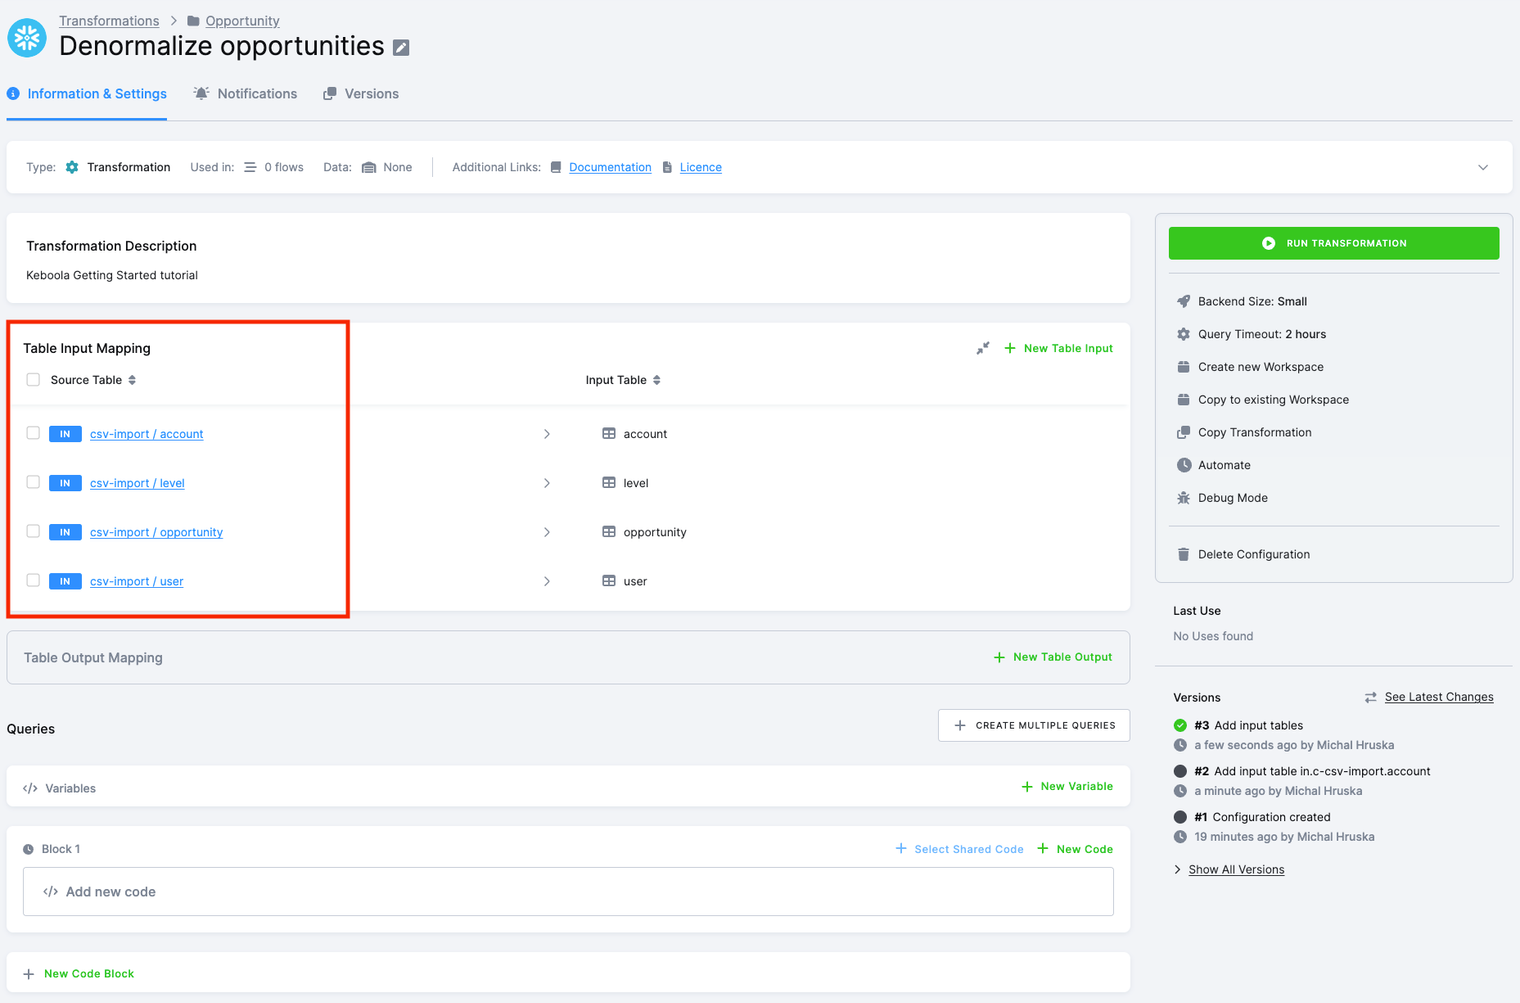
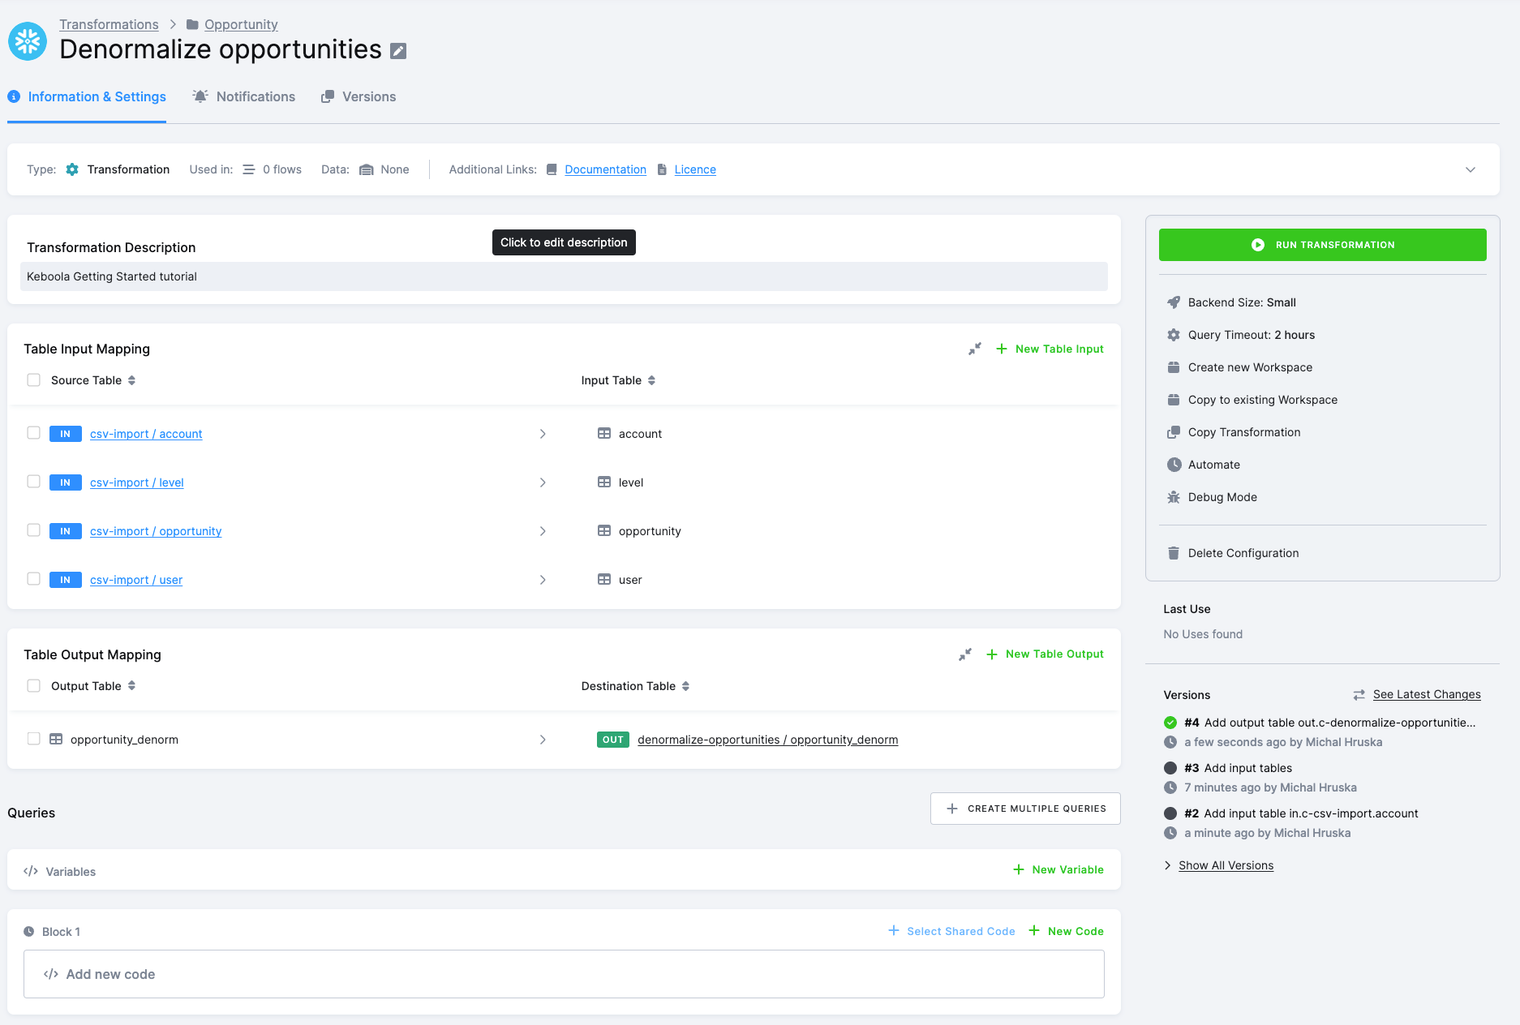
You will get to the following configuration:
Output Mapping
Section titled “Output Mapping”Continue with setting up output mapping by clicking on the New Output button.
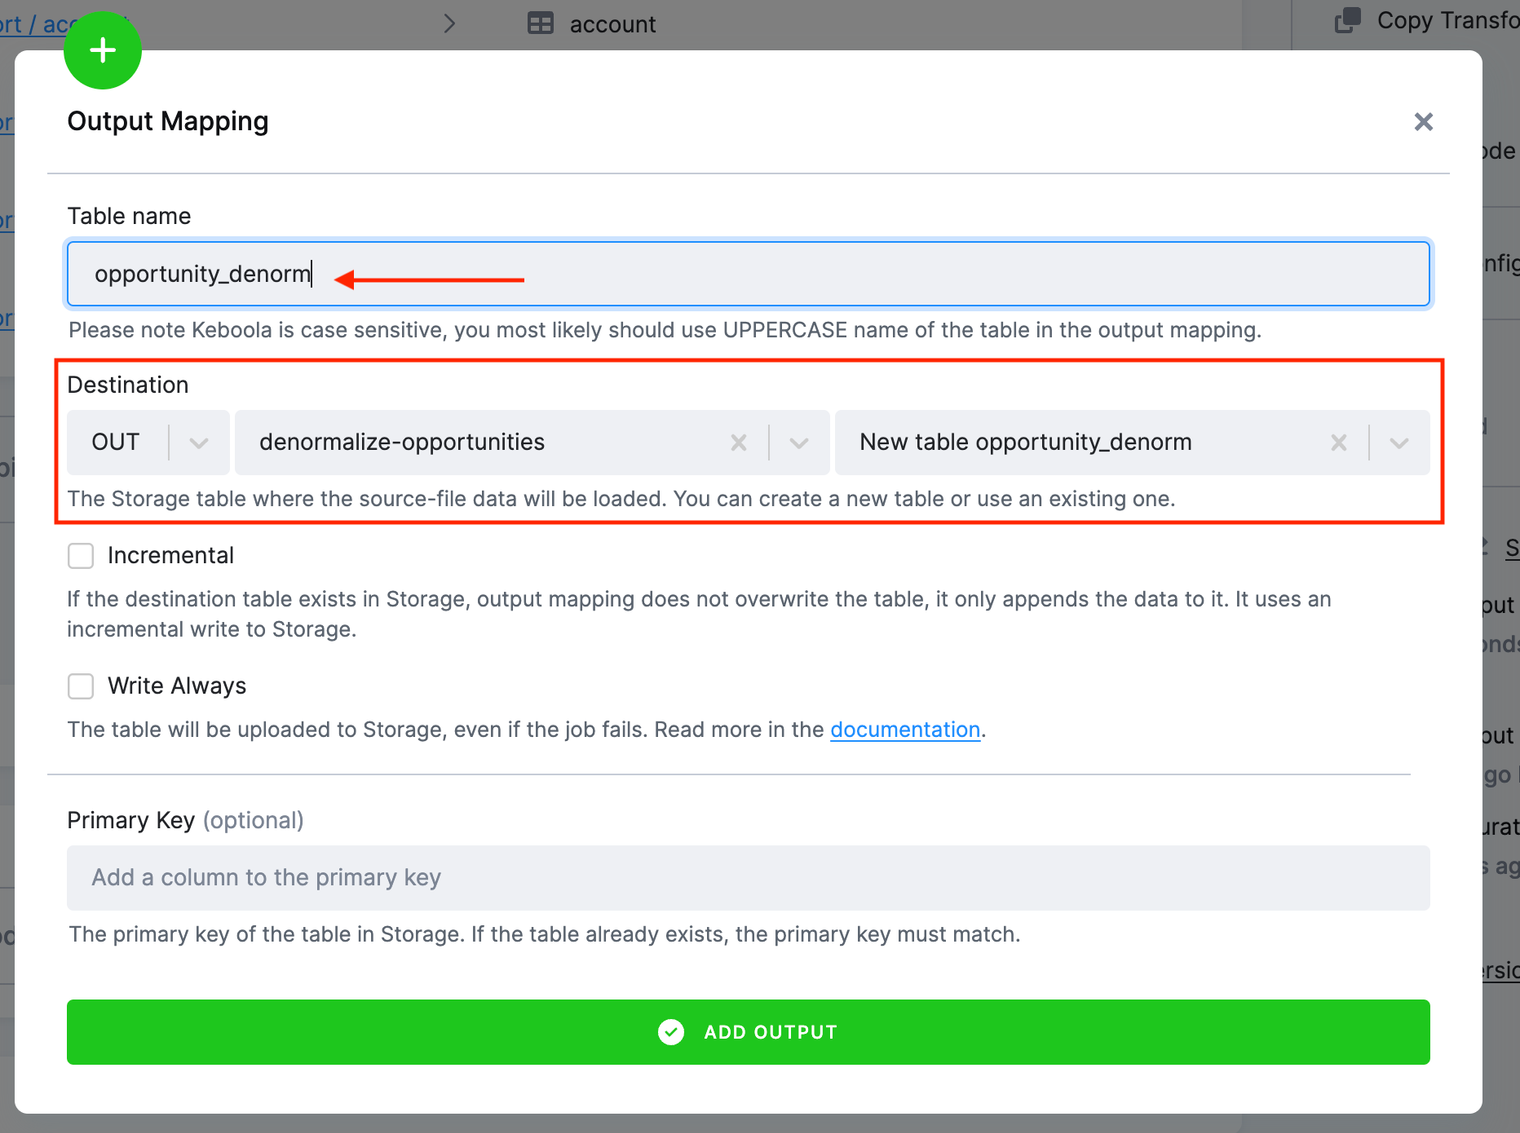
Enter opportunity_denorm into the Table name field in the output mapping; the Table name field refers to the transformation. This table does not exist yet.
We will create it in the transformation query.
The Destination field refers to the name of the output table in Storage. It will be auto-generated to create the opportunity_denorm table
in the denormalize-opportunity bucket in the output stage in Storage.
Neither the table nor the bucket exist, but they will be created once the transformation runs.
After you finish the output mapping, you will see this:
See additional information about output mapping (all available options, etc.).
Transformation Queries
Section titled “Transformation Queries”To produce that table from the tables account, opportunity and user, write a transformation script.
To save you some time, we have already prepared the necessary SQL queries for you:
CREATE TABLE "tmp_level" AS    SELECT "Name", CASE        WHEN "Level" = 'S' THEN 'Senior'        WHEN "Level" = 'M' THEN 'Intermediate'        WHEN "Level" = 'J' THEN 'Junior' END AS "Level"    FROM "level";
CREATE TABLE "tmp_opportunity" AS    SELECT *, CASE        WHEN "Probability" < 50 THEN 'Poor'        WHEN "Probability" < 70 THEN 'Good'        ELSE 'Excellent' END AS "ProbabilityClass"    FROM "opportunity";
CREATE TABLE "opportunity_denorm" AS    SELECT "tmp_opportunity".*,        "user"."Name" AS "UserName", "user"."Sales_Market" AS "UserSalesMarket",        "user"."Global_Market" AS "UserGlobalMarket",        "account"."Name" AS "AccountName", "account"."Region" AS "AccountRegion",        "account"."Status" AS "AccountStatus", "account"."FirstOrder" AS "AccountFirstOrder"    FROM "tmp_opportunity"        JOIN "user" ON "tmp_opportunity"."OwnerId" = "user"."Id"        JOIN "account" ON "tmp_opportunity"."AccountId" = "account"."Id"        JOIN "tmp_level" ON "user"."Name" = "tmp_level"."Name";
For BigQuery, the query will look like this:
CREATE TABLE opportunity_denorm ASWITH tmp_level AS ( SELECT Name, CASE WHEN `Level`.`Level` = 'S' THEN 'Senior' WHEN `Level`.`Level` = 'M' THEN 'Intermediate' WHEN `Level`.`Level` = 'J' THEN 'Junior' END AS Level FROM level),tmp_opportunity AS ( SELECT * EXCEPT (_timestamp), CASE WHEN CAST(Probability as INT64) < 50 THEN 'Poor' WHEN CAST(Probability as INT64) < 70 THEN 'Good' ELSE 'Excellent' END AS ProbabilityClass FROM opportunity)SELECT tmp_opportunity.*, user.Name AS UserName, user.Sales_Market AS UserSalesMarket, user.Global_Market AS UserGlobalMarket, account.Name AS AccountName, account.Region AS AccountRegion, account.Status AS AccountStatus, account.FirstOrder AS AccountFirstOrderFROM tmp_opportunityJOIN user ON tmp_opportunity.OwnerId = user.IdJOIN account ON tmp_opportunity.AccountId = account.IdJOIN tmp_level ON user.Name = tmp_level.Name;Click the New Code button. Begin by entering a query name – input Opportunity denorm. Next, paste the queries into the editor, and then click Save.
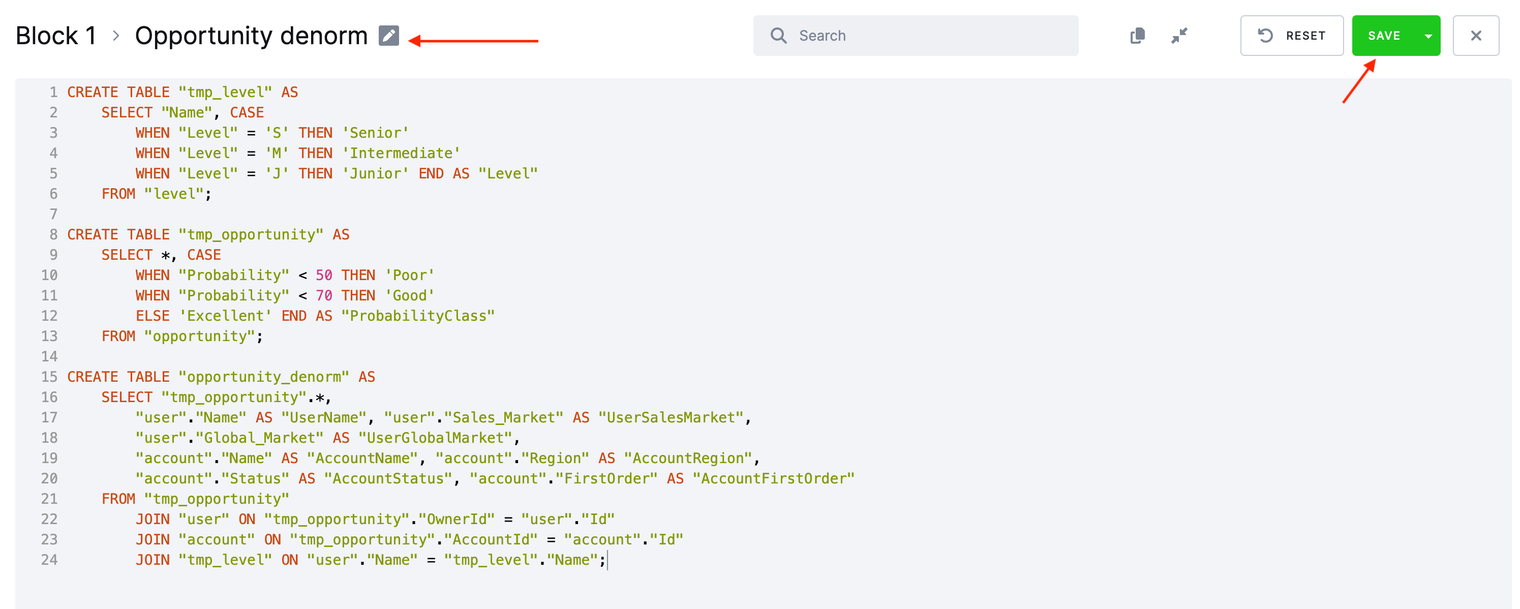
In the first query, we enhance user level descriptions for better clarity.
In the second query, we calculate the quality level for each deal opportunity based on the estimated probability of closing the deal.
In the third query, we denormalize all tables into a single one.
Running Transformation
Section titled “Running Transformation”Click Run Transformation. This will create a background job which will
- get the specified tables from Storage,
- load them in a transformation schema,
- execute the queries, and
- store the result in Storage again.
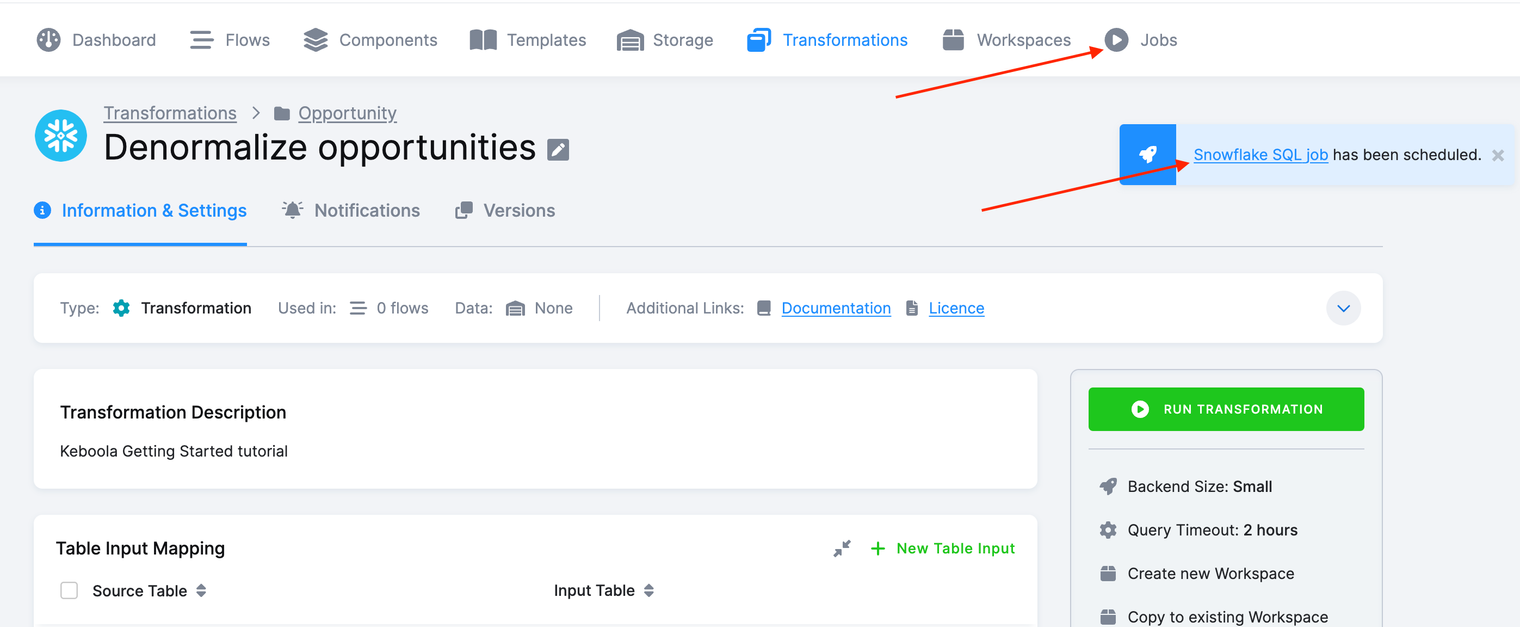
To see if the transformation job was successful, navigate to Jobs, or click on the small Snowflake SQL job has been scheduled window that pops up after a transformation starts running.
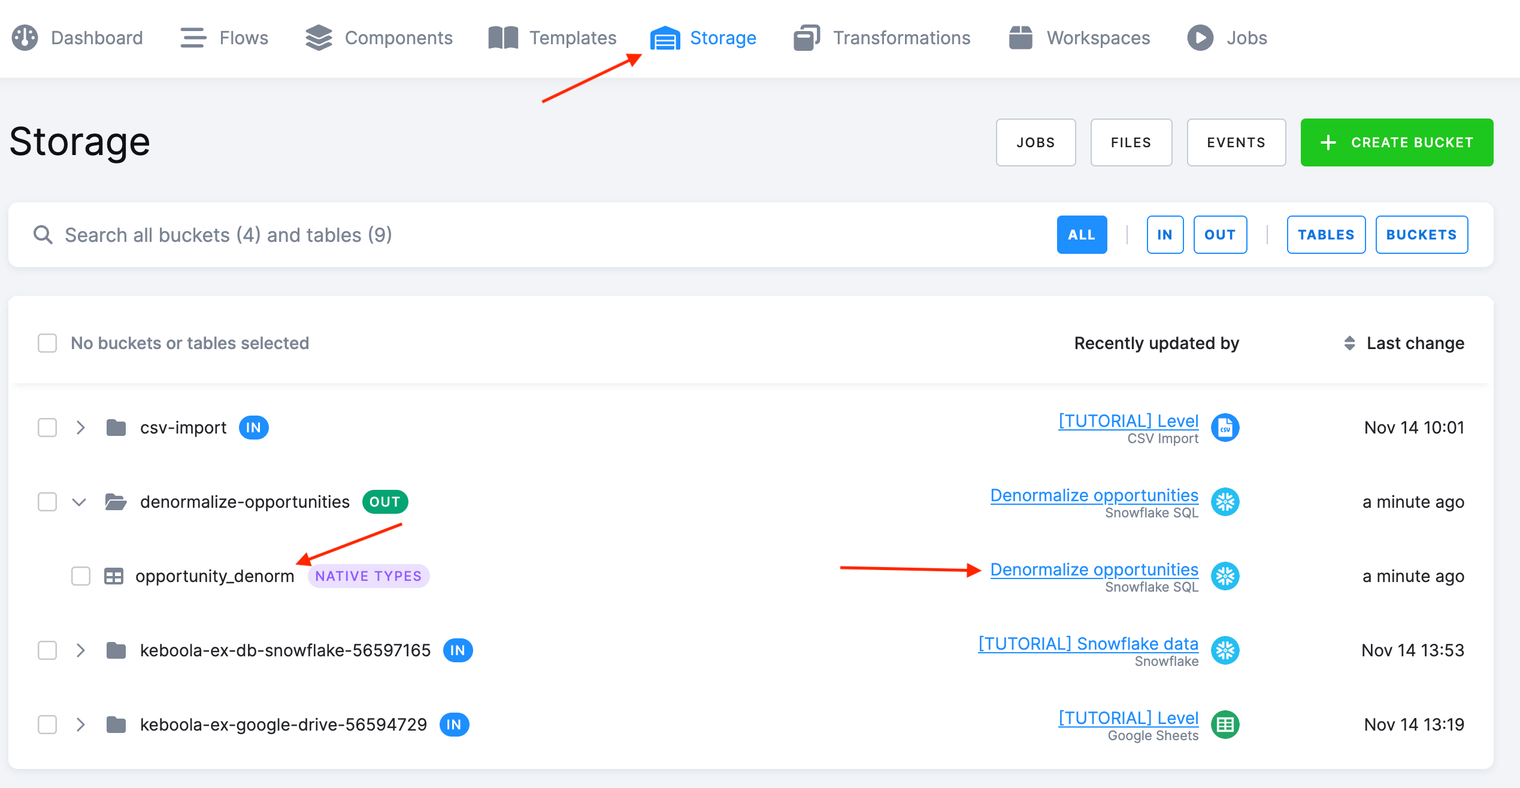
After a successful execution of the transformation you’ll see a new table created in your Storage. Please notice also the Recently updated by where you can see what component configuration recently updated that table.
What’s Next
Section titled “What’s Next”Having learned to set up a transformation, you can now
- continue with the next Writing Data step, or
- take a brief side step to Using a Workspace – while we’ve configured our transformation with pre-developed queries in this tutorial, in real-life scenarios, you’ll typically want to interact with the data, develop, and test your queries. A workspace serves as your safe playground specifically designed for that purpose.
If You Need Help
Section titled “If You Need Help”Feel free to reach out to our support team if there’s anything we can help with.