Merge to Production
After you have checked your changes in the branch, you can merge the branch back to production.
There are two ways to merge your changes to production, depending on whether you want to merge them all or just their subset:
- Full merge — merge all changes at once. You tested all of them together and know they work.
- Partial merge — merge just a subset of the changes and keep working on the rest. Keep in mind that while useful, this should not be used as your standard workflow. You cannot be sure that the subset of changes actually works without the rest. It is safer to prepare and test the changes in full, merge them, and then start a new branch for the next part of the changes.
Because you have made two isolated changes (the bitcoin Snowflake transformation, and the Python file manipulating transformation), you now have a good opportunity to test both approaches.
Partial Merge
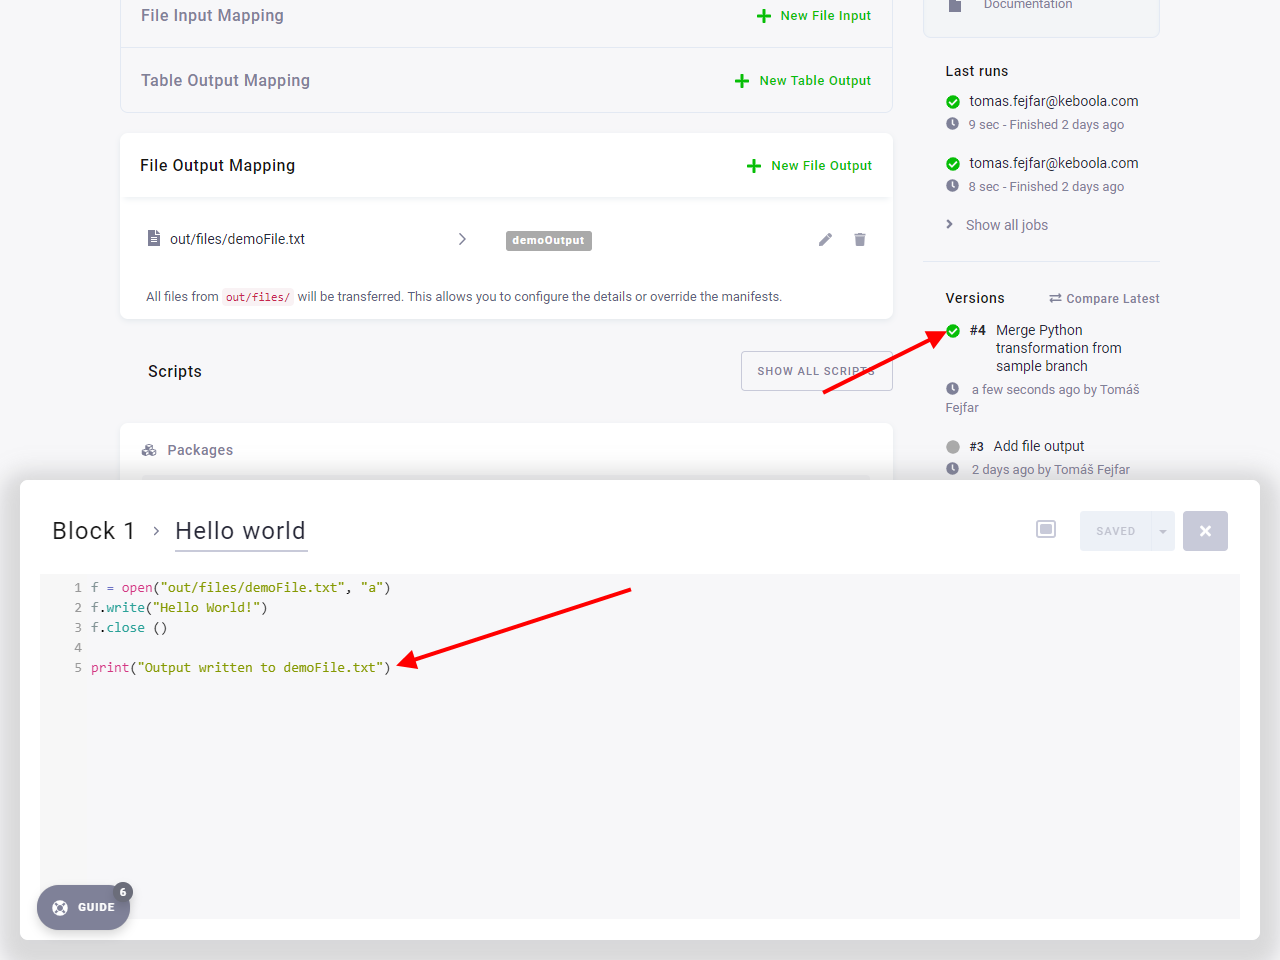
Section titled “Partial Merge”First, let’s merge only the subset of configurations related to the Sample Python transformation. Examine the project
diff further.
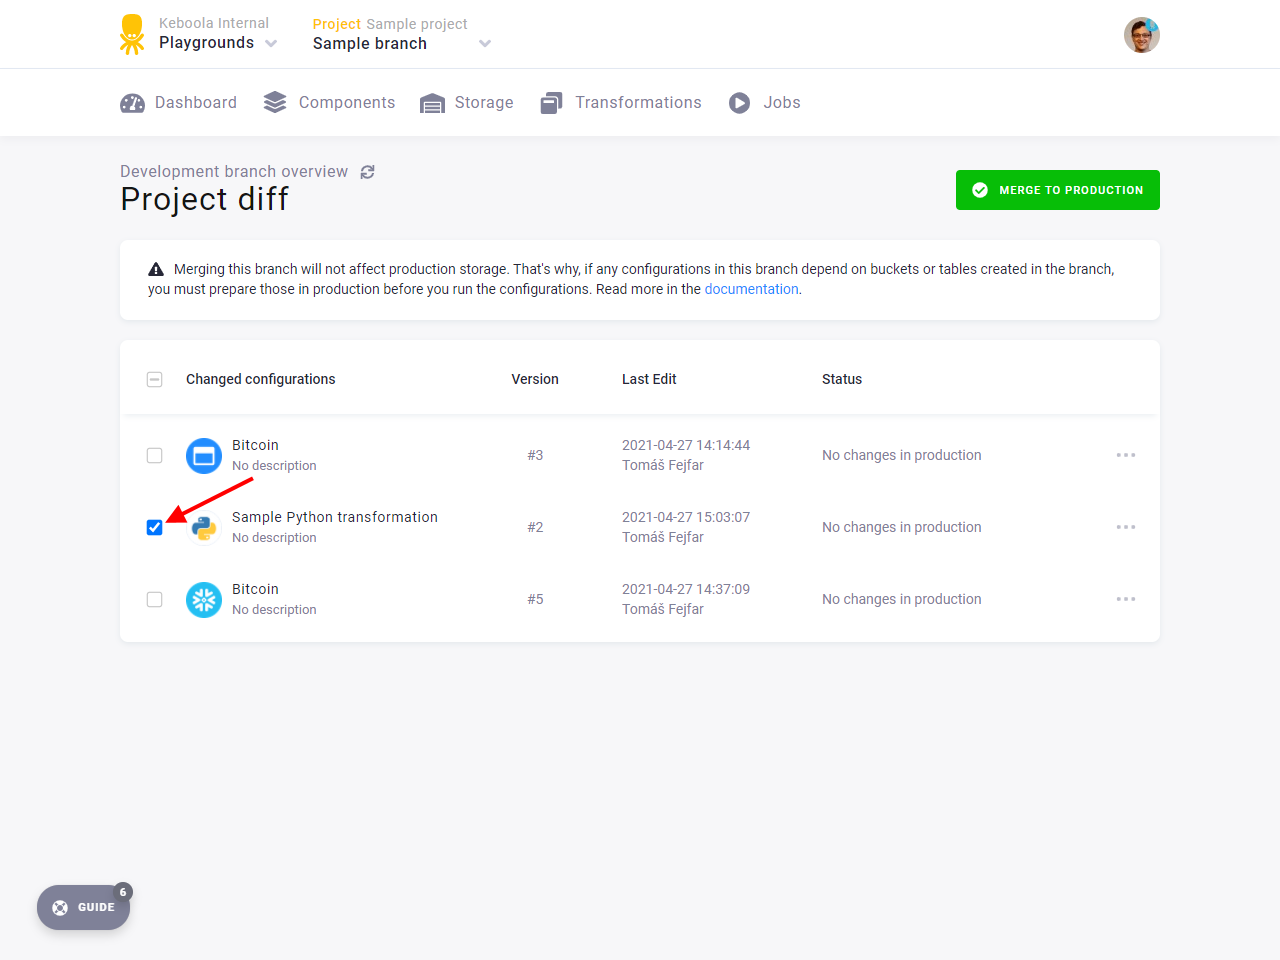
You can see that there are checkboxes to the left of each configuration in the list. The configurations that have
the checkbox checked will be merged. Uncheck all the checkboxes except the one near the Sample Python transformation.
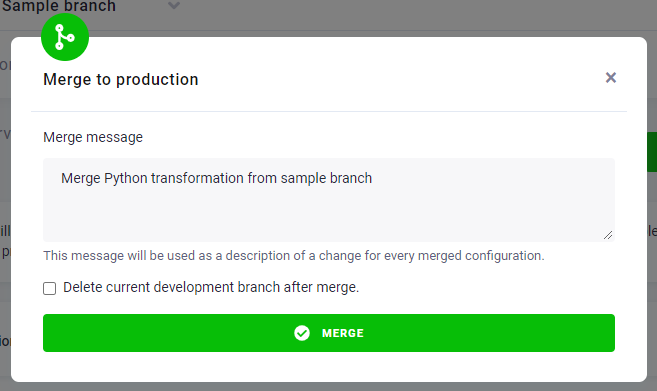
Click Merge to production. In the following dialog, you can change the merge message. Put in Merge Python transformation from sample branch as the merge message. Also make sure that the checkbox Delete current development branch
after merge. is not checked. Only then click the Merge button.
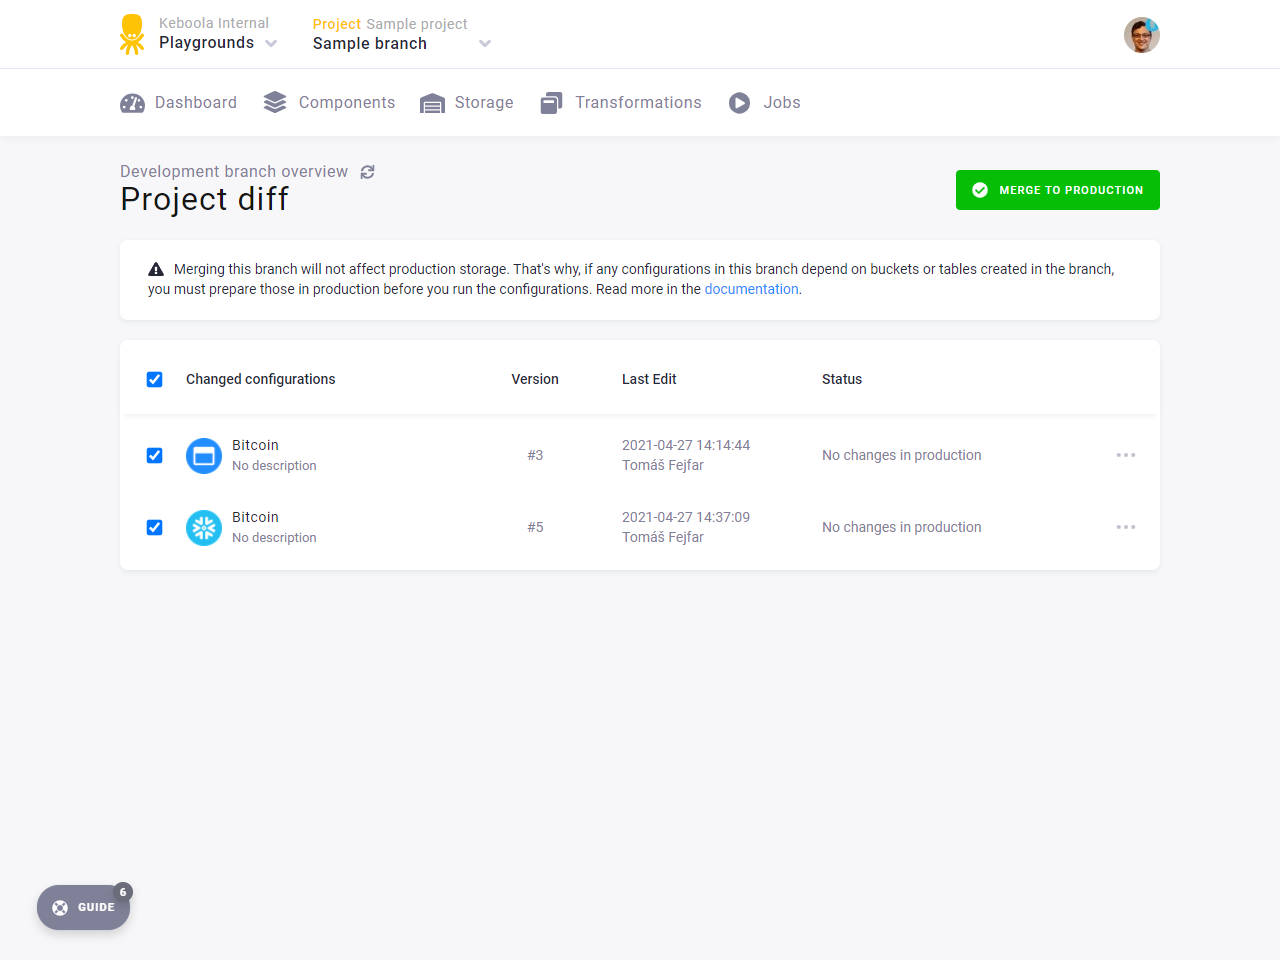
When you start the merge, a progress bar will show up informing you of the progress of the merge. After the merge is finished, you will see only two changed configurations in your branch. The Python transformation configuration no longer differs.
Switch to production, and examine the Python transformation configuration. Notice that a new version has been created with the merge message as the description of the change.
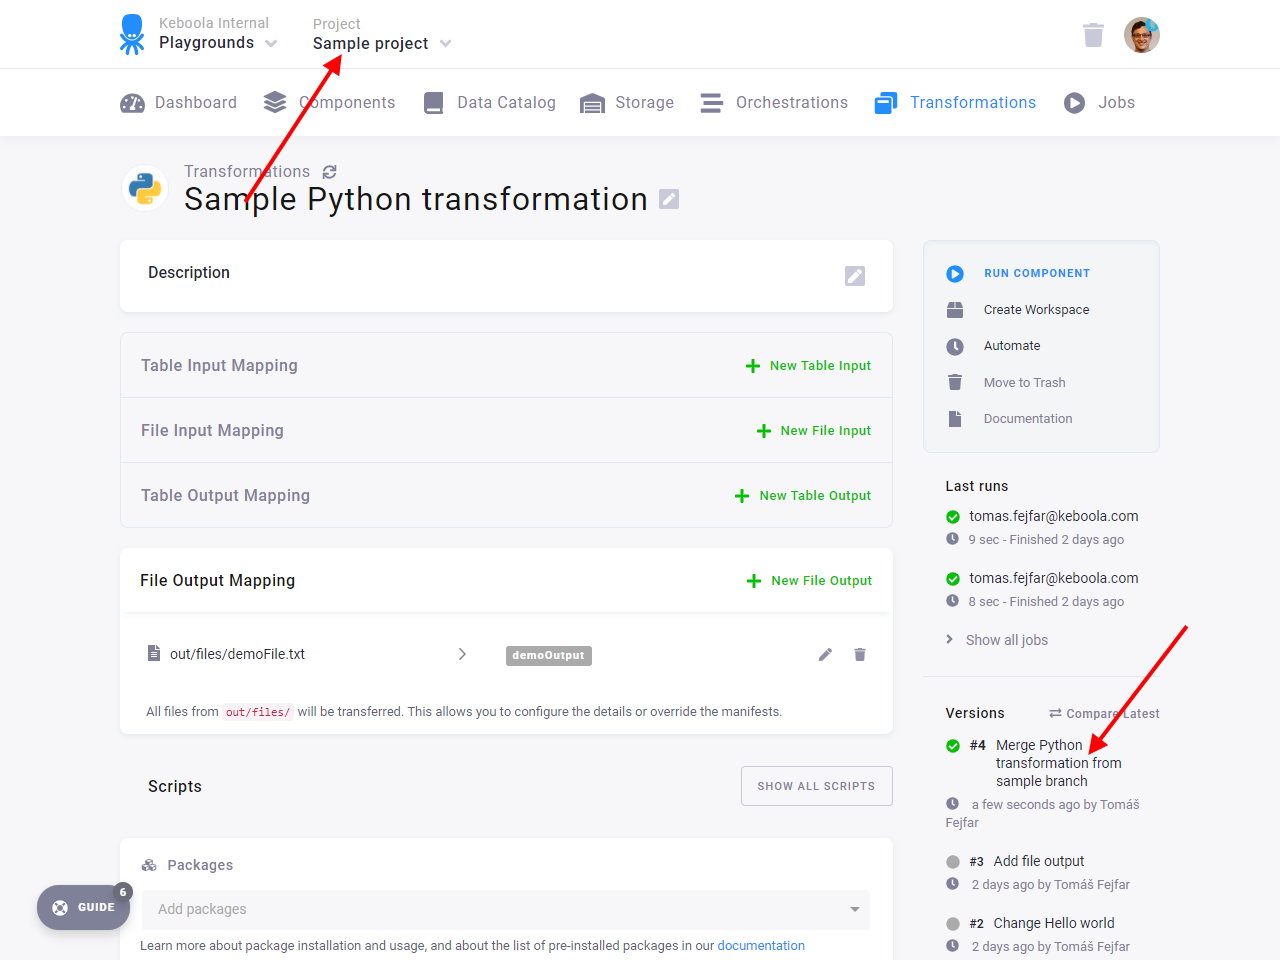
If you examine the code block, you will see that the change from the branch is there.
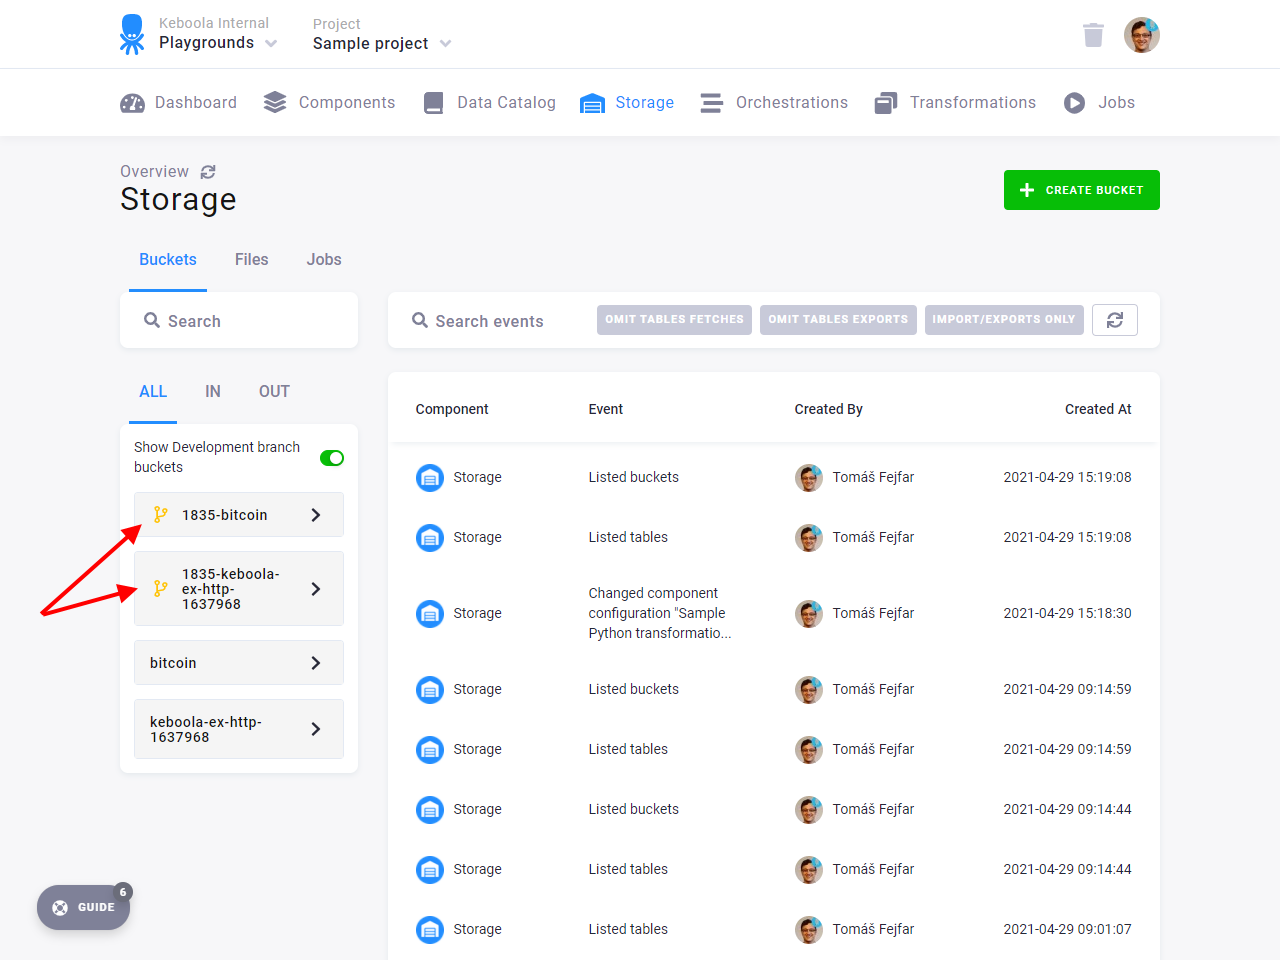
If you go to the Storage section, you will see that the branch buckets are still available if you toggle the switch to show development branch buckets. However, they cannot be used by the production configurations.
Full Merge
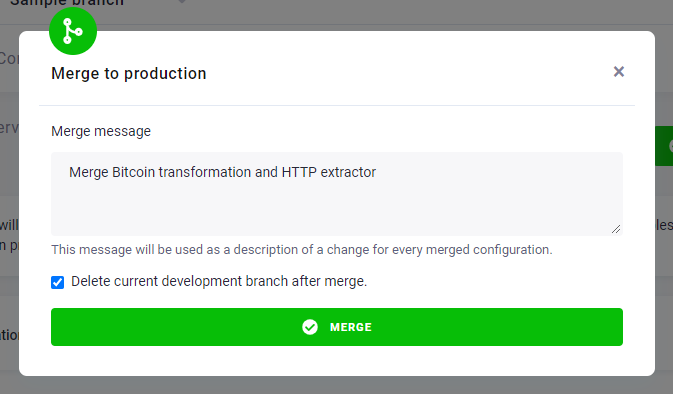
Section titled “Full Merge”Switch back to Sample branch. Go to Project diff. Make sure that all the remaining configurations have their
respective checkboxes checked. Then click Merge to production. Make sure that the checkbox Delete current development
branch after merge. is checked. Fill in the merge message: Merge the Bitcoin transformation and HTTP data source connector. Then click
Merge.
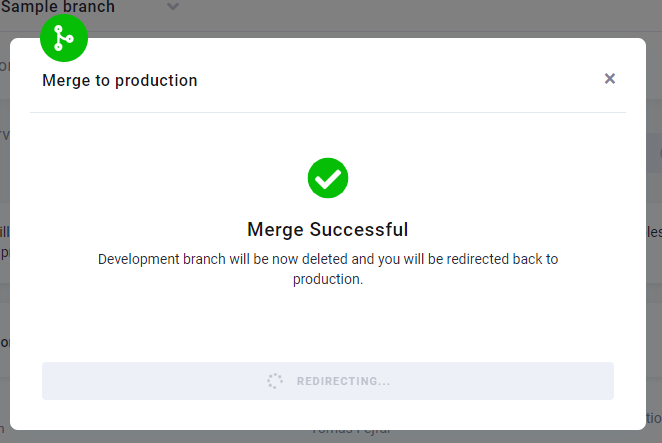
The merge will take slightly longer as the whole branch is being deleted. Afterwards, you will be redirected back to production.
If you go to Storage, you will see that the bucket out.c-bitcoin still only has the top_prices table.
The table dollar_btc_transactions is missing even though you had it in your branch and you merged the configuration.
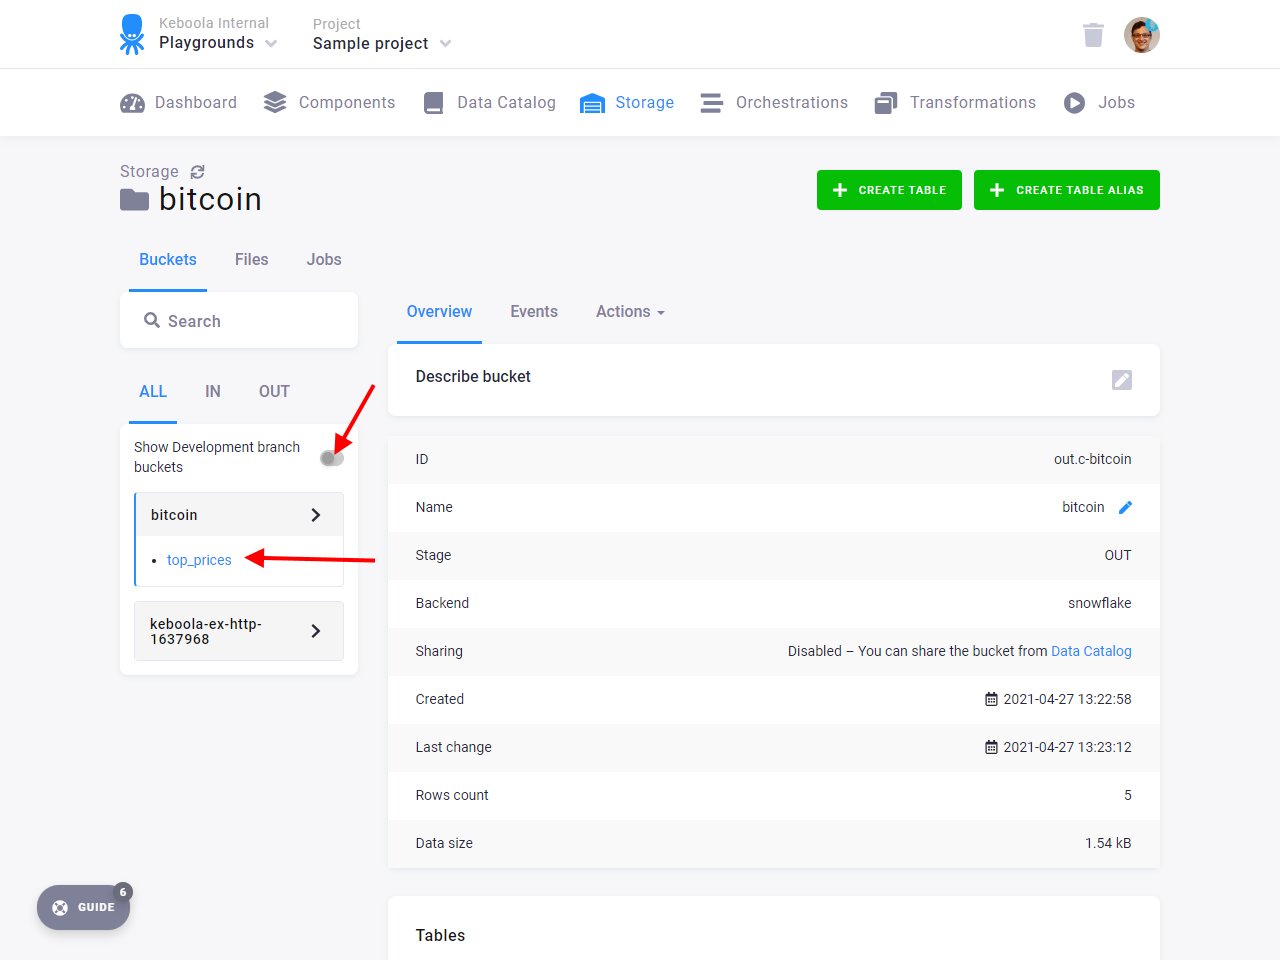
This is expected. Branch storage is completely isolated and no data are merged back to production, only configurations. You need to run the connector in production to get the data into production Storage. Also, notice that the branch bucket switch is disabled as there are no more branch buckets. They were deleted along with the branch.
Examine the merged configurations. Run the HTTP connector to get the source tables first, then run the Snowflake transformation. Examine the results.
You Did It! 🎉
Section titled “You Did It! 🎉”This concludes the tutorial. You learned how to create branches and how tables and files work in them. You also learned about different scenarios when merging a branch.